Einleitung
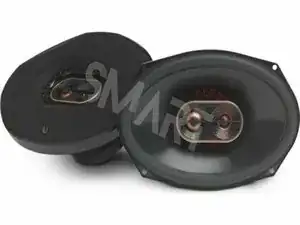
How to Test Car Speakers
Being a car enthusiast, you must be a fan of fabulous audio systems and when it comes to audio the first word that comes to our mind is speakers. Car Speakers are the most indispensable part of an audio system. They should be at their best as some of you cannot drive without listening to music or audio of any kind. But they are most infuriating when they are inoperative.
Have you ever had trouble with the music system of your car and felt helpless and thinking about what to do? So being a car fanatic you must know how to test car speakers before installing them without spending a heavy amount of money on car mechanics.
A true audiophile knows the importance of speakers in a car audio system. If there is any oscillation in the working of the speakers, this is a thing not to be ignored. Car speakers must be tested from time to time to check their effectiveness and performance before they get damaged. Testing your car speakers might seem like an intricate task but when you are into it, it is not that much difficult as it seems to be.
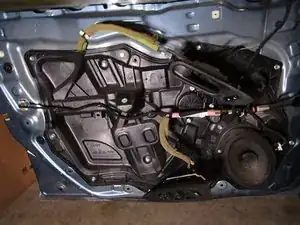
Times there is a problem with the speakers but you have to start testing the connections and wires. So before testing the speakers you must know how to go through the system. Knowing your speakers, you must keep an ear on the audio quality of your car speakers. Whenever you feel the sound quality is getting shoddier you must test the audio system starting from the wires, fuse, amplifier, capacitors, battery, and speakers themselves.
Here in this article, I will explain a complete step-by-step guide on how to test car speakers. But first, clear your mind about whether you should have component speakers or coaxial
For more detail visit: https://smartelectrohub.com/speakers/how...
For more articles visit: https://smartelectrohub.com/
Ersatzteile
-
-
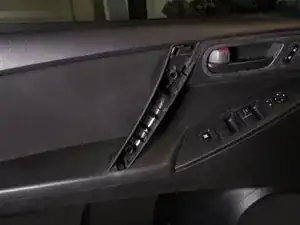
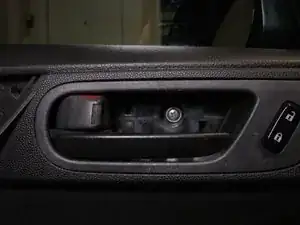
Pry the door handle cover upwards using a flathead screwdriver.
-
Remove the cover to expose the screw.
-
-
-
Pull the door handle towards you.
-
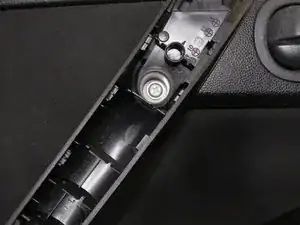
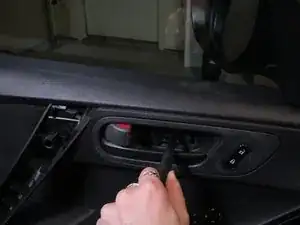
Insert a small flathead screwdriver between the lock and the plate.
-
Pry the plate off by applying leverage away from the lock, exposing the second screw.
-
-
-
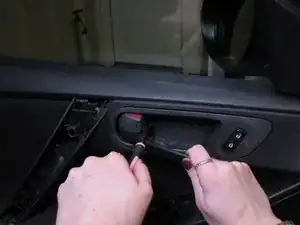
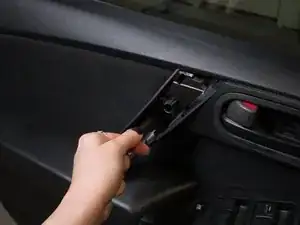
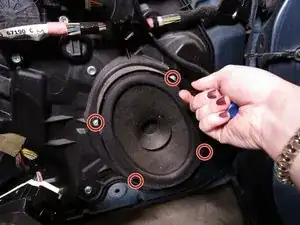
Push the switch panel out from the inside of the door cover.
-
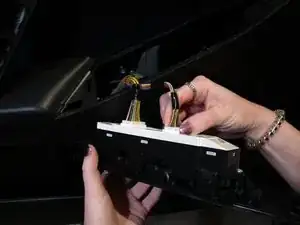
Remove the wires connected to the panel by pressing the clips and pulling them outward.
-
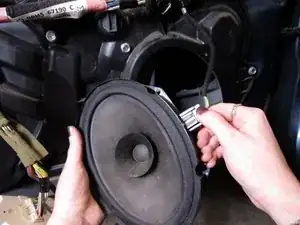
Remove the door cover.
-


To reassemble your device, follow these instructions in reverse order.
