Einleitung

Ohrhörerstecker verschleißen oft im Laufe der Zeit. Der Kauf eines neuen Kopfhörers ist recht teuer, der Einbau eines neuen Steckers ist doch viel preisgünstiger.

Bei dieser Reparatur musst du ziemlich dünne Kabel verlöten. Du solltest also geübt im Löten sein.

Passe gut auf, ein Lötkolben ist heiß und du arbeitest sehr beengt. Es empfiehlt sich der Gebrauch einer Löthilfe, der "dritten Hand".

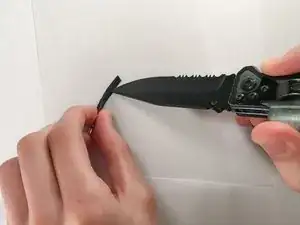
  1. GQLWqIGFX2KkU1on
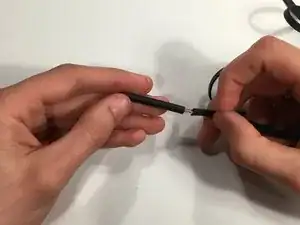
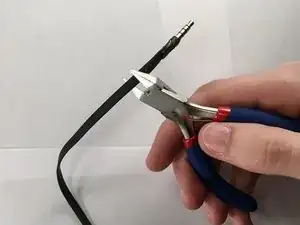
    • Schneide den alten Stecker knapp ab, lasse etwas Kabel dran.

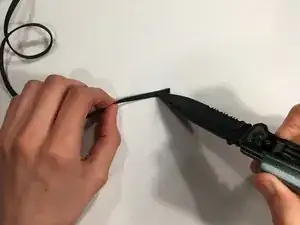
  2. HEZXwavvloKaALAU
    • Schneide die Isolierung am alten Stecker auf so dass die inneren Drähte sichtbar werden.

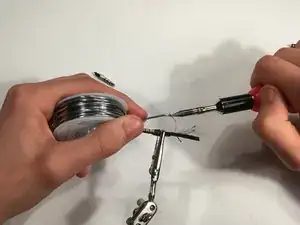
  3. HB4fmiZv2EgEZD5b
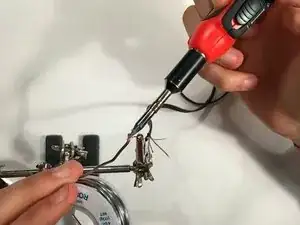
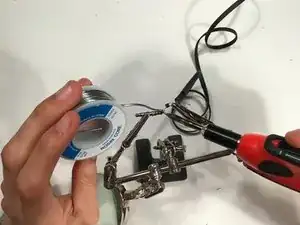
    • Bringe etwas Lötzinn auf alle Drahtenden an.

    • Nimm dazu eine dritte Hand zur Hilfe um die Drähtchen zu halten.

    • Bleibe nicht sehr lange mit dem Lötkolben am Draht, er könnte schmelzen.

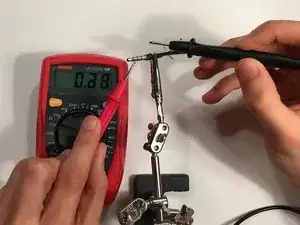
  4. RtlnZFaEy5qeGRpj
    • Schalte das Messgerät an und stelle es auf Widerstandsmessung.

    • Wähle irgendein Drahtende aus und verbinde es mit einer Messspitze.

    • Suche mit der anderen Messspitze das Segment am Stecker, bei dem der Widerstand Null ist.

    • Notiere dir genau, welcher der Drähte mit welchem Segment verbunden ist.

    • Wiederhole für alle Drähte.

    Alternative repair suggestion — use a 4 pole headset cable, cut off the jack and solder the wires to the headphone’s cable, using solder and heatshrink tubing. This results in a stronger connection and it’s a lot easier to solder the wires to each other than to the tiny contacts on the plug.

    Wayne Seltzer -

  5. 6KblfX6TUWwRoxMP
    • Entferne die äußere Isolierung am Kopfhörerkabel.

  6. LVXJok1LLgpyTQxc
    • Schneide dir ein geeignetes Stück Schrumpfschlauch.

    • Schiebe den Schlauch über das Kabel.

  7. knSCELc4AcKjwNiO
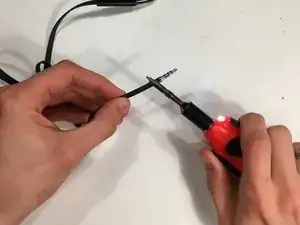
    • Wähle dir ein Drähtchen aus und verlöte sein Ende mit ein bisschen Lötzinn.

    • Wiederhole das für jedes Drähtchen.

  8. ikdMHBUidpXooqrp
    • Lege ein Drahtende an den entsprechenden Kontakt am Stecker.

    • Bringe etwas Lötzinn auf um den Draht zu befestigen.

    • Wiederhole für jeden Draht.

    • Achte sehr darauf, dass du genau die Zuordnung aus Schritt 4 verwendest.

    • Sei beim Verlöten sehr sorgfältig so dass es eine saubere Lötverbindung ergibt.

    • Wenn die internen Drähte keine eigene Isolierung haben musst du sie mit Schrumpfschlauch isolieren, damit sie keinen Kurzschluss erzeugen.

  9. c6RKuJ2oxdxiM1DR
    • Schiebe den Schrumpfschlauch über den Stecker, so dass er die Lötverbindungen bedeckt.

  10. S6RiwCOHOXi2Ffj3
    • Du kannst probieren den Schrumpfschlauch mit dem flachen Ende des Lötkolbens aufzuschrumpfen.

    • Alternativ funktioniert auch ein Heißluftgebläse oder ein Haartrockner.

Abschluss

Du hast den Stecker ausgetauscht. Stecke ihn ein, spiele etwas Musik ab um deine Reparatur zu testen.

Matthew Vaught

Mitglied seit: 30/03/16

1019 Reputation

12 Kommentare

This is a plug replacement, not a jack replacement.

Wes Hartman -

This is a jack replacement.

Jonathan Harper -

can you please tell me which color wire and where to solder !

Sujith Kumar John G -

Wire colors are not standardized. They even differ among models of the same manufacturer. The only way is to test against the plug that is being replaced. Hopefully most wires still connect to the plug contacts, so a process of elimination can be used. Typical colors are red, blue, green and no color. Ground is usually no color, and sometimes there are 2 grounds (e.g. for ‘zipper’ style wires). The contacts for most phones are as follows (from tip to outside barrel): Right, Left, Ground, Mic. My Samsung S3 cord was very strange: red, green, no color and 2 black wires. One black was Ground, the other was MIC. Soldering requires a magnifier and a fine tipped iron.

Bert490 -
No pinout, seriously?

Old Liquid -

This is rated difficult, I'm trying to find a replacement plug that uses screws vs. soldering. There's a YouTube video on it, but screw plugs are almost impossible to find. I also don't have a multimeter. Another option is to have a repair shop do it - $20 was quoted (fixed or your money back.) …but that is not in the spirit of iFixit.

Jeff -

Im using the original jack after i cut off plastic insulation can u tell me which wires go to which solder points on the jack.

Kevin French -

This tutorial would be much more helpful if descriptions were added as to which portions of the plug (tip, ring 1, ring 2, ring 3) are used for earphone and which are used for microphone.

Pete WK8S -

This is a plug replacement, not a jack replacement. The “jack” is the “female” connector in your device. The “male” connector is a “plug”. Seriously get your basic terminology straight, even the part list calls for a “plug”. I have been looking for a jack replacement how to, but every result I get is for plug replacements calling the plugs jacks. Jack & plug are not interchangeable terms.

Nerfbomb -

This guide does not even explain which cable to solder where? There are four wires. Where does it go? How can this even be a guide if it is not even clear? Should this not be removed until it is properly curated?

D1Xenotime -

davvero molto utile e molto apprezzato il lavoro del traduttore Simone

Mattia Mengia -

Grazie Mattia, qualora volessi contribuire sentiti pure libero di apportare miglioramenti al testo

Simone -