Einleitung

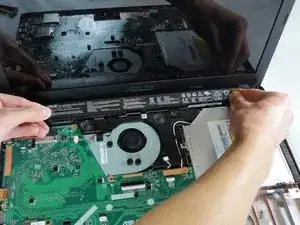
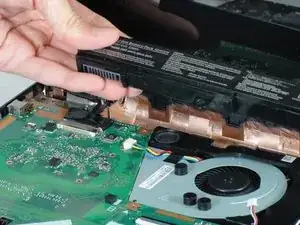
If your battery is worn or defective, this guide will show you how to replace your battery. The battery is located internally in the laptop and requires removal of the keyboard module for access.

  1. IatgNASQ3hXvWhkn
    IatgNASQ3hXvWhkn
    iiRdw62wNmKxi5BI
    • Before you begin, be sure to turn off your laptop and unplug it from the outlet.

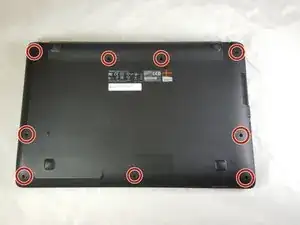
    • Use a Philips #1 screwdriver to remove the nine screws from the back cover.

  2. lJ2GBLRuOdBFqLi1
    • Turn the laptop over and open the display.

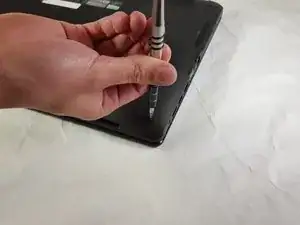
    • Insert the flat edge of the spudger into the crease of the keyboard cover.

    • While the spudger is in the crease, carefully pry open the casing by sliding the spudger along the edge.

    • Do not use excessive force to pry open the lid. You should hear each plastic clip snap open as you run the spudger along the edge.

  3. IiePWMhuWqTJ4aKS
    IiePWMhuWqTJ4aKS
    WJjbCjHeECJhPDCg
    • Make sure that the entire cover has been released from the plastic clips.

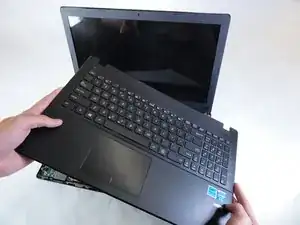
    • Slowly lift the cover open from the front of the laptop, but do not completely remove it.

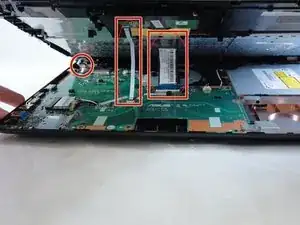
    • Note the locations of the three white and blue data cables connecting to the keyboard to the computer's main board.

    I need assistance. When I opened the cover, exposing the keyboard and main board I pulled the 3 blue and white data cables from the main board. How can I repair this? Someone please help!!!!!!

    Angela Rene'e Dortch -

  4. OZWdVhrDoBtyJgKC
    • If you are only replacing the battery, you can skip this step and the next. Shift the keyboard module away from the display and set it such that the fragile flex cables are not strained.

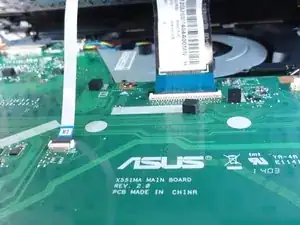
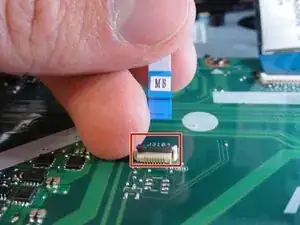
    • Disconnect the three data cables from the motherboard.

    • To unlock a ZIF connector, use the tip of a spudger or your fingernail to flip up the small, hinged locking flap. Carefully slide the unlocked cable out of the socket.

  5. Uv6bINfwu3V3KAtD
    • Remove the fully disconnected keyboard module from the laptop.

    No need to remove the keyboard. The ribbons are plenty long to give slack and allow access.

    hellcat -

    Good overall, thank you!

    hellcat -

  6. bvVQSKllrS6oKZjh
    bvVQSKllrS6oKZjh
    gKGEcQXFSOZngDLy
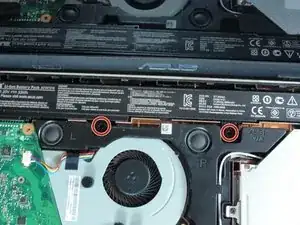
    • Do not use any metal tool to pry any type of battery. Doing so can puncture or short the battery, resulting in damage or injury.

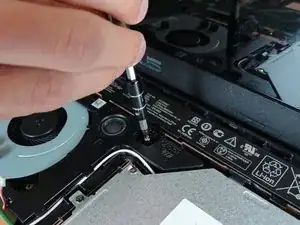
    • Remove the two screws securing the battery to the laptop case with a Phillips #1 screwdriver.

  7. k1GDCkRsoVLSTr5l
    k1GDCkRsoVLSTr5l
    ERe5nBXqixIM6GNq
    • Lift the battery out and remove it:

    • The battery is connected to the motherboard on the left side.

    • Use your fingertips to evenly grip the battery on the left and right sides of the battery.

    • Pull straight up to lift the battery out of its place.

    • Do not use excessive force or attempt to pry the battery with any tools. Doing so will result in damage to the laptop.

Abschluss

To reassemble your device, follow these instructions in reverse order.

For optimal performance, after completing this guide, calibrate your newly installed battery.

Take your e-waste to an R2 or e-Stewards certified recycler.

Repair didn’t go as planned? Try some basic troubleshooting, or ask our Answers community for help.

Richard Johnson

Mitglied seit: 16/09/15

692 Reputation

2 Kommentare

No need to disconnect the ribbon cables to gain access to the battery. Gently move keyboard toward you to expose the battery.

Robert Beasley -

Very nice and well explained! Bravo! Easy steps! Congratulations! :-)
MIGUEL MORENO -