Einleitung

This guide will assist in replacing the fan for an Asus K200MA laptop.

  1. 3slB2P4lkwY464Qp
    3slB2P4lkwY464Qp
    MuK2YocThXRK4ugK
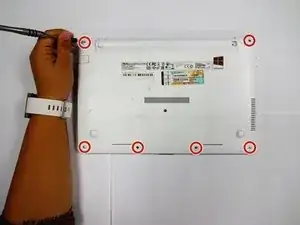
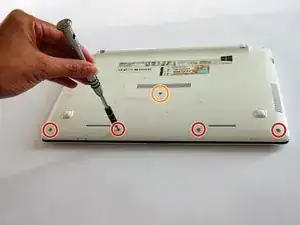
    • With the opening facing you, flip the laptop over and remove the following screws from the back panel:

    • Six 4mm Phillips screws using a Phillips #0 screwdriver.

    • One 12mm Phillips screw in the center using a Phillips #0 screwdriver.

  2. IcJYYUC5DfbnRLaQ
    IcJYYUC5DfbnRLaQ
    MMJnc1H1MVHQRZbw
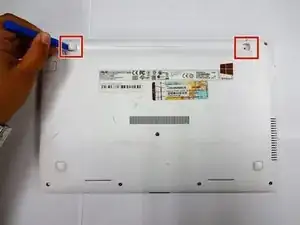
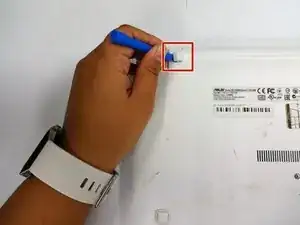
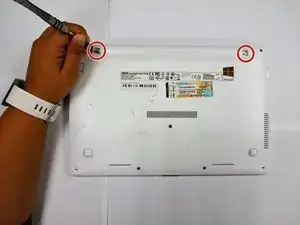
    • Using a plastic spudger, remove the two rubber stoppers closest to the hinge to reveal the screws underneath.

  3. yiniXHfNmajPNmhG
    • Remove the following screws:

    • Two 4mm Phillips screws using a Phillips #0 screwdriver.

  4. CMRpZVGjLBUJu4Cr
    CMRpZVGjLBUJu4Cr
    YnGDCxwsyvpLZ5Fw
    OpnhBGMtLeh2xiew
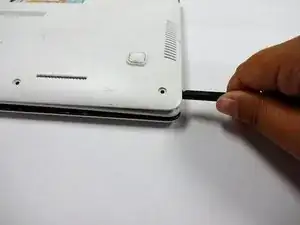
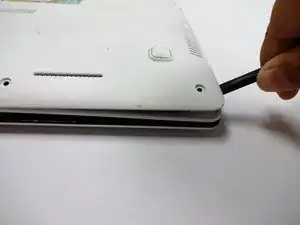
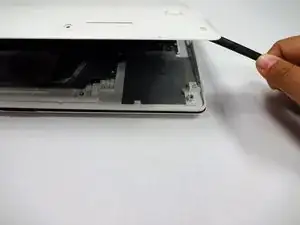
    • Using a plastic spudger (and a fair amount of force), pry the back panel up from the keyboard to separate.

    • You may have to use one spudger to wedge between the back panel and keyboard while using another to pry it open in a different spot.

  5. KqemhStxPk3jh5dK
    KqemhStxPk3jh5dK
    TByuoYsfTlI1AEOe
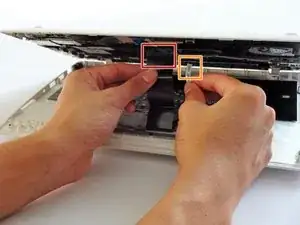
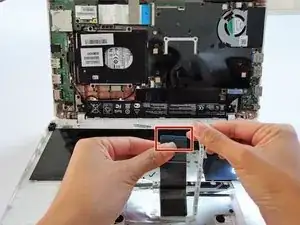
    • To disconnect the keyboard connectors from keyboard and back panel, gently pull wide keyboard connector out.

    • Gently pull the narrow connector away from the keyboard.

  6. MmRcUlWH4oi4XD6W
    MmRcUlWH4oi4XD6W
    lUOnRj3cssOdgQU1
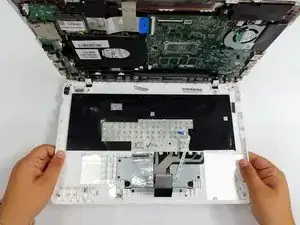
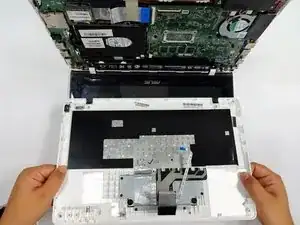
    • Now that the keyboard connectors are unplugged, pull the keyboard off and away from the back panel hinges.

  7. cyKBNRpUBSPwHKKC
    cyKBNRpUBSPwHKKC
    vvnPBCgQE3nJ2eTg
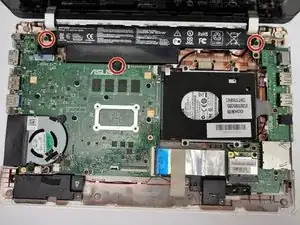
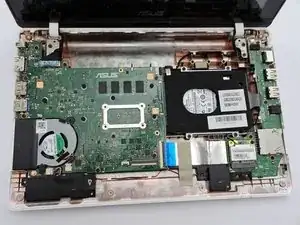
    • Flip the computer over so that the side with the motherboard (large green piece) is laying face-up.

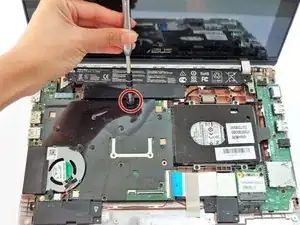
    • Remove the following screws from the middle and far ends of the battery:

    • Three 4mm Phillips screws using a Phillips #0 screwdriver.

    • The battery will be located closest to the screen.

  8. wSnC14ZE2I1rNIDR
    wSnC14ZE2I1rNIDR
    mnmYdHHEV3vp3TOI
    prI2mPJwAWR5nKSF
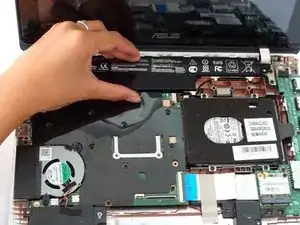
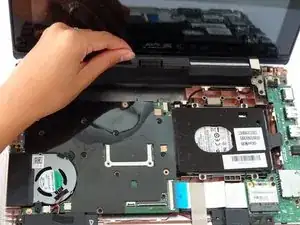
    • Gripping the wider left section, lift the battery up and away from computer.

  9. LVgn2pELUsIlfhRC
    LVgn2pELUsIlfhRC
    CoFTSZx1YIf34GCW
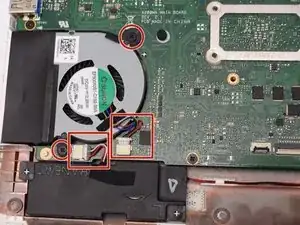
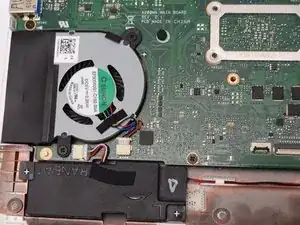
    • Locate the fan, two screws and two color coded wires in the bottom left corner of the computer.

  10. UU1oexm3pOV4BlbJ
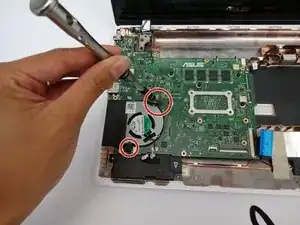
    • Remove the following screws from the fan:

    • Two 4mm screws using a Phillips #0 screwdriver.

  11. RZdrnnHAwcarOuYU
    RZdrnnHAwcarOuYU
    WjCxf4WRcLWCQqjR
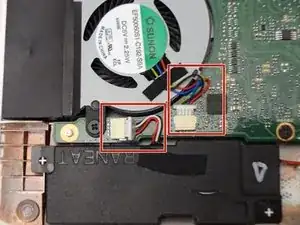
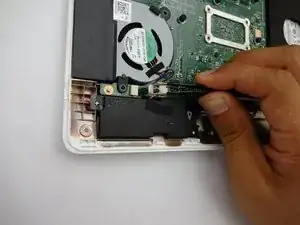
    • Firmly pull colored wires away from wire slot.

  12. thRElexIeUVOqcbq
    thRElexIeUVOqcbq
    uLIx2irrpJf5bhP5
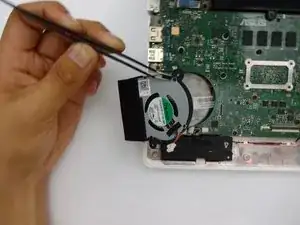
    • After removing both the screws and color coded wires, lift fan out of place.

    • Tools such as spudgers or tweezers may be used for fan removal.

Abschluss

To reassemble your device, follow these instructions in reverse order.
Terrinda

Mitglied seit: 17/09/18

526 Reputation

0 Kommentare