Einleitung

A CPU Fan within a laptop is to help prevent overheating. If your laptop is experiencing overheating more than usual, or it happens every time you turn on your laptop there might be an issue or a broken CPU Fan. Follow these steps to replace a faulty CPU Fan.

  1. 4VqDXcrGJp3jDQCf
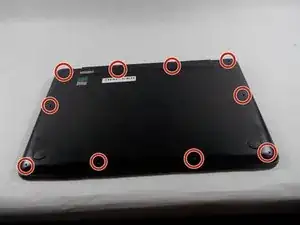
    • Remove all 10 Phillips screws on the backplate.

    • All 10 screws are 0.55 inches and 20 mm in diameter.

  2. gA2QWbKUOFksXdIm
    gA2QWbKUOFksXdIm
    hGUUSReJCCJDmBkx
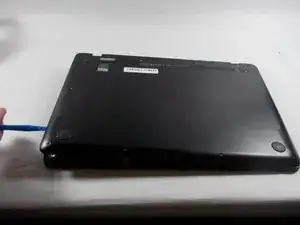
    • Carefully remove the backplate using the plastic opening tool.

  3. PIZBAI6YlyoT2TOe
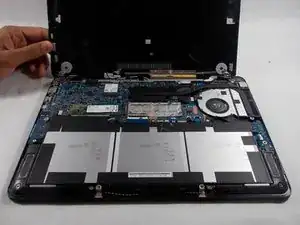
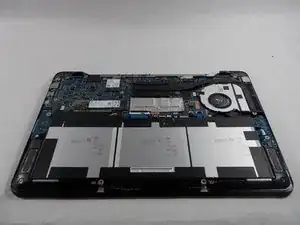
    • Locate the battery near the bottom.

  4. QnP5QmNSAFdDehOl
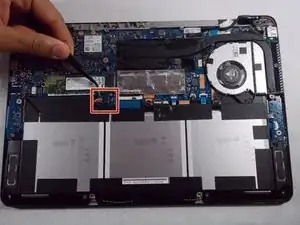
    • Next, lift up the battery connector from the laptop in the upper left side of the battery, using tweezers or spudger.

    • Make sure to complete this step with caution, because if the battery is not unplugged, the motherboard may shock you.

  5. SKQnGjc2OZfJOlBq
    SKQnGjc2OZfJOlBq
    t2iLTOajAfycltI2
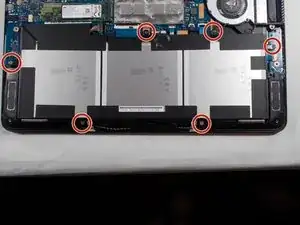
    • Remove the six screws holding in the battery with a Phillips #0 screwdriver.

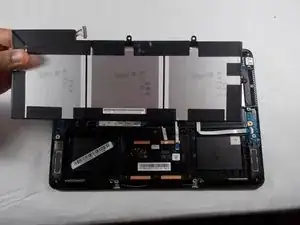
    • Once battery is lifted out and removed, proper dispose of the old battery.

    • Each screw is 0.5 cm in length and 0.5 cm in diameter.

  6. ERhMPSYjSgNWdPHq
    ERhMPSYjSgNWdPHq
    4of1MrBKnOWGCWXd
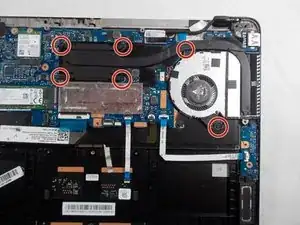
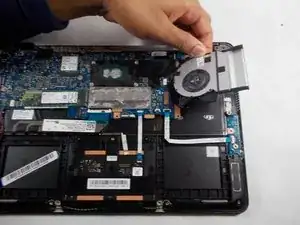
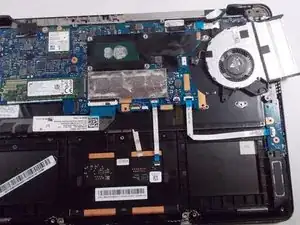
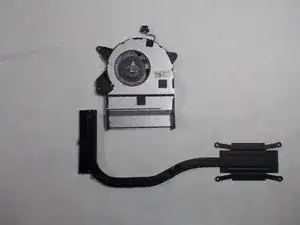
    • Using a Phillips #0 screwdriver remove the six screws holding the CPU Fan and Heatsink in place.

    • All six screws are 0.4 cm in length and have a 0.5 cm head diameter.

  7. qPArRebAZUKH4dVp
    qPArRebAZUKH4dVp
    Vu6t2BivHYS1CFpo
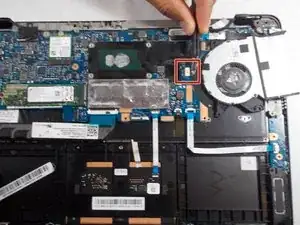
    • Next, carefully remove the sliding connector that connect the CPU Fan and the laptop together using the tweezers.

  8. qGjWGUCLJXo1GLaq
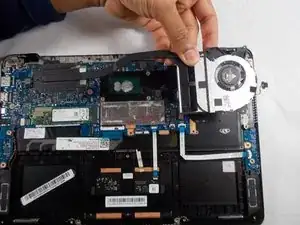
    • Remove the CPU Fan and Heatsink by simply lifting upwards.

Abschluss

To reassemble your device, follow these instructions in reverse order.
Scott Santiago

Mitglied seit: 17/10/17

534 Reputation

0 Kommentare