Einleitung

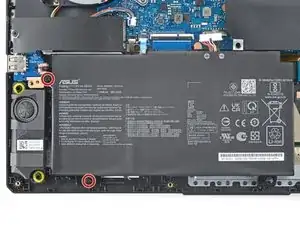
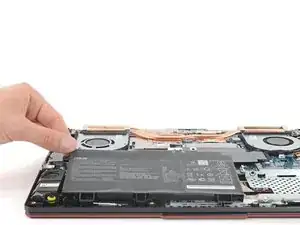
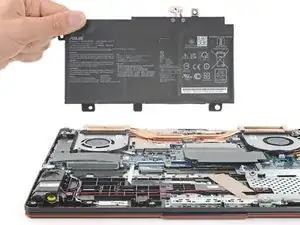
Follow this guide to replace the battery in your ASUS TUF Gaming F15 FX506L.

For your safety, discharge the battery below 25% before disassembling your device. This reduces the risk of fire if the battery is accidentally damaged during the repair. If your battery is swollen, take appropriate precautions.

  1. pmffEm5cGIoOoOfH
    pmffEm5cGIoOoOfH
    PyQJiT3jdPlwnnd3
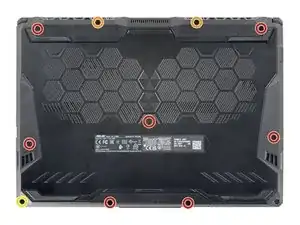
    • For your safety, discharge the battery below 25% and power down your device before disassembly.

    • Use a Phillips screwdriver to remove the 10 screws securing the back cover:

    • Seven 11.6 mm screws

    • Two 14.6 mm screws

    • One 6 mm screw

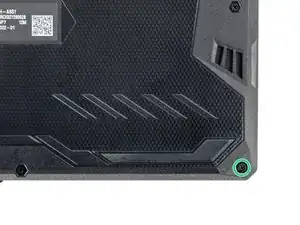
    • Use a Phillips screwdriver to loosen the captive screw.

    • Loosening this captive screw will pop up and separate the bottom-right corner of the back cover from the chassis.

    • During reassembly, tighten the captive screw before the rest of the screws.

  2. aAyjBurpDO1PwjFA
    aAyjBurpDO1PwjFA
    TO2xkRNVSxbYkWcP
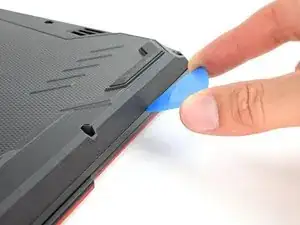
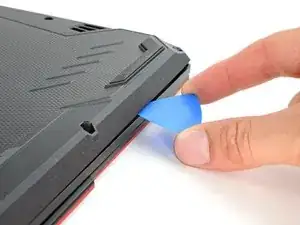
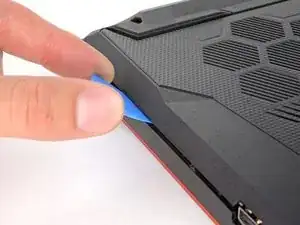
    • Insert an opening pick between the bottom-right corner of the back cover and the chassis, near the captive screw.

    • Pry up to release the clips securing the back cover.

    • You'll hear a click whenever a clip is released.

  3. URoRSNrGHjKAZFOl
    URoRSNrGHjKAZFOl
    vvdaFJ3wwSwDyHJA
    FFevTHAkNKee2f2f
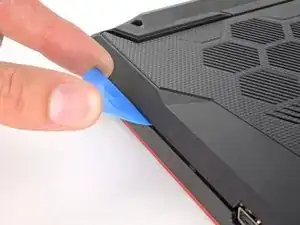
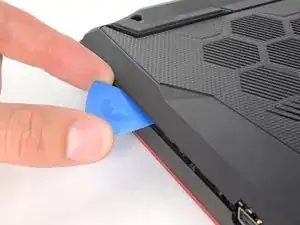
    • Insert your opening pick again between the top-left corner of the back cover and the chassis.

    • Insert the pick at a steep angle. Pry up to release the remaining clips securing the back cover.

    How Much Storage can Upgrade to The Asus Tuf F15 fx506l

    S Canvas -

    This ASUS TUF supports up to 8 TB of SSD storage between two M.2 2280SS slots, according to the main product page.

    Clay Eickemeyer -

  4. dOeSUOw3jbrkFgBg
    dOeSUOw3jbrkFgBg
    jYC5loHovEIcNQAB
    yf11rJQW6qlgWE4Y
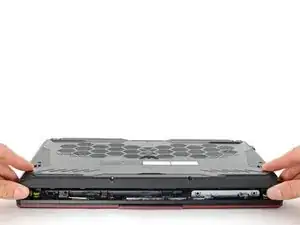
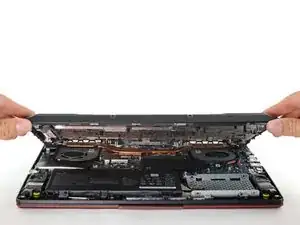
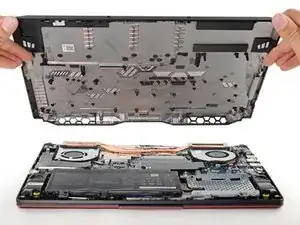
    • Lift the back cover off the chassis and remove it.

    • If your back cover is stuck to the chassis, use an opening pick to release the clips around the back cover's perimeter.

  5. xbMrSEN23xBgcXCS
    xbMrSEN23xBgcXCS
    iUP5OjtiIxIfcw4I
    2snwkTkFlmRCM5aU
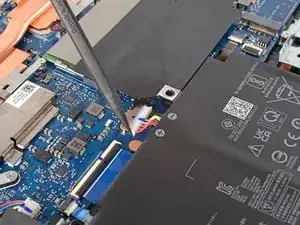
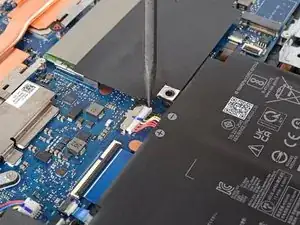
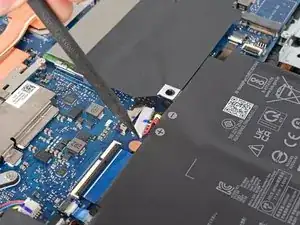
    • Use the point of a spudger to push the sides of the battery connector out of its socket.

    • Push on alternating sides to 'walk' the connector out.

  6. RejRUNy4VQxYTOhD
    • Use your Phillips screwdriver to remove the two 6.2 mm-long screws securing the battery.

  7. PPUnIFqO5RGU3flf
    PPUnIFqO5RGU3flf
    2jZbZDXkqVX5dAKW
    • Remove the battery from its recess.

Abschluss

To reassemble your device, follow these instructions in reverse order.

For optimal performance, calibrate your newly installed battery after completing this guide.

Take your e-waste to an R2 or e-Stewards certified recycler.

Repair didn’t go as planned? Try some basic troubleshooting, or ask our ASUS TUF laptop answers community for help.
Clay Eickemeyer

Mitglied seit: 19/09/22

23447 Reputation

0 Kommentare