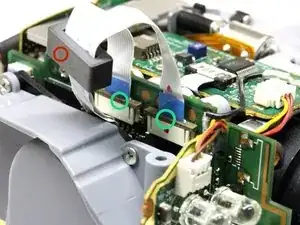
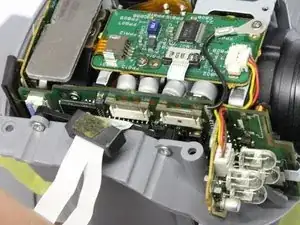
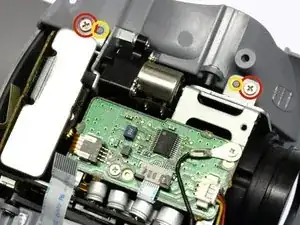
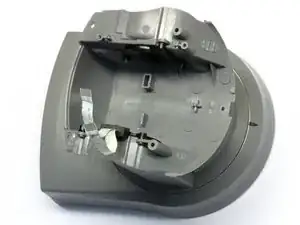
Einleitung

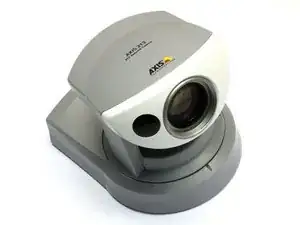
A lot of these camera's seem to come down with a "NO VIDEO" error in the upper left corner of the preview window. This is due to the failure of one or more capacitors on one of the video module's interface boards. Probably due to a combination of rather high temperature inside, and many years of use.

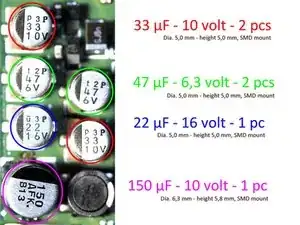
It is hard to determine exactly which capacitor is involved. But knowing that any one of the others might fail next, it is better to replace the lot while you're in there ...

The soldering is not for the faint hearted, and requires much more than entry level experience !! You may want to prepare everything, and seek help for the final soldering step ...

  • Edit 7 jan 2016 : due to quite a few requests, I have assembled a few sets with the necessary capacitors that I can send by mail. Just ask !
  • Edit 16 april 2017 : due to quite a few requests, a gain in experience, and several equipment upgrades, I have decided to offer a repair service. Just ask !
  1. TT2GlSm2AsCBOwcJ
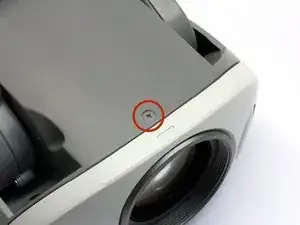
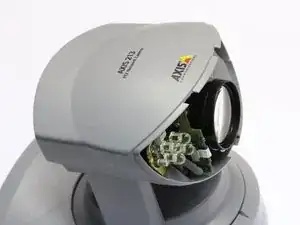
    • This the AXIS 213 in which the "NO VIDEO" error occurs. We will get to the 6 capacitors to be replaced.

  2. VkWOapm4tgAkFE1W
    VkWOapm4tgAkFE1W
    cjDlnYcNnNd3Lb6d
    IEDHWaJBsCNlYEqm
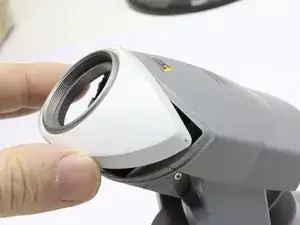
    • Take out the screw under the lens. Gently tilt front upwards and remove.

  3. MA2Yh3ccpoYInWlX
    MA2Yh3ccpoYInWlX
    vZ11bLKSJYt5BAMV
    tAQxH5PfwCfbhpM6
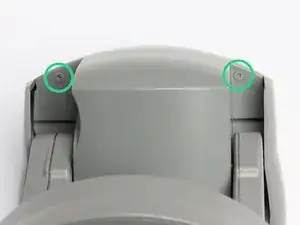
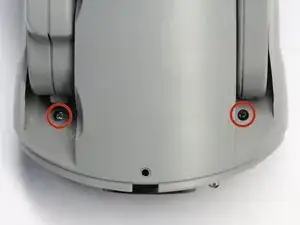
    • Take out the 2 screws (painted grey) out at the back end bottom.

    • Take out the 2 screws at the front end bottom.

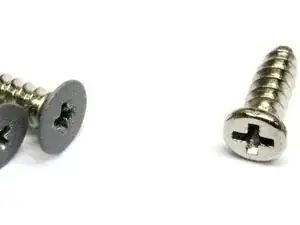
    • You now have 5 screws of which 3 with grey painted heads. For reassembly, use them wisely. :)

  4. ggQJ6FISPKhESmSp
    ggQJ6FISPKhESmSp
    CONPJaMlRMBiV4ZK
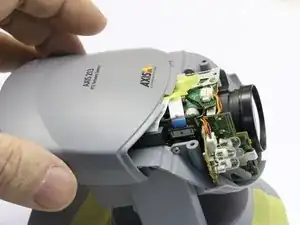
    • Gently lift the housing top, and slide it back while lifting.

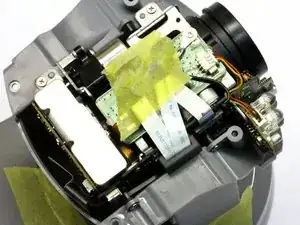
    • You will find the whole camera module wrapped in thick cellophane. For reasons of heat dispersal and prolonged life, I would recommend disposing of it during following steps. But only if your camera is for indoor use ! Outdoor cams might benefit from the wrapping, containing the heat in the camera module, preventing condensation/corrosion.

    • Optional : for reassembly, some adhesive tape might come in handy to hold down the flat cables.

  5. gdQsqmpAou1n5ZAg
    gdQsqmpAou1n5ZAg
    aI1DUf2o4drrKrhH
    • We will now disconnect the 2 flatcables that connect the camera module to the camera base.

    • The ferrite core is attached to the left cable connector with some 2-sided sticky tape. Gently pry it loose so it can slide upward along the cables. Now is a good time to mark which cable goes in which socket.

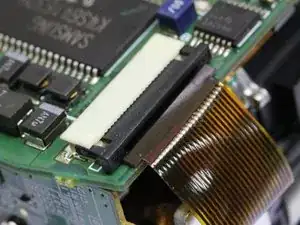
    • The 2 brown/white cable connectors can now be reached. The brown part has to slide UP. Pry it loose with a very fine instrument : bit on the left, bit on the right, and repeat until loose. It should remain seated in the connector body. If it's no longer clamped, you're far enough ! FRAGILE !

    • Gently bend the ribbons to the side, so the camera module is exposed.

  6. hkMHip6ly6yrBTh2
    hkMHip6ly6yrBTh2
    rOwROT2p6pDvQarf
    • Take out the two screws holding the camera module to the plastic housing.

    • You can now lift the whole camera module straight up to remove it from the housing.

    • At reassembly, before tightening the screws, make sure the round plastic notches are well seated in the metal bracket's holes.

  7. hEGqZKrCl4lOGTy1
    hEGqZKrCl4lOGTy1
    4GQJJVSVMTfLS4ZW
    • Now the infrared light module is to be removed in order to gain acces to the board we need.

    • Gently slide out the white connector.

    • Remove the two screws, and remove the light module.

  8. iopLMwflI4Xn5CfF
    iopLMwflI4Xn5CfF
    XMUQyCTeTlDPKPMA
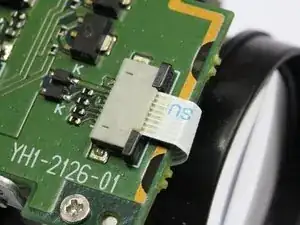
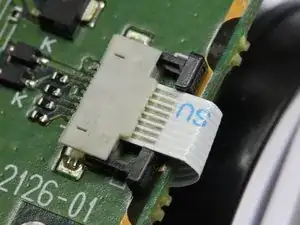
    • Disconnect the right ribbon cable. Hook your fingernails behind the right and left notches of the black connector part, and pull it towards the white ribbon cable with even and L/R balanced force until loose. FRAGILE ! The cable will slide out easily.

    • For reassembly : notice this cable is ON TOP of the black connector wedge. Insert the cable as intended, and push the black wedge back in place, again balancing force left and right.

  9. Ym3KECpIEFFGgVje
    Ym3KECpIEFFGgVje
    2sG5bGa1MaqUy4Tl
    • Disconnect the bottom left ribbon cable. Hook your fingernails behind the right and left notches of the black connector part, and pull it towards the brown ribbon cable with even and L/R balanced force until loose. FRAGILE ! The cable will slide out easily.

    • For reassembly : notice this cable is UNDER the black connector wedge. Put the cable back in place, and push the black wedge back in, again balancing force left and rigt.

  10. FSfqBeCj44sJMAle
    FSfqBeCj44sJMAle
    BI4ixPlTcAAVNZNJ
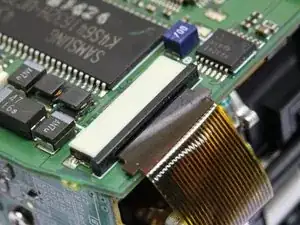
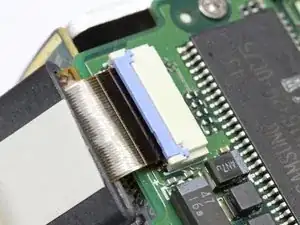
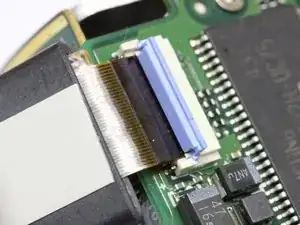
    • To disconnect the left top ribbon cable, tilt up the blue connector part, and hinge it up 90°. The cable will slide out easily.

    • To reassemble : position the cable and tilt the blue part down again.

  11. OBCvcGccHMZoTnuD
    OBCvcGccHMZoTnuD
    Ud1gQLZwJoxEHT4W
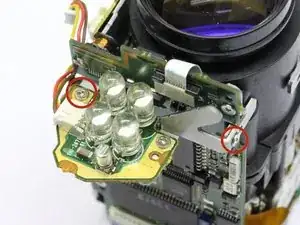
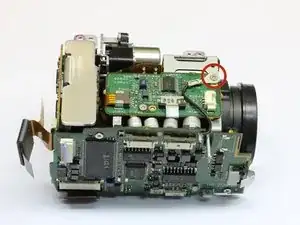
    • Remove the screw from the ground terminal.

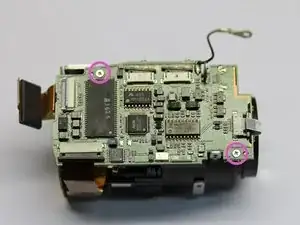
    • Remove the two screws holding the board.

  12. cYFBF1r1BUvBGYkQ
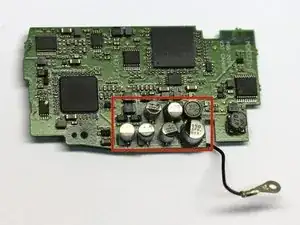
    • The board is now free for replacing the 6 capacitors.

  13. lAUjcUPirMXIOVrw
    • These are the capacitors to replace. PLAN in which order you will do the resoldering in the last step. Do it now, while you can still try all positions. Make sure your tip doesn't touch anywhere except on the spot where you want to apply the heat ...

    • To remove the old caps : use a pair of fine tipped cutting pliers, and cut the capacitors as low as you can. The bottom of the can is encased in a rubberlike material, and is easily removed using tweezers.

    • Then de-solder the capacitor's legs still attached to the circuit board. Provide a new clean patch of solder to the soldering islands.

    • Now install the new capacitors. Mind you, this is NOT to be done with your average soldering iron. You will need a 0,8mm tip or smaller, or SMD tweezers. And you'd better have darn good eyesight ... :)

    • Hint : soldering these caps is much easier with the black plastic seats removed from under them ... They are easy to crack open and discard.

    • Edit 7 jan 2016 : due to quite a few requests, I have assembled a few sets with these capacitors that I can send by mail. Just ask !

    • Edit 16 april 2017 : due to quite a few requests, a gain in experience, and several equipment upgrades, I have decided to offer a repair service. Just ask !

  14. wLtGDValrGqVKkZF
    • Work your way up again, assembling until and including step 5.

    • Now test the thing.

    • A job well done ! :) Lay back and relax.

    Thank You. Just recently I recovered my camera and when I booted the axis 214 ptz it had no video so I figured I wasn’t making browser qualifications and went to figuring it out. morning time would soon come but to no avail. I would had eventually taken it apart, probably in haste and not using as much ginger as required it might had made the scrap pile for parts processing. but now I’m not going to wait till im configure crazy but get started right away gingerly. thank you for the pictures and the well clarified detail in this operation. I have lots of cameras but am fond of the reliability of the axis. Thank you.

    leroy brown -

Abschluss

To reassemble your device, follow these instructions in reverse order.

Stefan Van pellicom

Mitglied seit: 05/04/11

996 Reputation

53 Kommentare

It states 6.3v but the cap reads 6v. ??

blahb41 -

Always replace a capacitor with one of the same voltage or higher.

My supplier only offered 6,3v, and I believe that is the standard nowadays.

Stefan Van pellicom -

Do you or do you know anyone that will do the capacitor replacement once we have the board out for us?

Rod -

No, sorry.

You could google “electronics repair (name of your city)”.

Lots of these tinkerers are becoming part of their local makerspace communities nowadays, so you could use this search-angle too.

Oh, and there's nifty guys to be found in small (!) radio/TV/satellite shops !

Success !

Stefan Van pellicom -

I disassembled the camera and took the board into a repair shop. However, they tested and found no problems with the capacitors. They are running further diagnostics. Any other suggestions?

Mike -

bonjour mike

avez vous trouvez d ou venait la panne?

merci

Sapgato Sapgato -

Hello mike

have you find d or had trouble?

can you help me?

Thank you
Sapgato Sapgato -

I need set of these capacitors.Thank you.

ssen35@gmail.com

spendless11 -

I have sent you an email a few minutes ago.

If you let me know where they have to be shipped, I can give you a price quote.

Stefan Van pellicom -

Thanks (again) Stefan.

Same story as everyone ; NO VIDEO. This problem took months to become lethal to the camera ; at first you only had to reboot it (by removing the plug), then I needed to reboot it a 100 times to finally get it working, and lately it never rebooted without the "NO VIDEO" message ; so it was basically dead.

Also the head clearly made a "noise" ( tiiiiiiiiiiiiit ) and the head was not moving anymore ( including at boot time ).

I replaced the 6 elements, which I can confirm is not an easy task, and my camera in back online for 10 more years I think !

You saved it :)

Cedric -

A guy from France sent me one a few weeks ago, and it also had the noise in the camerahead (focus or zoom or iris motor ?) but after replacing the caps the sound was gone, and the whole thing worked just fine !

When my own camera failed, I only got the NO VIDEO notification, so the capacitor issue presents in different ways ...

Stefan Van pellicom -

For those who'll be bold enough to try the repair : (1) it works (2) it's not easy.

Here are the necessary parts, they are very cheap ( less than 5 $ for all of them ) but you need to open an account at Farnell.

http://be.farnell.com/jsp/search/product...

http://be.farnell.com/jsp/search/product...

http://be.farnell.com/jsp/search/product...

http://be.farnell.com/jsp/search/product...

I repaired mine with those parts, so I can confirm it's 100% working with those parts.

Before doing the soldering, I also tried to replace to power block with a lab power supply tuned at 13V DC ; there is nothing wrong with the power supply, don't bother trying to replace it. It's 100% an issue within the camera, people who say(inside other forums) that it's a problem with the power supply are just wrong.

Cedric -

i to would like a few sets goodrich@adsnet.com thanks......

Michael Goodrich -

I love this article! I do have a question... sometimes my camera says "NO VIDEO" but after a bit, the error goes away and I get a dark picture with green lines running across it. Do you think this capacitor replacement could fix that issue? I believe it to be that they are starting to kick the bucket but just quite haven't made it all the way. If you think that could be the issue, how could I go about contacting you; as you stated above that you have put together some packages of the capacitors and I am indeed wanting to get this camera fixed for my mother so she can monitor her property.

Jeremy -

@Jeremy

I think you have a point there. The drying out of the electrolyte in the caps is a slow process, and there actually is a phase in which it would intermittedly work. You can be sure of the fact that it WILL die if you do nothing, so you might as well fix it now.

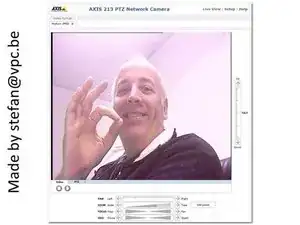
My email address is embedded in the last picture. Big black letters. :)

Stefan Van pellicom -

I would like a few sets as well. Please email me at kmlongee@gmail.com

Kyle Long -

I have requested two sets for this repair to stefan@vpc.be

Please let me know if you have received my request.

Dan Jaramillo -

Yep, I did and have responded.

Success with the repair !

Stefan Van pellicom -

I would love 5 of these sets if possible. Can you contact me at rifraf99@hotmail.com ?

Raf99 -

No problem Raf, email has been sent.

Stefan Van pellicom -

Hi Stefan, very interesting article thanks.

I have the "no video" message along with the black screen with the odd flicker and the background noises!!

Unfortunately I am a bit challenged in the hand / eye coordination department........ so soldering in new caps is out of the question. Would you consider quoting me for a completed board to be delivered to the UK?

You can contact me on Hogg_Alan@hotmail.com

Many thanks. Alan

Alan Hogg -

Hello Stefan,

I consider your proposal of sending a set of capacitors, could we arrange this is private message, here's my email soloflight64@hotmail.com.

regards

jbertanne -

Hi Stefan,

Could I please arrange to purchase a set or two as mentioned in step 13? Shipping to New Zealand.

Email stowell1j[at]gmail.com

Regards,

John

John Stowell -

Do you still have a set available? I'd like to purchase one.

ahoersten@gmail.com

ahoersten -

I too could use a set (or 3) my gmail address is technauticmarine or dscbill since this computer decided it wanted to be the work address instead of the personal one :)

Thanks in advance

Bill

technauticmarine -

You should have received an email from me. If you did not, I got the hints to your mail address wrong ...

Then please email me yourself at stefan at vpc dot be.

Stefan Van pellicom -

If anybody has any comments on how the repair went, I'd be glad to hear from you !

(Probably other fixers would like to read it as well ...)

Stefan Van pellicom -

Thanks for the great tutorial. We have one of these cameras at our school, and we are thinking about trying to fix it. Can tell me how much a kit would cost (including shipping to Hawaii)? Does a kit consist of just the 6 capacitors? Thanks. If you want, you can email me at mr.carr@kalama.ktwelve.hi.us Just replace 'twelve' with the actual number.

Mr. Carr -

Hi Guys

I contacted Stefan about having my camera repaired under by his repair service.

The e-mail contact back and forward was fast and accurate, and on top of that 100% honest.

I sent my camera to Stefan, according to the information I have from the courier, Stefan received the camera at approximately 1100 hours.

I had a tracking number for my camera on its return journey in my inbox at approximately 1700 hours the same day!

Camera is now back, installed and 100% operational. Cannot recommend Stefan highly enough.

The cost of the repair was less than 10% of a new camera from Axis. If you are reading this and you are based in Europe just do it!

He was even able to provide me with professional receipts (He is a business) to submit to my company. All legitimate.

Great service, great guy,

Thanks Stefan

Can Ada -

You make me blush ... :)

Thanks for giving me the opportunity to help you, and for your kind words !

Stefan Van pellicom -

Hi Stefan,

Thank you so much. You’re a hero for identifying this problem!

Like Jeremy (04/15/2016), I had green lines running across the screen for a couple of weeks and then got the ‘No Video’ message. The camera also stopped responding to PTZ commands.

I sourced the capacitors from Farnell here in the UK and the repair went smoothly, but it might be a difficult repair for a beginner (I’m fairly experienced with electronics repair). The camera is now working perfectly again.

Mark -

On another note, I originally installed this camera for a client. It worked outdoors (inside a dome) in a very harsh environment for over four years. It was returned to me when the flagpole it was mounted on collapsed, resulting in the camera unit separating from the base and snapping all of the connecting FFC cables.

I was able to glue the broken body back together, but it was impossible to source the correct replacement cables. I managed to get some 20 way 0.5mm pitch FFC cables of the right length and trim them down with a scalpel to the 11 way cables required.

Correctly routing the cables is difficult and requires the camera to be completely dis-assembled. I took detailed photographs at every stage of the dis-assembly and these were invaluable when re-assembling the camera.

I only mention this in case somebody has the same problem.

Thanks again Stefan!

Mark -

Hi Stefan,

I have two Axis 213 cameras that show the video but will not come into focus. Would replacing the capacitors fix this issue too?

Gina Bradley -

Hello Gina,

Sorry for the late reply, just returned from a holiday.

I am not 100% sure that your error can be fixed by this method, but I would sure give it a shot !

It's your one and only option ...

I have had one case in which the zoom motor functionality was repaired by a replacement of the caps.

Since the whole supply part of the camera module seems to come from this pcb, I wouldn't be surprised at all if it could fix a focus motor issue as well ...

Stefan Van pellicom -

I have (1) 214 and (3) 213’s that have the “No Video” Showing, network works fine but no video on the live view page. How do I contact you about your repair service?

Thanks;

Jon

Jonathan Manley -

Please send me an email.

My address is in the last picture of this article !

Stefan Van pellicom -

Hey Jonathan, something seems to be wrong with iFixit’s mail system …

Please send me an email. My mail address is in the last picture above. :)

Stefan Van pellicom -

can you send me a capacitor set please?

Email: harrison@gluckli.com

harrison herring -

Do you still sell capacitor sets for the Axis 213 PTZ camera?

Email:wfenstad@lakeconnections.net

Wayne Fenstad -

Hello Stefan,

how can i reach you via Email? The Email above in the picture is actually not further registered.

I have 2x 213 for repair.

Thanks.

Deltakappa -

Please note the Made by in the left margin of the final picture. This topic is too visible for spambots …

Stefan Van pellicom -

Hello Stefan, if i send you an email (given in the picture above) i get this status: "no valid MX hosts found". It seems there is a problem with your email configuration?

Please send me an alternate email for contact at: ax213

Please use the Domain: 0box.eu

This email address is only valid one day and you have to confirm the delivery.

Thank you very much.

Deltakappa -

can I get info on purchasing a set of caps. dswelch51964@yahoo.com

Douglas Welch -

Como tendríamos que hacer para enviarle la cámara Axis 213 para repararla?

How should we do to correct the Axis 213 camera to repair it?

JOSE MARÍA VENTURA -

You can send me an email, and I’ll give you the details.

Stefan Van pellicom -

I have three of these cameras, all with the same problem. They were quite old when they all died, and they cost £1000 each in 2003 (?)

Anyway, I fixed one and gave to my manager at the time. I still have two to do…

Getting the capacitors was easy, removing the old ones was ok, soldering the new ones on not so easy since they are surface mounts, but you can do it

:-)

Charlie Stevenson -

Sir, I have two 213s, one of which has failed with No Video, as you’ve described. What is your cost for a six pack of capacitors and what would be your cost/process to send to you for repair, from the U.S.?

Thank You, Marc

Marcandtheresa@hotmail.com

marc moscowitz -

Dont worry, realy is very cheaper, and you can do it.

Manuel Ramirez -

Hi, I have two of these with hardly any use over the years. One of them does not seem to boot correctly and engine does not seem “push enough” to move the camera on the standard boot process. I just hear a small click, sometimes ongoing. Have not found any info about that issue so I will likely keep it for spare parts unless someone has an interest. Shame on this old little cameras that were very innovative at the time.

Jose Luis Moya -

hello! someone have de diagram?, I broke a path of terminal possitive of capacitor of 22 uf on pcb board.

Manuel Ramirez -

There are no schematics available, you’re on your own I’m afraid …

Stefan Van pellicom -

OMG, I appreciate your response. I will try to connect these capacitor like parallel. I will aport my result.

Manuel Ramirez -

Ok, the best of luck with your repair !

Stefan Van pellicom -