Einleitung

The first step will be to remove all the screws from the back cover of the device. Then we will remove the back cover. Next, we will remove the screw holding the battery in place. Once that is complete the battery will be unplugged and removed. These steps will be repeated in reverse to put everything back together.

  1. 24CeglUKVvaVNaep
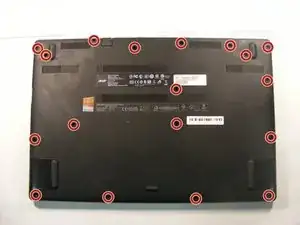
    • Remove all 18 marked screws (2.12 mm) using a Phillips #1 Screwdriver.

  2. n4hvTBpjRQLcO5dA
    n4hvTBpjRQLcO5dA
    TpOBlXuLKEUaLDIO
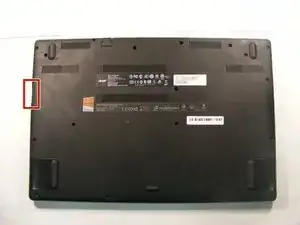
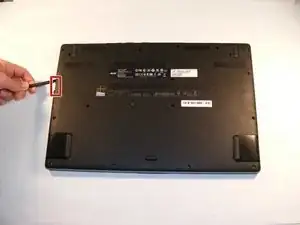
    • Use the spudger to slowly work your way around the perimeter starting at the marked location to pop the bottom cover off.

    Extra Note for Step 2 -- It's a good idea to start at the spot indicated in the photo, right where there's a cut-out in the backpiece for the micro-SD card slot. First, remove the small plastic place-holder that tucks flush into the micro-SD slot when you don't have a chip in there. Then if you gently pry up right there, twisting your spudger (or any miniature prybar) so that you will be using the bottom of the case for leverage (and taking care not to cram your prybar all the way into the micro-SD slot), the backpiece will begin to snap off easily. The rest of the back will lightly snap off, not requiring any force at all, as you work your way around the perimeter.

    Old Bins -

  3. MHKSHIZENDFBkkgS
    MHKSHIZENDFBkkgS
    eYVJdMMXNAAk4KOl
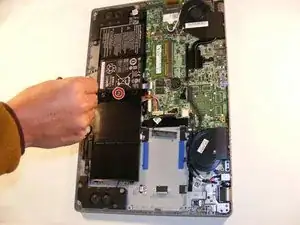
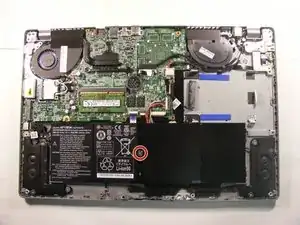
    • Remove the 1 marked screw (3.3 mm) holding the battery in place using a Phillips #1 Screwdriver.

  4. SPGfFKOo1kST22V2
    SPGfFKOo1kST22V2
    5emVBPpk2R1EYVvE
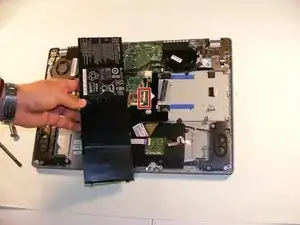
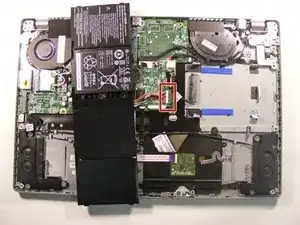
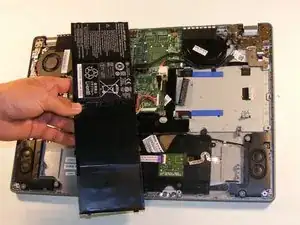
    • Unplug the marked plug from the motherboard and this will complete the removal of the battery.

Abschluss

To reassemble your device, follow these instructions in reverse order.
Daniel Bates

Mitglied seit: 29/01/18

172 Reputation

0 Kommentare