Einleitung

This guide will explain how to completely remove the motherboard in an Acer Aspire One Cloudbook AO1-132-C3T3.

  1. RmGUNnN4wAq6bKiT
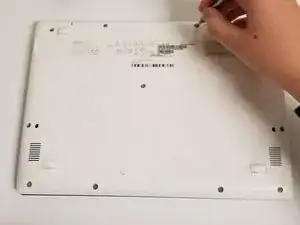
    • Remove eleven 4 mm Phillips #1 screws.

    • Pull the backplate off using your fingers.

  2. vAiZnunUWMcGTG54
    vAiZnunUWMcGTG54
    nl1k25BhavECTFwe
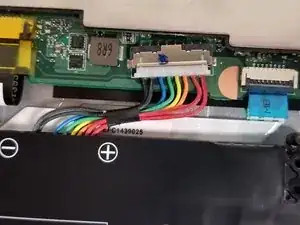
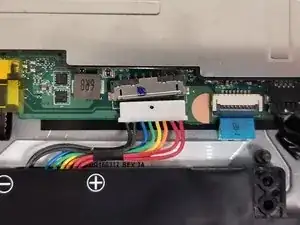
    • Pull the rainbow cord out of the motherboard using the tabs on the sides.

  3. G6SkMhsWpLbpoIRI
    G6SkMhsWpLbpoIRI
    gkRI2EZROAePhi4T
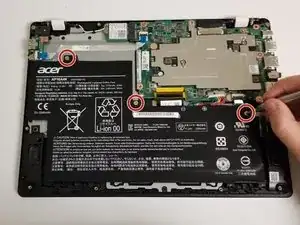
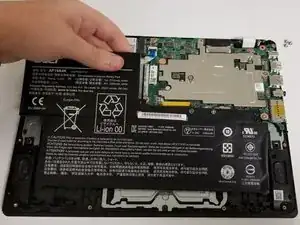
    • Remove three 4 mm Phillips #1 screws holding down the battery.

    • Lift the top edge of the battery and pull back towards the hinges to remove the battery.

  4. MjKUeQxrQugGc3Ay
    MjKUeQxrQugGc3Ay
    EErrTSd6QUZkr2R1
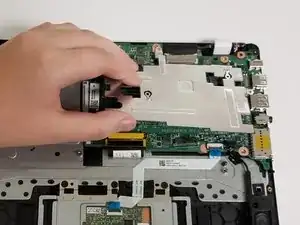
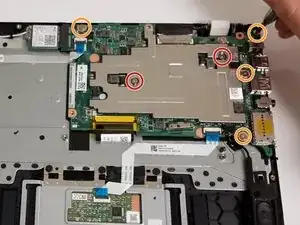
    • Remove two 4 mm screws holding down the metal plate using a Phillips #1 screwdriver.

    • Remove the plate using your fingers.

    • Remove four 5 mm screws holding the motherboard in place using a Phillips #1 screwdriver.

  5. eP1ijPOGgTI1eyZQ
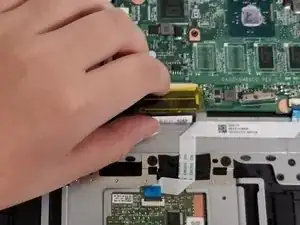
    • Pull the yellow cord out from the motherboard using the sticker.

  6. 6kuVPfuKw22FQoAB
    6kuVPfuKw22FQoAB
    6PkbPuCnFGNrkoEB
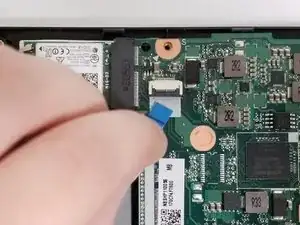
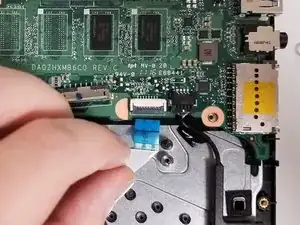
    • Pull both small blue ribbon cords out of the motherboard using the stickers.

  7. vJvH2ioeSkU3GgHF
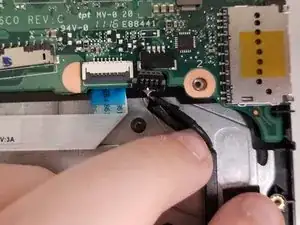
    • Gently pull the black cord out from the motherboard.

  8. 3SqPfoMwfPISjQ1y
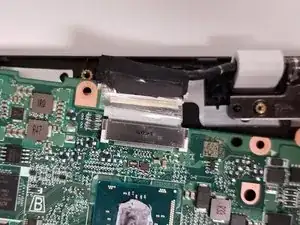
    • Pull the top cord out of the motherboard using the sticker.

  9. HuVmQSymeZlRPivD
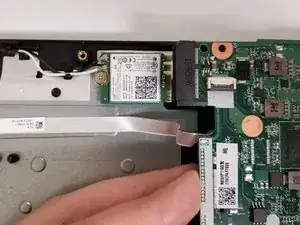
    • Gently pull the motherboard away from the small square chip to its left.

Abschluss

To reassemble your device, follow these instructions in reverse order.
Hanna Flores

Mitglied seit: 20/09/17

149 Reputation

0 Kommentare