Einleitung

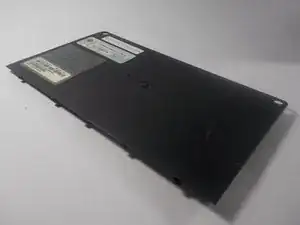
Though the back panel is not itself a component that is often replaced you will need to remove it in order to get to various components inside the computer. You should read through the entire guide before performing the repair and should have all necessary tools readily available. You should also find a safe location to store the various screws taken out of the computer to ensure that they do not get mixed up or lost.

  1. IUIVwDm5x3im4hcs
    IUIVwDm5x3im4hcs
    6LBVQEnr6PkZlKAq
    • Unscrew seven 1.2 mm Phillips #1 screws from the back of the device

    This step is not necessary. The screws do not have to be removed for RAM replacement.

    Markus Schmidt -

  2. mm616hA1H2CDuwXN
    mm616hA1H2CDuwXN
    rU4kWpTJiPQGAnGZ
    • Unscrew eight more 1.2 mm Phillips #1 screws from the front of the computer.

    Here too many screws are removed. Only the 4 denoted with a circled "1" have to be removed.

    Markus Schmidt -

    just remove the 4 screws that are marked as “Door” or something similar since i don’t remember .. not all those need to be removed

    leartzajmi -

  3. j6Hc1X6qXZGABcQw
    j6Hc1X6qXZGABcQw
    rtTFqkCXp46nRJTR
    o2fgTvqHdKlyK1vw
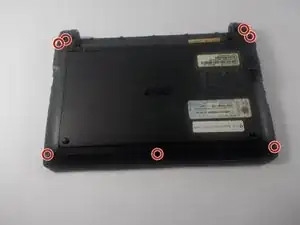
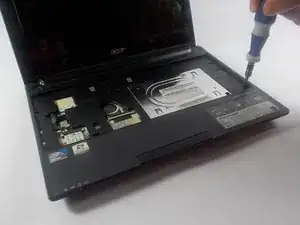
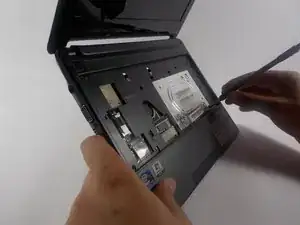
    • Using a spudger carefully push though the hole to dislodge the panel on the back of the device then remove the panel by hand.

    • It is recommended that you use a plastic spudger to reduce the chance of damaging any internal parts.

Abschluss

To reassemble your device, follow these instructions in reverse order.
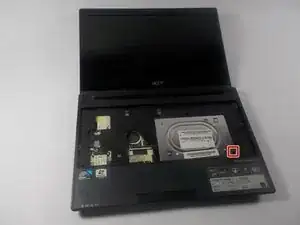
Brian

Mitglied seit: 20/03/16

1224 Reputation

0 Kommentare