Einleitung

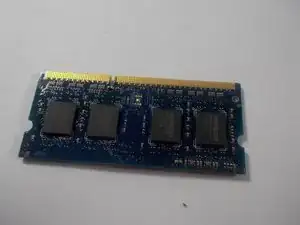
The RAM on a computer is used to store temporary information for your computer to run swiftly. If you computer seems to studder or slow down it might mean that you could use an upgrade of the RAM. RAM upgrades are one of the more common upgrades in a computer unit. You should read through the entire guide before performing the repair and should have all necessary tools readily available. You should also find a safe location to store the various screws taken out of the computer to ensure that they do not get mixed up or lost.

  1. Lqr3VObcCYEcIsaf
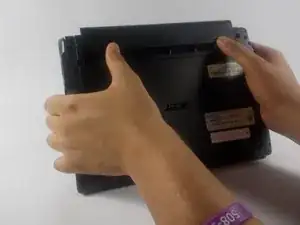
    • Start by removing the battery found on the back of the device.

    • The battery must be removed in order to ensure the device does not have power! Make sure you do not skip this step!

  2. qrafMogAJIlyaXP2
    qrafMogAJIlyaXP2
    TnKZKKAPmAbXUq21
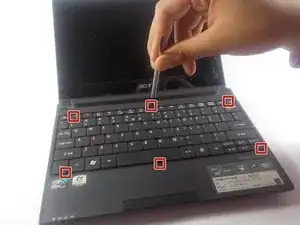
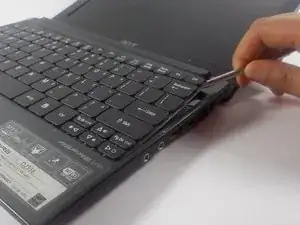
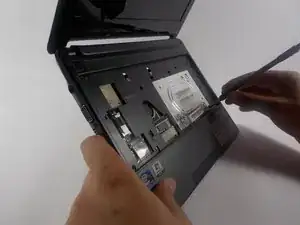
    • Using plastic opening tools press down the 6 clips located around the keyboard.

  3. ubFCRrYpYNgPxA3y
    ubFCRrYpYNgPxA3y
    HopEXEEYMX2VCKFp
    eCNT6hOLhQp2JAmH
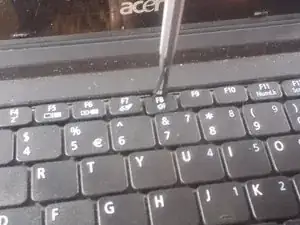
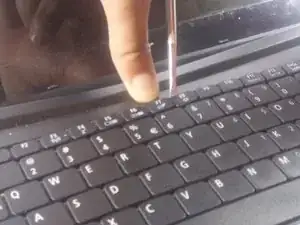
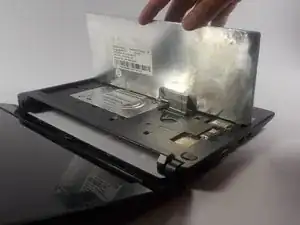
    • Using a plastic opening tool or spudger move the keyboard out of position.

    • There is a thin cable on the backside of the keyboard. Make sure when you move the keyboard out of position you do so slowly to prevent damage to this cable.

    • If you use a spudger it is recommended that you use a plastic spudger to reduce the chance of damaging any internal parts.

  4. 1o6NJ4EOfbdcQYNG
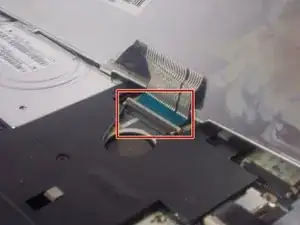
    • Using a spudger gently push the tab on the port forward then pull out the cable.

    • Be careful to do so as gently as possible. You do not want to damage the port.

    please don’t disconnect the keyboard for this job and even for HDD replacement..

    it’s useless and you will complicate the life to yourself.

    leartzajmi -

  5. IUIVwDm5x3im4hcs
    IUIVwDm5x3im4hcs
    6LBVQEnr6PkZlKAq
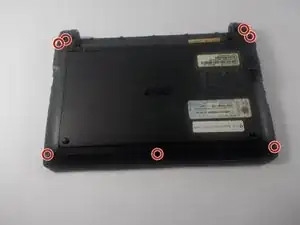
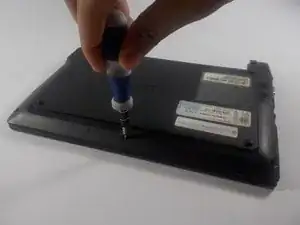
    • Unscrew seven 1.2 mm Phillips #1 screws from the back of the device

    This step is not necessary. The screws do not have to be removed for RAM replacement.

    Markus Schmidt -

  6. mm616hA1H2CDuwXN
    mm616hA1H2CDuwXN
    rU4kWpTJiPQGAnGZ
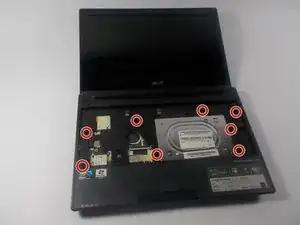
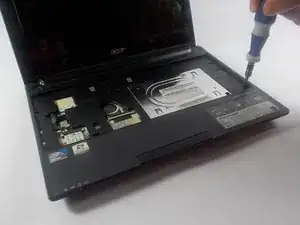
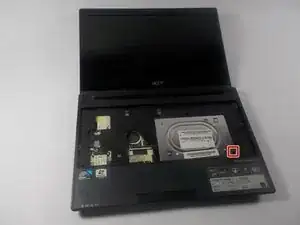
    • Unscrew eight more 1.2 mm Phillips #1 screws from the front of the computer.

    Here too many screws are removed. Only the 4 denoted with a circled "1" have to be removed.

    Markus Schmidt -

    just remove the 4 screws that are marked as “Door” or something similar since i don’t remember .. not all those need to be removed

    leartzajmi -

  7. j6Hc1X6qXZGABcQw
    j6Hc1X6qXZGABcQw
    rtTFqkCXp46nRJTR
    o2fgTvqHdKlyK1vw
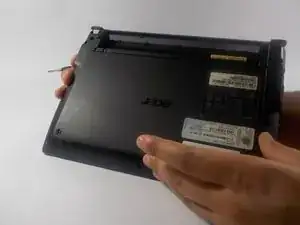
    • Using a spudger carefully push though the hole to dislodge the panel on the back of the device then remove the panel by hand.

    • It is recommended that you use a plastic spudger to reduce the chance of damaging any internal parts.

  8. 1DuIFOBeEB2PVPwX
    1DuIFOBeEB2PVPwX
    m1be4LmvTELJItww
    XiTmSUuCZJHqeTIx
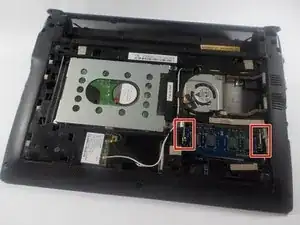
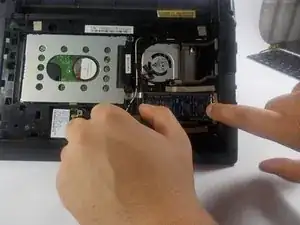
    • Using your hands pull apart the two clips holding the RAM in then pull out the RAM.

    • It uses (DDR3) 204pin PC3-10600 1333MHz DDR3 SO-DIMM Memory Modules

    You really don't need to do steps 2-6, if you are careful you can attack the lower case panel with just the spudger (just like you'd do from the top), and get at the ram/disk right away, instead of taking the rest of the machine apart.

    cliff strabac -

Abschluss

To reassemble your device, follow these instructions in reverse order.
Brian

Mitglied seit: 20/03/16

1224 Reputation

0 Kommentare