Einleitung
The hard drive is a common problem when laptops become older. If the hard drive is not functioning correctly, there will be an error message on the display that indicates a problem exist. The error typically indicates there is no operating system, or there are missing boot files. When these types of errors are displayed, it is a good idea to replace the hard drive.
This guide provides simple steps to replace the hard disk drive on the Acer Aspire TimelineX 4830T-6682 using minimal tools that can be acquired locally, or through iFixit. Please make sure and follow the prerequisite procedures.
Note 1: The hard drive used to make this guide is not original to the laptop, and only approximates screw locations.
Note 2: The Acer Aspire TimelineX 4830T-6682 battery requires the keyboard to be removed to gain access to disconnect it. For this reason, it is reasonable to replace the hard drive without removing the battery.
Werkzeuge
-
-
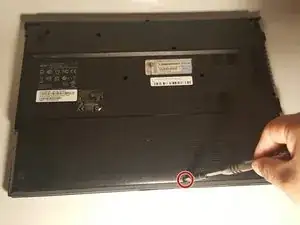
Remove the single screw with a Phillips #0 screwdriver.
-
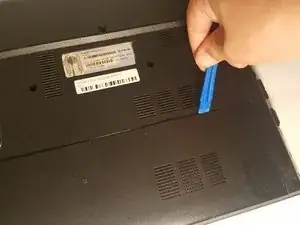
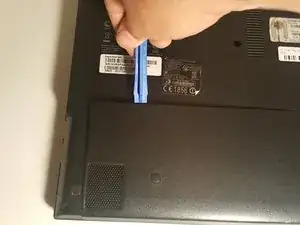
Use a plastic opening tool on the upper part of the panel to remove it and access the RAM.
-
-
-
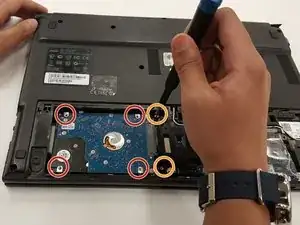
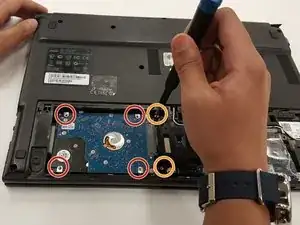
Remove four silver screws, highlighted with red circles with a Phillips #1 screwdriver
-
Remove two black screws, highlighted with orange circles with a Phillips #1 screwdriver
-
-
-
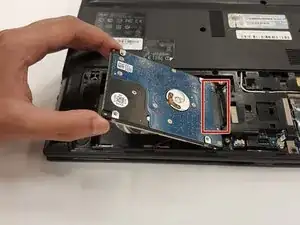
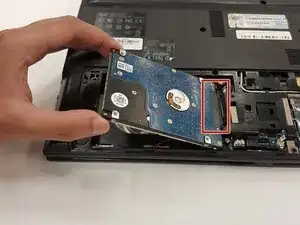
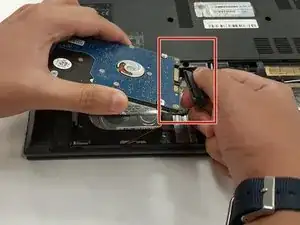
Pick the hard drive up from the laptop. Keep your hand off the circuit board since the battery is still connected, and voltage might be present
-
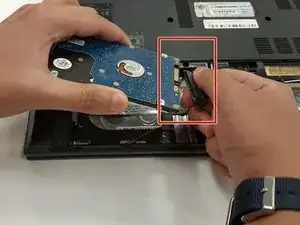
Disconnect the SATA connector by pulling the black plastic marked in the pictures horizontally away from the hard drive
-
To reassemble your device, follow these instructions in reverse order.
2 Kommentare
Thanks for the guide. Do you know how to detach the SATA cable from the motherboard? If not, I would really appreciate your help if you know where I should look for an answer. Thanks so much for your help!!
Hello,
I am glad you were able to use the guide. The connector is about two centimeters under the cover on the back side of the motherboard. The SATA cable can be removed once the motherboard is detached from the frame.
Best regards,
Jon
