Einleitung

This guide will show you step-by-step instructions for replacing the display assembly. Removing the hard drive is not necessary, step 6, for completing this task. Also, make sure the unit is powered down before performing any of the following tasks.

  1. tUoiwHMPFreWhxcK
    • Flip laptop over so that the back is facing upward.

    • Push switch to the right.

    • Pull battery away from the laptop.

  2. oo3WEee5xrgQo2du
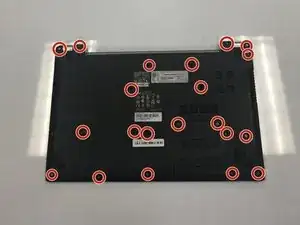
    • Use a #0 Phillips head screw driver to remove all of the screws.

  3. CdPvjopkHBPAFUQo
    • Flip laptop back over.

    • Open the laptop.

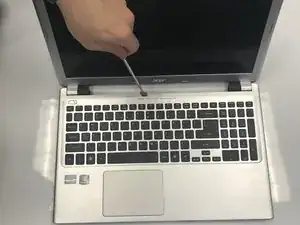
    • Wedge a prying tool between the keyboard and laptop body seam to remove keyboard.

    • Be careful not to bend the keyboard too much or break the tabs that connect the keyboard to the laptop.

  4. 4rjcPGfPEFxoJi6Y
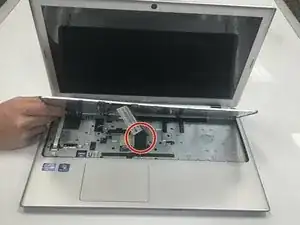
    • Gently lift keyboard.

    • Disconnect keyboard from the laptop.

  5. VxYworM3ARZSW2L3
    • Disconnect the two ribbon cables at the near left.

    • Remove six screws: ⁃ one by the left most ribbon cable connector ⁃ one mid-right center ⁃ one on the near edge left of center ⁃ three across the back

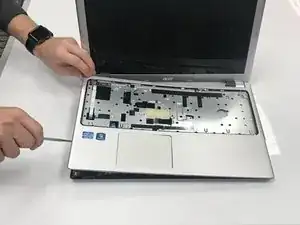
    • Use a prying tool to remove the upper cover.

    There are several #00 philips head screws in the area under the keyboard that have to be removed as well. Either you forgot to mention that, or Acer isn’t consistent on these models. I had to remove 6 found around the perimeter and in the center of that area.

    Troy Shadbolt -

    I second the extra six screws and there are also two cables at the near left that have to be disconnected before the upper cover can be lifted.

    Kevin McIntyre -

  6. 6KyuHMjEV5uvrfC6
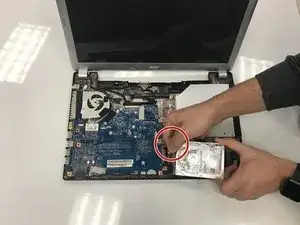
    • Locate the hard drive.

    • Lift the hard drive.

    • Disconnect hard drive.

Abschluss

To reassemble your device, follow these instructions in reverse order.
Joe Niu

Mitglied seit: 20/09/17

628 Reputation

0 Kommentare