Einleitung

If your Acer Chromebook CB5-132T-C8ZW is not playing any audio, the speakers may be broken and need repair.

The speakers are the part of the laptop that provides audio when an audio device is not plugged in. If the Chromebook has a non-functioning speaker, no sound will be produced from the laptop when a video is playing.

Before beginning, make sure the Chromebook is disconnected from any external power source; then press and hold the power button for at least five seconds prior to dismantling in order to release any stored energy that could potentially be harmful.

  1. KfKyLENQVkokqmqw
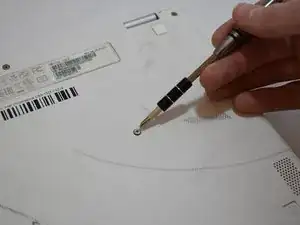
    • Remove eleven 7.2 mm screws from the bottom of the Chromebook using a JIS #1 screwdriver.

  2. 2e3RQso2osRuTSBg
    2e3RQso2osRuTSBg
    TbyBSidSO6YJrmYP
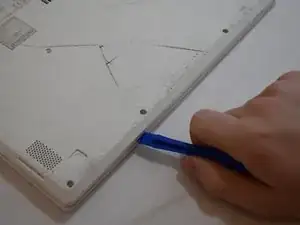
    • Insert and slightly twist a plastic opening tool to separate and remove the backing of the Chromebook from the body.

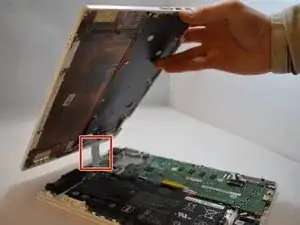
    • Do not immediately remove the back from the laptop. The power strip keeps the backing attached to the rest of the laptop. Gently lift backing from the power button side and set next to the body of the laptop.

  3. FxBsocUYDRdtu4Sc
    FxBsocUYDRdtu4Sc
    TYwSUvQlYOpbi3JG
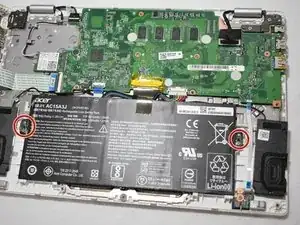
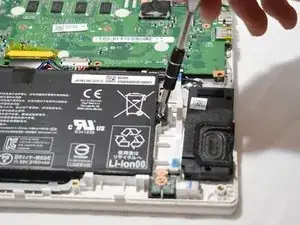
    • Remove two 4.6 mm JIS # screws at each end of the battery.

  4. qMSNeKCLvEgEclXP
    qMSNeKCLvEgEclXP
    FPSxeDgdbZVSa2Ie
    EvhYaAaJQcZCJRxH
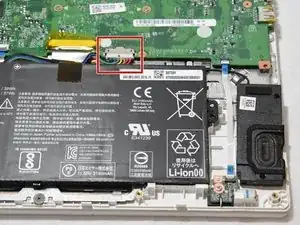
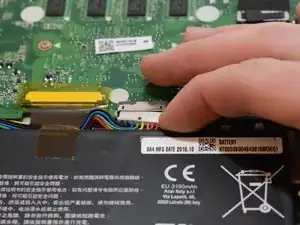
    • Carefully pull out the ribbon cable attached to the motherboard that runs wires to the battery.

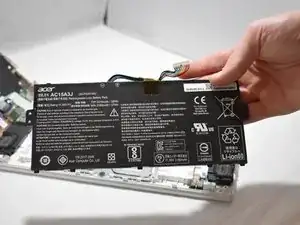
    • Remove the battery.

  5. mJgqRWuAc6bACtSK
    mJgqRWuAc6bACtSK
    QLExfObmc5bchJ2K
    md13r5SqWjsCWZc5
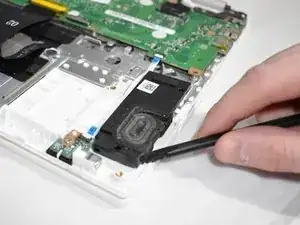
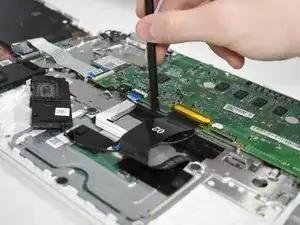
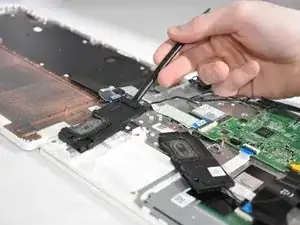
    • Lift the speakers up using a spudger.

  6. LrSEBlvoJEudCiBK
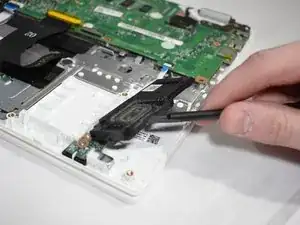
    • Lift the white strip up and slide the speaker underneath.

  7. 2dRnIWS1CHv6BNnC
    2dRnIWS1CHv6BNnC
    12Ku4MxwBOIcvnW3
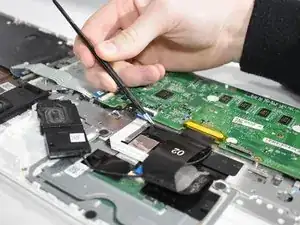
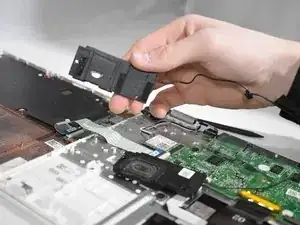
    • Slide the speaker through the black power strip.

    • A plastic spudger may be helpful to hold the power strip up.

  8. yIR5lLBl1uq2cIFK
    yIR5lLBl1uq2cIFK
    HNPCVLGmfNRUW4Ka
    emOyxE2dVu5fvGE6
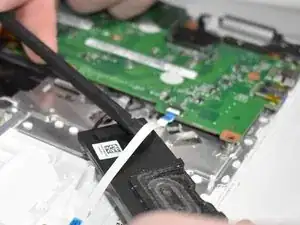
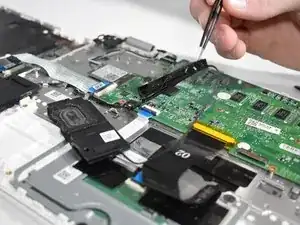
    • Remove the black tape that holds the wire in place using precision tweezers.

    • Unhook the wire from the small hooks that hold the wire in place.

  9. ciCh62lQooTKgVaH
    ciCh62lQooTKgVaH
    UoBRosUfNDfjkKwN
    MWECGhFcGLbrL4Zn
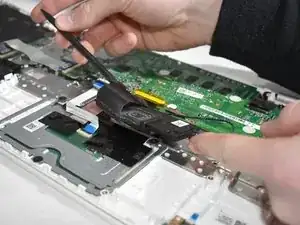
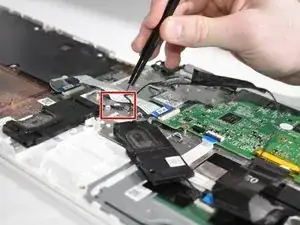
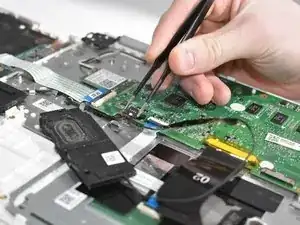
    • Disconnect the black connective piece using tweezers.

    • Lift the second speaker up using a plastic spudger tool.

Abschluss

To reassemble your device, follow these instructions in reverse order.
Lauren Reichenbach

Mitglied seit: 13/01/20

580 Reputation

0 Kommentare