Einleitung
If your Acer Chromebook R11 C738T-C44Z needs a new battery, this guide will assist you step by step with replacing your battery to ensure that your computer works like new. A laptop battery is a component that allows the device to work. Without it, the laptop would be nonfunctional. After using your computer for many years, it may begin to malfunction. One of the most common reasons is that the battery is dead and needs to be replaced. This is typically due to over charging the laptop and the age of the laptop. A big indicator of this is after charging your Chromebook, you notice that the battery drains very quickly.
Before beginning this guide, if you notice that the bottom of the laptop is slightly expanded, your battery could possibly be swollen. This can cause personal injury or damage to items surrounding it as swollen batteries are known to explode. Do not attempt to remove a swollen battery by yourself. This article about swollen batteries will give you all the information and resources you need to handle a swollen battery situation: What to do with a swollen battery
Once you have confirmed that you do not have a swollen battery, shut down your laptop and drain any residual power and check to see if the power is drained completely by attempting to turn it on. The computer must not have any power to perform this guide as that can create complications for the computer. A laptop is a very delicate item and when working on it, you have to be as gentle as possible to not damage any wires and other items in the laptop.
After you completed those steps, begin following this guide. After you have successfully replaced your Chromebook battery, dispose of the battery as soon as possible. How to dispose laptop battery
Werkzeuge
Ersatzteile
-
-
Lay the laptop with the back side up.
-
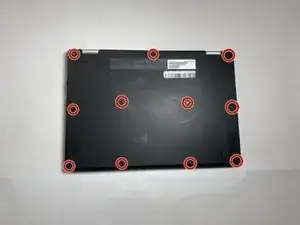
Use a Phillips #1 screwdriver to remove eleven 3 mm screws.
-
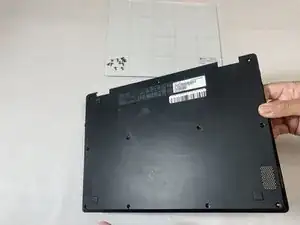
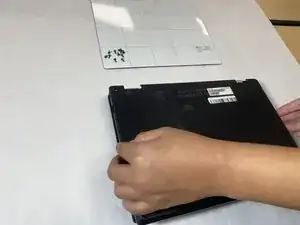
Use the opening tool to pry the back cover off gently by placing it in the seam and working your way around the perimeter.
-
-
-
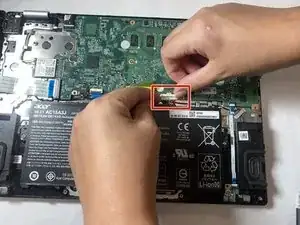
Unplug the battery connector from the motherboard. (The motherboard is a group of wires in rainbow colors)
-
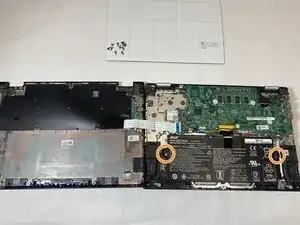
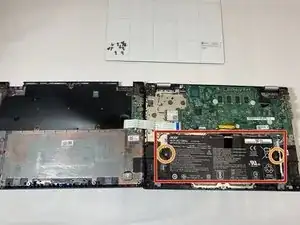
Use a Phillips #1 screwdriver to remove the two 3 mm screws, (one on each side of the battery), that secure it in place.
-
-
-
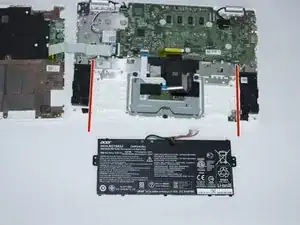
Remove battery from its holder by pulling it upwards from the device
-
Attempt to remove it as gently as possible to avoid damaging the Motherboard
-
-
-
Install the new battery and again use a Phillips #1 screwdriver to remove the two 3 mm screws
-
To reassemble your device, follow step one and two in reverse order.
