Einleitung

If your tablet seriously malfunctions, (e.g. it is not turning on), a replacement motherboard may be needed. Motherboards in tablets are much smaller than traditional motherboards, and this guide shows you how to properly replace yours.

  1. OGuI1UNuHRuCnqJs
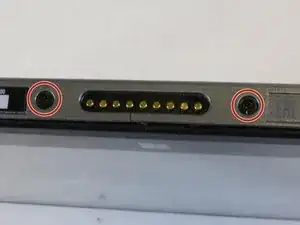
    • Make sure that the tablet is turned off and disconnected from any power source.

    • Disconnect the tablet from the keyboard attachment.

    • If you have a Micro SD card in the tablet, remove it now.

    • Remove the two 3.5 mm Phillips #0 screws on either side the keyboard connection.

  2. cSqOUjJKD5enZhFa
    cSqOUjJKD5enZhFa
    LYFfUnLchSTVVXB1
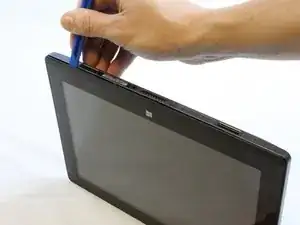
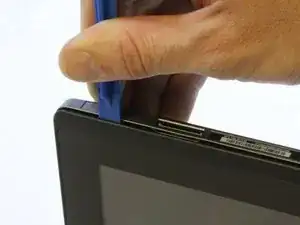
    • Starting from a corner of the tablet, use the plastic opening tool to create a gap between the screen and the back covering.

    • Slowly maneuver the plastic opening tool along the perimeter of the tablet to pry the screen and back covering apart.

    • Separate the back covering from the screen.

    Doing this, i’ve broke some of the “hook” thing that keepsthe plastic back plate to the screen, so now is loose and not well closed. How can I solve it?

    Lorenzo Giraudi -

    I need motherboard for Acer one 10 s1001

    Abdul Majeed Hajam -

  3. jDfPLiOCkgrhZfyS
    jDfPLiOCkgrhZfyS
    Ufd2rQg2V1Hmwdoc
    1deBXrvFKXTyY1eC
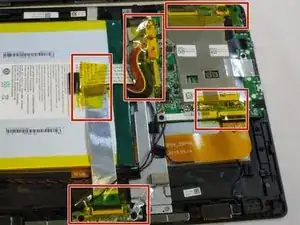
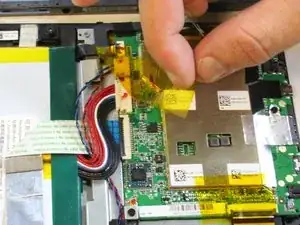
    • Peel off all of the Polyimide tape (yellow tape).

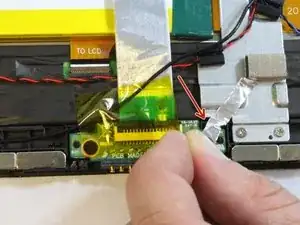
    • Remove the metallic tape covering the keyboard connection.

  4. UQeYNWjJ2RN2pxPX
    UQeYNWjJ2RN2pxPX
    QeLYrSMUHVOYGVDK
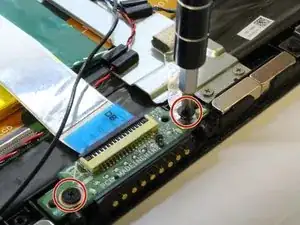
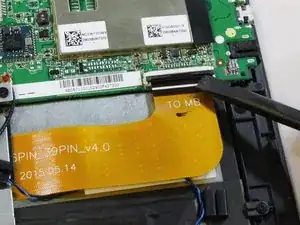
    • Unscrew the two 3.5mm Phillips #0 screws and open the ZIF latch.

    • Gently remove the silver part covering the battery and set it aside.

  5. gcfTVqIJKYOHIcGy
    gcfTVqIJKYOHIcGy
    WatxDiuRkpjL2ZTQ
    AZZD2V5cBgVFxg1M
  6. xSB4Lu3RAZXZPLqD
    xSB4Lu3RAZXZPLqD
    R3dDjJ6pQQ45GffR
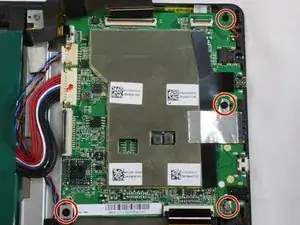
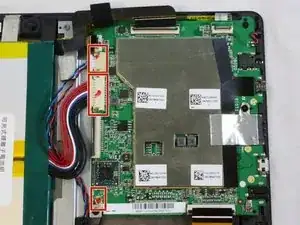
    • Remove the four 4mm screws at the corners of the motherboard with the Phillips#0 bit screw.

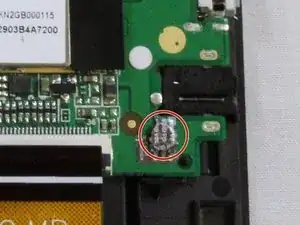
    • The screw beneath the metallic tape also needs to be removed.

  7. JyD5JnQpbJCpCedD
    JyD5JnQpbJCpCedD
    4VFPoufptdpalpGk
    EtMBfWFTKFNbBZte
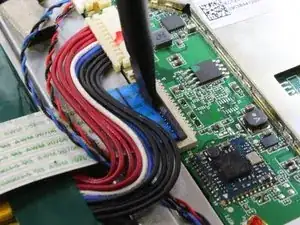
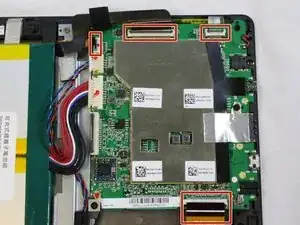
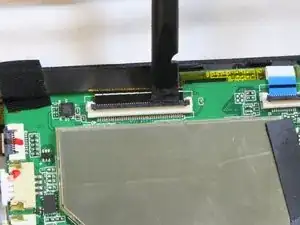
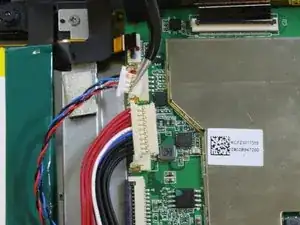
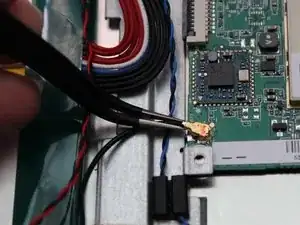
    • Disconnect the three cables on the motherboard closest to the battery.

    • These cables require some extra prying power to be removed.

  8. NKEZVWHSDL2YBybs
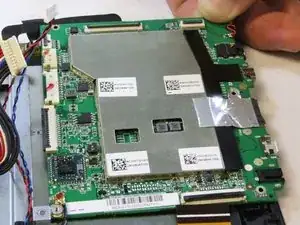
    • Slide out the motherboard and put it aside.

Abschluss

To reassemble your device, follow these instructions in reverse order.

Shannon Griffin

Mitglied seit: 03/10/16

1339 Reputation

11 Kommentare

WOW. Thank you so much for this guide. My keyboard wasn't connecting and last time I had to send it to Acer ...and that took a month. This time it is out of warranty and it wouldn't connect again!!!.... After opening it following this guide, it was immediately visible that the cable was out.

Thank you SO much!

Alen Mijic -

put it aside and then?

Double Bone -

Hey,

Whenever you see a 'put aside' anywhere in a guide there's an implied 'then continue' afterwards.

Hope that helps!

Allen Tools -

Great help. Was able to restore connection for my grandson’s computer using your clear concise directions. THANK YOU!!!
Linda Byars -

how can i fix my acer one s1002 keyboard dock it is not working if i connect it to the tablet i

Wencel Angelo Maturan -

me salvaste la vida! graciasss

Beto Valdivia -

Me salvaste la vida!!!!!!!!!!!

Beto Valdivia -

worked perfect to fix my daughters keyboard

Shayla Moran -

OK, just out of warranty, 3 years from Costco, and went crazy trying to find out if a software upgrade left me disconnected. This video, and 15 minutes later, working again. The ribbon connector to the edge pins was the problem, lifted the black lock bar, pushed the ribbon cable back in position, and resnapped the black lock bar. A huge thanks for this video..

mapleridge240 -

Thank you so much . My keyboard wasn't conneced and After opening it following this guide, it was immediately visible that the cable was out.

thank you so much

vigyan singh -

Any idea what the correct part number or spec for the power connector on the mother board is. Center pin was broken on parents and am trying to find replacement to get up and running for them.

jasonquintal -