Einleitung
Before starting this guide, You should take the proper precautions to prevent damage to your machine, and to you. Please do the following before starting this guide:
- Unplug the computer from the external power supply
- Press (and hold) the power button for 3 seconds. (This will ensure that the system uses any excess power in the board)
An ESD Strap is recommended as this prevents damage to your computer
Werkzeuge
-
-
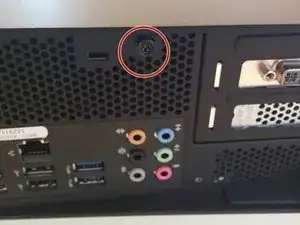
First, turn the computer so you can see the rear panel. Remove the small screw to the right (or above, if the system is on its side) of the audio jacks.
-
Once the screw is removed, use both hands to push the side panel down and towards the front of the case.
-
-
-
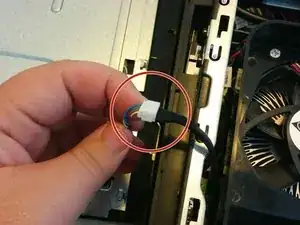
Lift the side panel off, and gently flip it over the top of the system, being careful not to break the LED control cable. Unplug its connector and set the case panel to the side.
-
-
-
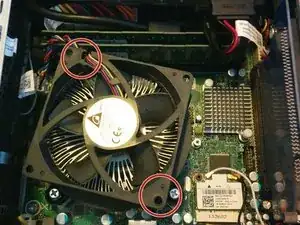
Next, remove the screws securing the plastic air re-director (not shown in picture) to the fan, and gently lift it out of the case. Set aside and move to the next step.
-
-
-
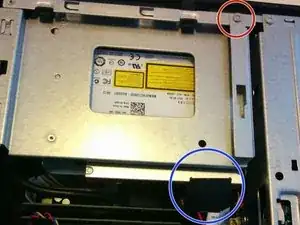
Unplug the SATA cable at the base of the DVD drive circled in blue. This cable will have a lot of tension on it, but do not worry. Just be careful not to yank on it too much.
-
You will then unscrew the screw securing the DVD drive to the case (circled in red). Once the screw is removed, remove the DVD drive and set to the side.
-
-
-
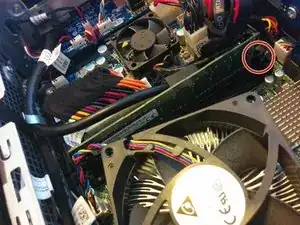
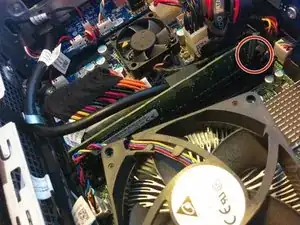
Now, push the white latch (circled in red) DOWN and pull the ram card straight up to a ~45 degree angle. Pull up and out, towards the latch side, and set aside.
-
-
-
You will insert the new DIMM. Push the side opposite to the latch in first, being sure that the notch in the connector matches the location on the ram DIMM.
-
Insert at a ~45 degree angle and push straight down into the socket, being sure that the latch clicks.
-
To reassemble your device, follow these instructions in reverse order.
