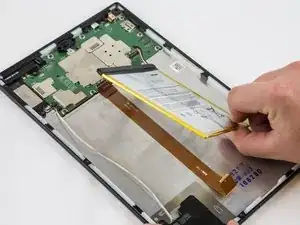
Einleitung

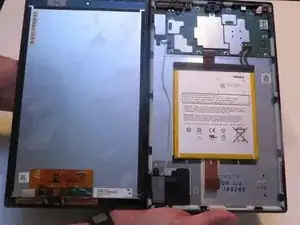
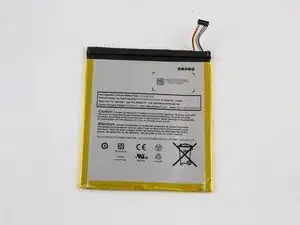
Before you begin, make sure the device is off. You will need to use the screen replacement guide as a prerequisite.

  1. pMUsf5gRYMNi2hgC
    pMUsf5gRYMNi2hgC
    RDROMVPXqogIgTOT
    J2ufhOZpVSFQKTKJ
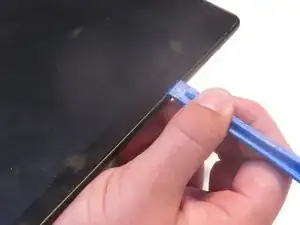
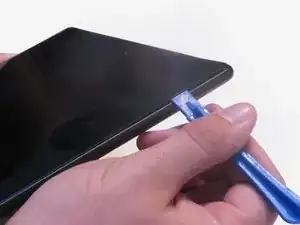
    • Avoid prying near bottom right hand side due to LCD Connector

    • Use a plastic opening tool to pry the screen up in the right hand corner.

    The right side with the power switch on top?

    Sonny Shear -

    Where is the right hand corner? Is it the corner nearest the USB connector? Farthest from USB connector?

    Thanks!

    Steve Ciciora -

  2. lTqFQgEFiHSNgYWJ
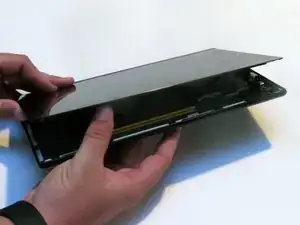
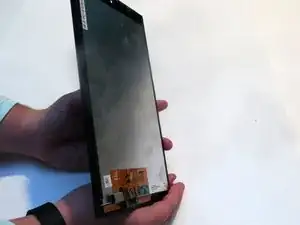
    • Do not completely remove the screen yet as there is a ZIF connector connected.

    • Lift the screen and digitizer from the case.

    • You may need to use some force due to the glue.

    What is a ZIP connector? What does it look like?

    Beldenr -

    Hi Beldenr! We happen to have a handy guide for a lot of different types of connectors, including ZIF connectors.

    Adam O'Camb -

  3. 3xBWtELWfcZnMODd
    3xBWtELWfcZnMODd
    6EwvG6oFoBRvcsxI
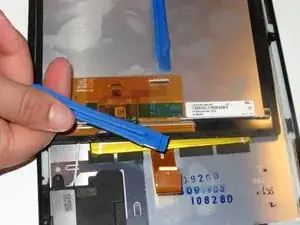
    • Be mindful of the ZIF connector.

    • Disconnect the ribbon connector from the digitizer side using your hands or the plastic opening tool.

  4. 3H6ELaVaCoPLtFTQ
    • Remove the screen and digitizer from the case completely.

  5. FXqt3U5VENyryUIM
    FXqt3U5VENyryUIM
    NL3QsGE1YymEQKLm
    36iapYXxIaXSmBHK
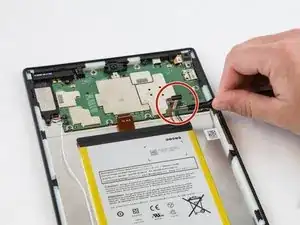
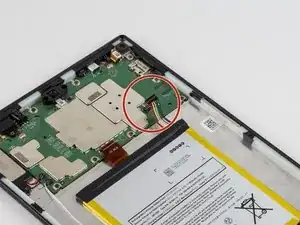
    • Locate the power cable that links the battery to the motherboard.

    • Carefully unplug the battery power cable to disconnect the battery from the motherboard.

    • The third image shows what it should look like with the battery power cable is disconnected.

    Battery removal is optional for the motherboard, but is a great addition to this guide for completeness.

    scottpickles -

  6. YFNwGjjTFJOGhJPs
    YFNwGjjTFJOGhJPs
    WjTRBfnCBcXsLiLt
    KuoLIeDlSr2lYc2M
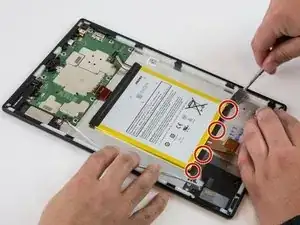
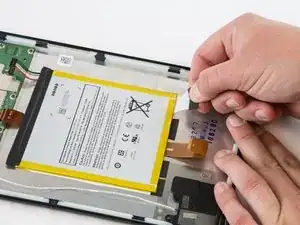
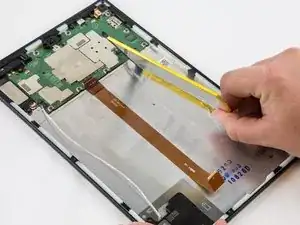
    • Begin by locating the double sided pull tape locations.

    • Do not lift on the battery when doing the following step. You will bend it. It is very pliable.

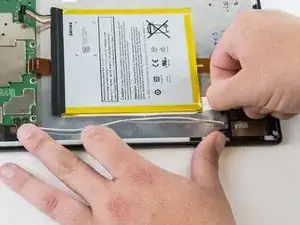
    • Pull the black soft tabs to release the tape's adhesion.

    • Make sure you pull the tabs slowly and continuously away from the case until the adhesive is completely out.

    • Do this to all 4 tabs until the battery is completely free of adhesion to the device's backing.

    Why not heating the tabs a little to take battery easier

    Engin Isleyen -

  7. 2vGnRDVoHaN1hOjy
    2vGnRDVoHaN1hOjy
    sNYOXZybPcvah5f6
    xiD26PaPUGfFJRGW
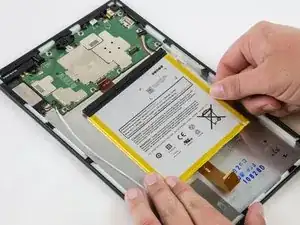
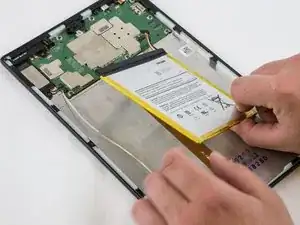
    • Make sure all the adhesive is removed before trying to lift the battery from the case.

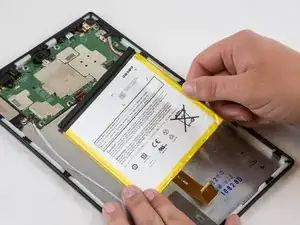
    • After the battery is totally free of any adhesion, simply lift the battery from the case.

  8. DX4KwOiOFDpGTydG
    DX4KwOiOFDpGTydG
    hgGTTpfHCASKwEIc
    U3iC4eZgeBiQ3giB
    • Inspect battery for any leakage.

    • Please follow all U.S. regulations and laws when disposing or recycling the battery.

Abschluss

To reassemble your device, follow these instructions in reverse order.

Jaie Hillery

Mitglied seit: 07/10/14

1685 Reputation

7 Kommentare

why is there so much empty space next to the battery?

Ethan Chow -

Big screen, little processor. The screen dictates the space, that’s why the battery has to be secured with adhesive.

ctgblue -

I’m confused. If it’s a battery replacement issue, why is the battery not listed on the parts list? Is that not necessary once you take the old one out? Where do I get a new battery to replace the one this is teaching me to remove? O.o

tyger.night -

You’ll have to google one. Amazon does not offer one. They want to sell you a new Kindle instead.

I am buying one with the plastic tools (ebay), even if they suck, they should get through this process once.

ctgblue -

How do you know if ita battery or charging port? Mine dont do anything whe. Its
Tech Reviews -

That’s my question also. How do you know if it is the battery or the port?

ronvir5049 -

Fitted battery replacement now won't start up any clues where iv gone wrong?

steve cruickshanks -