Einleitung

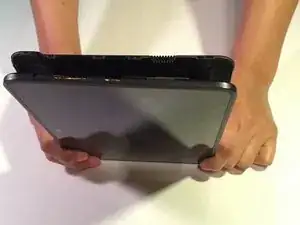
Stelle sicher, dass dein Gerät ausgeschaltet ist, bevor du anfängst. Lege dann das Gerät mit dem Bildschirm nach unten hin.

  • Vorsicht: Bei einigen Geräten ist die Rückseite mit Klebeband befestigt.
  1. LwnlbpLRWDfdxuHg
    LwnlbpLRWDfdxuHg
    VIPg4Eva1YanmMtq
    ARXdACscI2PAtOXb
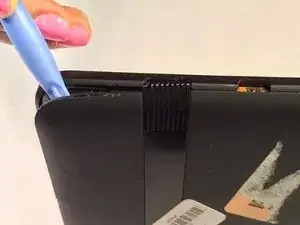
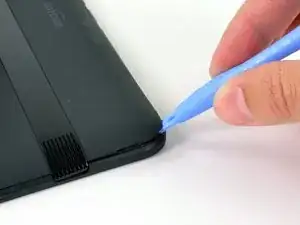
    • Schiebe ein Plastiköffnungswerkzeug in die untere rechte Ecke des Kindle Fire.

    • Drücke die Rückseite so lange hoch, bis du ein leises "Ploppen" hörst.

    • Wiederhole den Vorgang um das ganze Gerät herum, um die Klammern zu lösen, mit denen die beiden Hälften des Gehäuses miteinander befestigt sind. Entferne die hintere Abdeckung.

    • Das Kindle Fire kann auf der Innenseite unter Umständen über Klebeband verfügen. Kontrolliere das, bevor du die Rückabdeckung entfernst.

  2. bNMd3FwhbFRamXfg
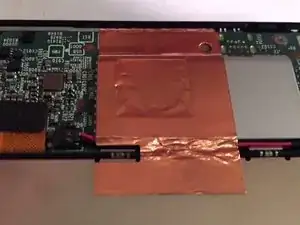
    • Wenn der Akku deines Kindle mit Kupferfolie versehen ist, dann löse diese vorsichtig ab.

    SERIOUSLY, don't bother trying to peel up the copper tape. Just cut it, and replace with new tape. Much easier than trying to detach the old and new batteries from their backings.

    Marc -

  3. aakOM2f26hk3K4gI
    aakOM2f26hk3K4gI
    IT2elU6RTKK41oXe
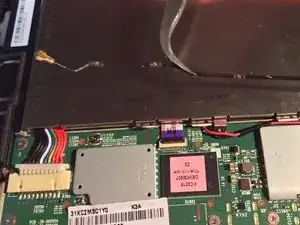
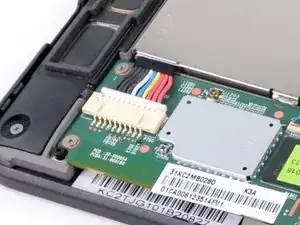
    • Finde den Antenne Stecker. Schaue nach dem Kabel mit vergoldetem Ende, welches um den Akku herum verläuft.

    • Hebe den Antennenstecker zusammen mit dem Antennenkabel, welches um den Akku herum verläuft, hoch und ziehe ihn ab.

  4. eBfHywrEG2EwYdbR
    eBfHywrEG2EwYdbR
    AaHYHNBP1IOQhMFb
    hgAYmnZmHfq6Knpp
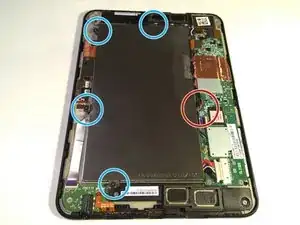
    • Drehe die vier 3 mm Kreuzschlitzschrauben #00 heraus.

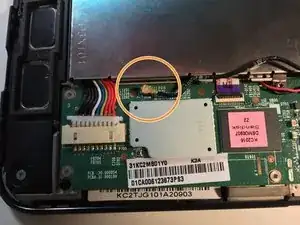
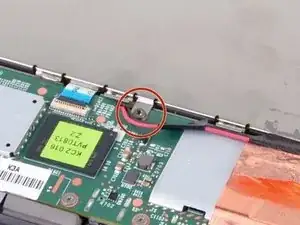
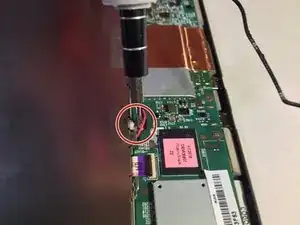
    • Drehe die einzelne Torx T5 Schraube heraus.

    • Diese 2 mm Torx T5 Schraube befindet sich auf der Hauptplatine in der Nähe der Antennenklammer.

    • Wenn du keinen T5 Schraubendreher hast, kannst du es mit deinen Fingern probieren, das wird aber sehr schwierig.

    SERIOUSLY, you guys need to add a step to unplug the red and black wires, and then detach them from the battery cover!

    Marc -

  5. xFi6fJKIOfXvbqJh
    xFi6fJKIOfXvbqJh
    hZiA5gbEAhLVt6Zp
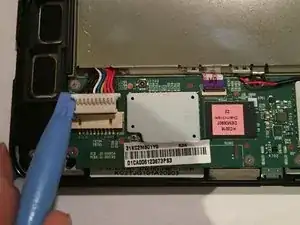
    • Löse den Stecker mit einem Plastiköffnungswerkzeug von der Hauptplatine ab.

  6. IVWRtepNB6gapgfw
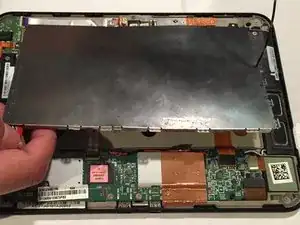
    • Hebe den Akku mit den Fingern oder dem Plastiköffnungswerkzeug aus dem Gerät.

    The battery is adhered to a metal “shield” which has the screw lugs, etc. around the edge. Acetone helped soften the adhesive, a palette knife helped separate shield and battery in the middle. Acetone also helped loosen the copper tape adhesive.

    cskilton -

Abschluss

Um dein Gerät wieder zusammenzubauen, befolge die Anleitung in umgekehrter Reihenfolge.

Matthew Hodgdon

Mitglied seit: 03/03/15

1330 Reputation

6 Kommentare

Help. During our removal of the battery, the red and black wires that run along the long edge of the battery pulled free of their plug. Now we can't get them reattached. Not sure about polarity either.

Marc -

Where can you get a replacement battery

Gerald Hotchkiss -

Easy peasy! The hardest thing was getting the back cover off (and back on). Our local electronic repair store refused to open the case for me (they’ll never get any business from me), so I asked my dentist to do it, and he did (and loved it). I can’t remember where I ordered the battery from; I just put the model number in a search engine and got several hits. The one I bought was new, cheap ($14), came in two days, and had all the tools with it! Thanks, ifixit; I’ll get a few more years out of this older one, which I use for crosswords puzzles and solitaire; you know, stuff you do in the waiting room. btw, I’m a 78-year-old woman.

Just Me -

Nice work, proud of you.I would have never thought to ask your Dentist.

Dano -
Je voudrais un tuto pour cabler un lecteur de carte DE sur ma kindle Fire hd

remon dramon -

Je suis technicien je veux cabler un lecteur SD sur kindle Fire HD qui n'a pas de lecteurs et me donner le schéma électronique pour cabler sur la carte mère il très possible de le faire de toute manière elle n'ai plus sur garentit merci des réponse des techniciens remon remondramon353@gmail.

remon dramon -