Einleitung

With a defective charging port, you're going to have a hard time trying to connect your Kindle to a computer or charger. This can lead to problems when trying to charge your battery or when trying to update your Kindle. This guide will teach you how to change your charging port.

  1. ACf5mxiBCssPPCN2
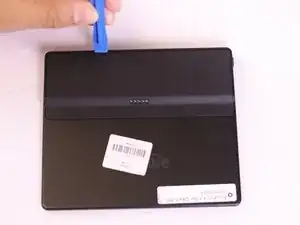
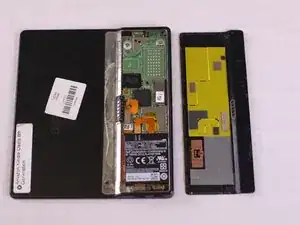
    • Carefully wedge the plastic opening tool between the back panel and the device to free the clips holding the back panel and the device together.

    Where can I buy this battery?

    [deleted] -

    Where can I find the port pls?

    Bobby Turner -

    It would be really helpful if you could show more detail on how the backing is attached to the device, what the latching mechanism looks like in detail, and how to separate it. The technique in the photos might work on a device that has been opened a hundred times before, but on a new one, this guide doesn’t really help me to understand how to open the device.

    Jesse Dhillon -

  2. Wx5F3LpiCq5kRbUN
    Wx5F3LpiCq5kRbUN
    CioShLZyeFXHEIFt
    IxKytEovyj3rjTYJ
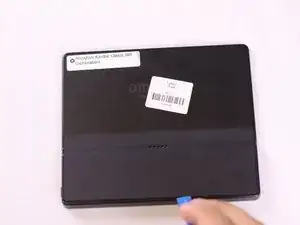
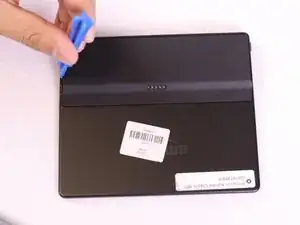
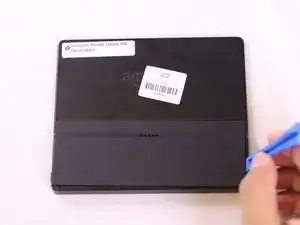
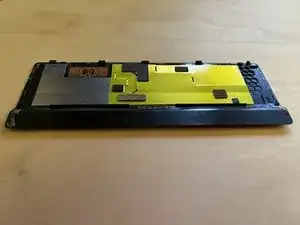
    • Work your way around the back panel to free all the clips.

    • There are 5 clips on the long and thickest side of the oasis, and none on the others.

  3. teO4fhuE21ldNMsN
    teO4fhuE21ldNMsN
    qBkGDa4QOtK5FDIs
    • Carefully remove the back panel from the device.

    • Gently peel the back panel away from the adhesive, being mindful to keep the adhesive strip in good condition so that it can be used again.

  4. YNM1bSGCFduWaXRQ
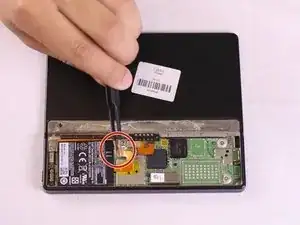
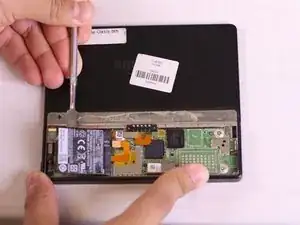
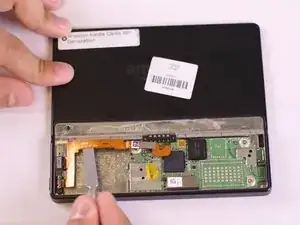
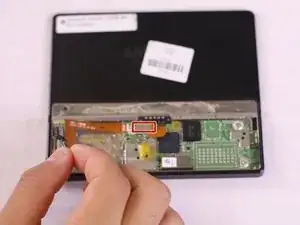
    • Using tweezers, lift the orange bridge connector off.

    • Place the tweezers in between the battery and the end of the bridge and lift upwards.

  5. EeK5rItegodx4Ooq
    EeK5rItegodx4Ooq
    BNrkuWNKNRAGn2Xl
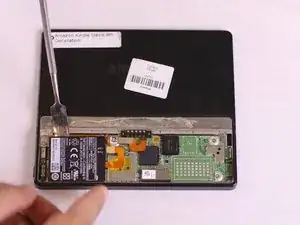
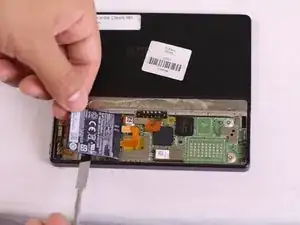
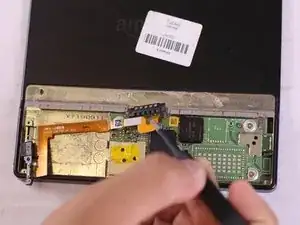
    • Gently wedge the spudger under the battery starting from the left side, and slowly work the spudger around the edge to loosen the battery from the tape. Be careful not to rip the thin foil on the back of the battery.

    • Only use ESD safe tools when working on internal components of your device such as a spudger or opening tool.

    • It is not advised to use a metal spudger, as you could puncture the battery.

  6. yeC6YNceC2Cv1J1n
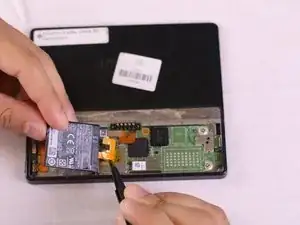
    • Lift the battery up using the spudger and use your fingers to slowly pull the battery off the adhesive.

  7. dXAxPa63whNyuke6
    dXAxPa63whNyuke6
    ZySdqItIhDTYWD6k
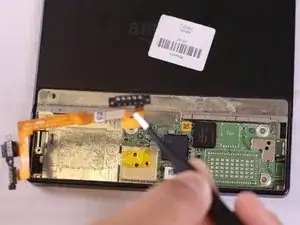
    • Using the tweezers, gently lift the tape off of the Power bridge connector. If a new unit comes with a new piece of tape, remove entirely, if not remove and place one corner lightly face down on a clean surface to be used again.

    Heya, can you share the details for the battery?

    richardfortune -

    Specs of the battery I just extracted from my Oasis: 3.7V / 245mAH / 0.91Wh

    The battery also reads "Part No 58-00017 Model 223337 1ICP3/34/38". Manufacturer is DongGuan Amperex Technology Limited.

    Nikkoura -

  8. qcqdVebNEJke1CBI
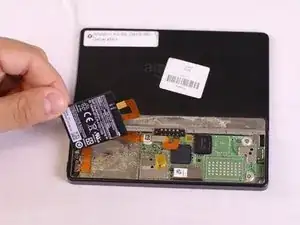
    • Once free of the adhesive and connectors, remove the old battery from the device.

    where can buy this oasis battery?

    h9502757 -

    One step missing…. the end of the orange power connector (the end not attached to the battery) clips into a little socket which is barely visible. You can tell when it clips in by the feel and sound. Make sure that when you put the new battery in, you first clip the connector in before you stick the tape down.

    Gary Jacobson -

    Thank you @Gary Jacobson… that’s a pretty important step that’s missing. I greatly appreciated your comment noting it.

    Also, folks should be aware that the battery you get from iFixIt might come fully discharged. So if your Oasis doesn’t power-on immediately (or do anything at all) after replacing the battery, don’t despair! Plug it in, let it charge for a while, and see if it comes back to life. Mine did (after I had taken it apart twice, reseated the battery and then assumed it was dead and ordered a new one from Amazon). Sigh!

    Peter Viscarola -

    • Attach the new battery by inserting the end of the orange power connector (the end not attached to the battery) clips into a little socket on the device (it's barely visible). You can tell when it clips in by the feel and sound. Make sure that when you put the new battery in, you first clip the connector in before you stick the tape down.

    • Be Aware: Your new battery might not be charged, so it may not power-on immediately! After replacing the battery, plug your Oasis in and let the battery charge to full capacity.

  9. aYe26GIEs6NDtCS2
    aYe26GIEs6NDtCS2
    YDeXp5JmG62OUWmG
    HrrOvUsSnCBIPcAT
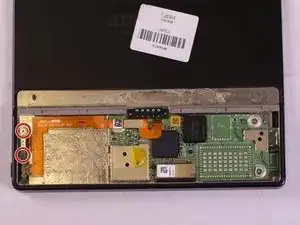
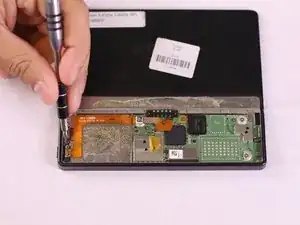
    • Locate the 2 Phillips screws (labeled PH 0) and remove screws using a screwdriver with a PH0 bit.

  10. fdDQs6UhhHYsuIMg
    fdDQs6UhhHYsuIMg
    c2gaQvngnxrmBpVm
    LDu2GLkC5L6XclK5
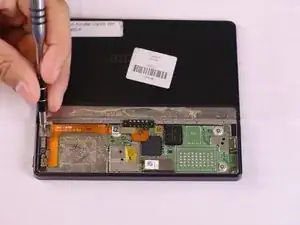
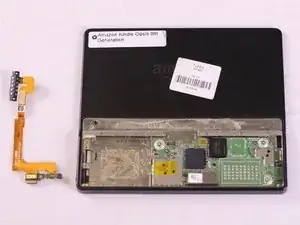
    • Using the metal spudger, tweezers, and your finger tips, gently lift the orange power bridge connector off of the motherboard first and then off of the kindle.

  11. gU2HOxCETAluRKh5
    gU2HOxCETAluRKh5
    LWTMJmlKkxIKFMYB
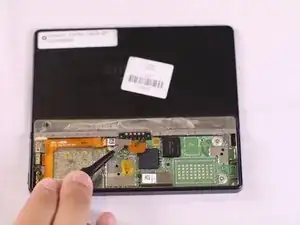
    • Use the tweezers to pluck the orange bridge power connector from the Kindle. The charging port and power button is attached to the connector.

Abschluss

To reassemble your device, follow these instructions in reverse order.

Mohamed Elzini

Mitglied seit: 27/09/17

416 Reputation

7 Kommentare

Where did you source a replacement charging port?

Matthew Gustas -

I also need one please, did you ever manage to find one?

Stefan B -

Since I don’t see an answer a year and a half later; I’ll ask the question again. Does anyone know somewhere to order a replacement charge port for this model? The replacement procedure doesn’t seem too difficult but I can’t find the Kindle Oasis part that is inclusive with the ribbon cable anywhere.

William McGinnis -

I also am trying to purchase a replacement. Anyone have any success?
Vincent Bryan -

Ditto .looking everywhere. Any ideas?

Bobby Turner -

I typed in kindle charging port replacement part on duck duck to and it popped up a ton of parts for each model starting at 6.00- 15.00 bucks walmart,ebay,Amazon

Richard -

Sorry duckduckgo

Richard -