Einleitung

Use this guide to remove or replace a driver pad on a Clarke Floor Sander 07163A 2017.

This guide shows the removal of just one pad, but the procedure for the other two pads is identical.

  1. K1NixocPg1pbUaid
    • Before you begin, be sure that the sander is unplugged and powered off.

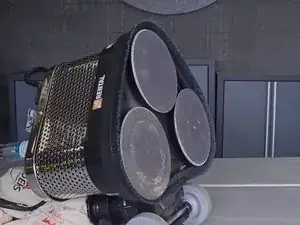
    • Carefully tilt the sander back and lay it down on its side, exposing the three sanding pads on the bottom.

  2. WRxewIeJBi4PYQnD
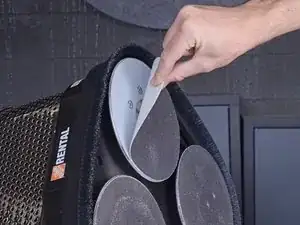
    • Peel the hook-and-loop sandpaper disc off of the driver assembly.

    This picture doesn’t refer to the white pads between the sanding disk and the base plate.

    GREGORY -

    what is part number for the white pads?

    REYNA -

    MP481400 Disc, Hook, 6-7/8 O.D is the thin white pad

    MP482000 is the sanding disc and pad all in one

    SAM -

  3. TejJnMAKYgMPlpoe
    TejJnMAKYgMPlpoe
    eEqT4ZBSAKQWLS5H
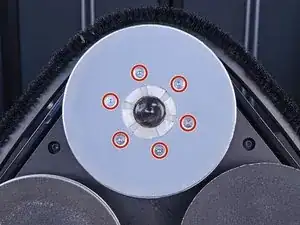
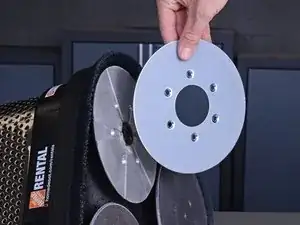
    • Use a 3 mm hex key or driver bit to remove the six 11.9 mm-long screws securing the driver pad.

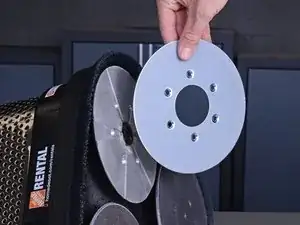
    • Remove the driver pad from the sanding disc.

    Would be nice if you gave the correct part numbers. The disk in the picture is NOT 11139A.

    MARK -

    Not even listed as the Driver Pad it’s called the Sanding Disc part # MP482000

    WAYNE -

Abschluss

To reassemble your device, follow these instructions in reverse order.
Adam O'Camb

Mitglied seit: 11/04/15

178852 Reputation

0 Kommentare