Einleitung
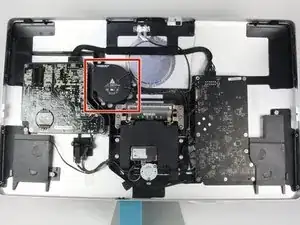
Der Lüfter wird nur von wenigen Schrauben festgehalten, allerdings verlaufen einige Kabel hinter anderen Bauteilen. Ziehe nicht zu stark an diesen Kabeln, hole sie lieber hinter den Bauteilen hervor, bevor du den Lüfter ausbaust. Achte darauf, an welcher Stelle die Schrauben waren, eine unterscheidet sich von den anderen. Der Zusammenbau wird dadurch weniger nervig.
Werkzeuge
Ersatzteile
-
-
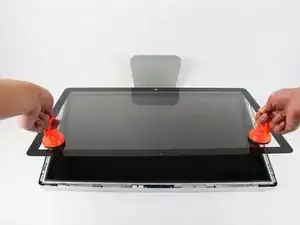
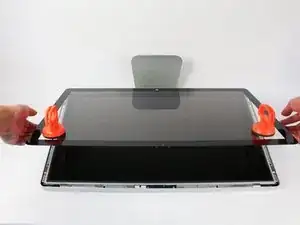
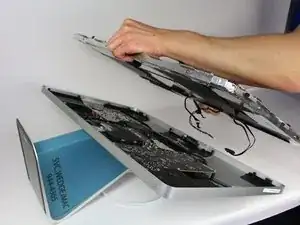
Lege das Display mit der Bildschirmseite nach oben ab.
-
Bringe die Saugheber auf beiden Seiten oben fest am Bildschirm an.
-
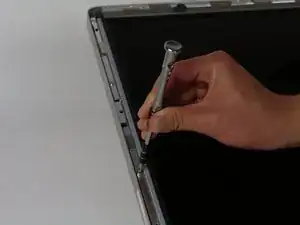
Die Glasscheibe ist am restlichen Bildschirm mit kleinen Magneten befestigt. Hebe langsam an, bis sie sich ablöst.
-
-
-
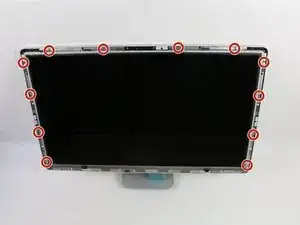
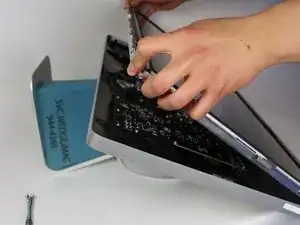
Fasse den Stecker des ersten Kabels (das, was am weitesten von dem mit Schrauben befestigten entfernt ist) an und ziehe ihn langsam heraus.
-
-
-
Um an den Stecker vom nächsten Kabel, direkt neben dem eben gelösten, zu gelangen, musst du erst an einem Stück Klebeband an einer Metallleiste ziehen.
-
Benutze das Klebeband als Griff und klappe die Metallleiste herum.
-
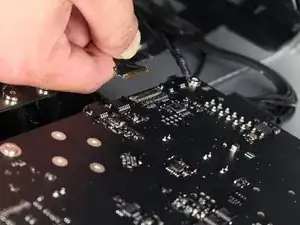
Fasse dann den Stecker und ziehe ihn langsam aus dem Anschluss auf dem Logic Board ab.
-
-
-
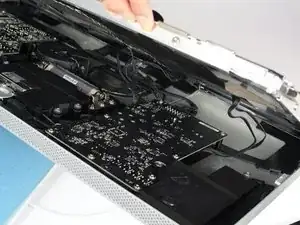
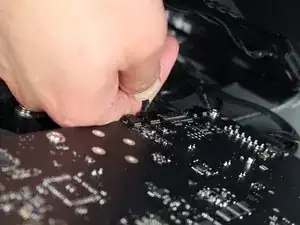
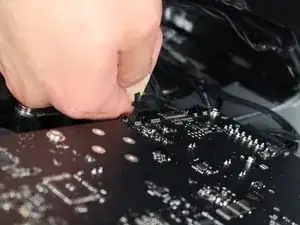
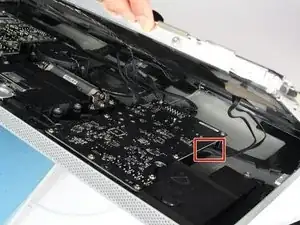
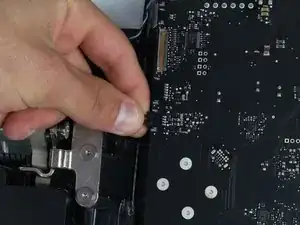
Fasse behutsam den Stecker auf der anderen Seite des Logic Boards unten an und ziehe ihn vom Board ab.
-
-
-
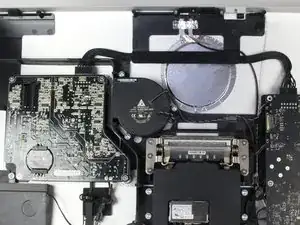
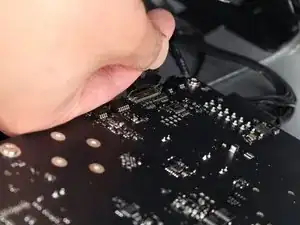
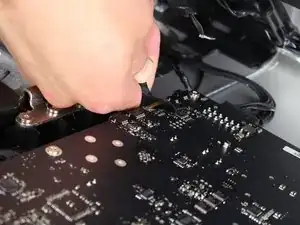
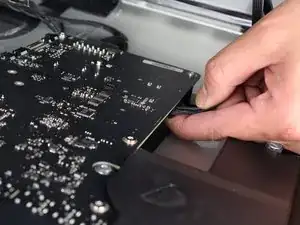
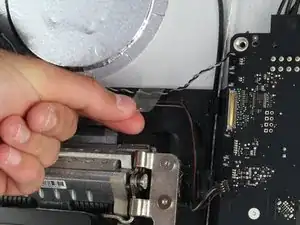
Der Lüfter ist am Logic Board mit zwei Steckern angeschlossen. Fasse die Stecker beim Ablösen so nahe wie möglich am Board an und ziehe sie langsam heraus, damit sie unbeschädigt bleiben.
-
Entferne das Klebeband, mit dem die Kabel am Gehäuse befestigt sind.
-
-
-
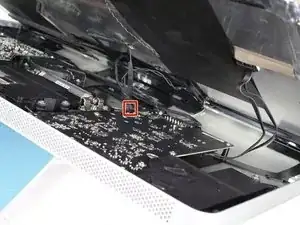
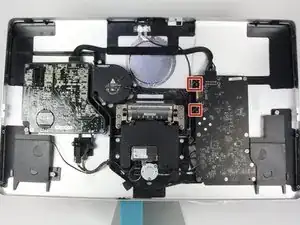
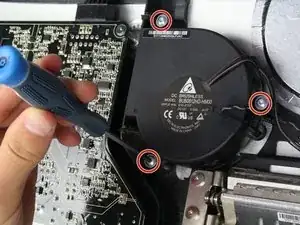
Der Lüfter ist mit drei Schrauben am Gehäuse befestigt.
-
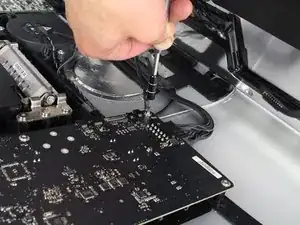
Drehe die drei TR10 Schrauben heraus.
-
-
-
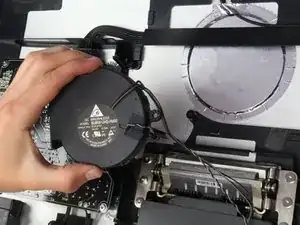
Hole den Lüfter behutsam heraus, beschädige dabei keine der umliegenden Bauteile.
-
Tausche den Lüfter gehen einen neuen aus.
-


Um dein Gerät wieder zusammenbauen, folge den Schritten in umgekehrter Reihenfolge.
10 Kommentare
I have been having trouble with fan noise -- a noisy, rapid thumping sound, especially on startup but getting worse over a few weeks and lately persisting all day. Following this excellent guide, I removed the fan and examined it. I could see nothing wrong except perhaps a fine layer of dust on the blades, no worse than could be expected. I did not manage to disassemble the fan itself, as its two-part housing is very firmly clipped together, but applied a vacuum cleaner hose to both the entry and exit sides to clean it up as much as possible. I put it back and reassembled the whole display, and am pleased to report that the noise has completely disappeared. This may be good news to anyone dismayed by the apparent non-availability of replacement fans.
This guide made the power supply replacement quick and easy.
I had the rumbling fan cleaned by a pro. but the rattling didn't go. I just finished replacing the fan on my 27'' Thunderbolt Display using these instructions, and so far so good after 3 hours. It usually started the rattling after 30mn!
I purchased the fan on eBay. There were a couple available then.
I got the fan for $18 and spent 30mn on the job. At the Apple certified spot in town, they were going to charge me $250! I bought this Apple Display second hand for $250! and now it is back to its old self, working like a charm :)
Thank you very much for this web page which walked me through the process.
By the way, for a succion cup I used the two small ones that are attached to my soap holder, from the bathroom tiled wall; worked just fine and I didn't have to spend $20 to buy one.
cheers
Instead of $14 foam block, I used a full roll of paper towel and two pillows. While it worked, if I ever did this again, I would buy the block of foam. Since you’re removing a power cable, you need to be able thread it through and I think the foam block would make that easier.
Josh Miller -
You can also use a single handle, double cup floor lifting suction cup. Just place it in the centre of the screen near the camera and lift slowly.
Steve A -
I just used a toilet plunger to remove the screen and it worked like a charm!
Philip Jacob -
That’s what I call resourceful—made my day. I hope your repair was successful.
Tobias Isakeit -
Great idea, thanks a lot!
Yvan Sandoz -
The glass lifted off the magnets quite easily after just using my fingernails. No suction cups or toilet accessories needed.
Adrian Gropper -
I had the same problem and after removal of the fan and a bit of work with the vacuum, the fan is quiet. Thanks to ifixit for the great instructions that made this easy.
John Perser -
To keep the screen up, other soft objects might work, but it's important that the hole in the back isn't covered because you will need to thread the new Thunderbolt/MagSafe cable through it and it would be a hassle to do it after everything's been set up.
Thomas -
Anybody got any links to glass screen replacement supplier for the A1407 Thunderbolt Display? Im finding it impossible to find a replacement without it being crazy money.
Michael McMillan -
Instead of a wedge, I used 4 rolls of toiletpaper, one under each corner.
jnbruin -