Einleitung

Replacing the motor requires access to the motherboard and it is suggested to place screws into magnetic tray to avoid loss of important screws. Removal of the rotational motor assembly is simple but it may be difficult to find a replacement motor online.

  1. q5AsWsBJinXuO3Z2
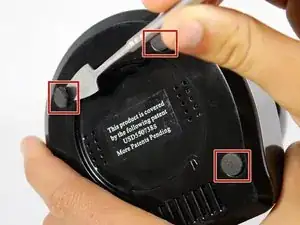
    • Remove the four bottom tabs in order to access the bottom screws.

  2. fvepsUId5FVg6fv1
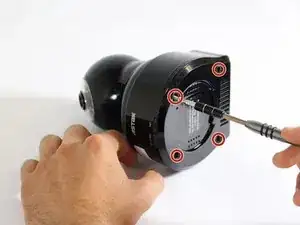
    • Remove all four 14 mm Phillips #1 screws.

  3. I3FLVHjKl6CemveS
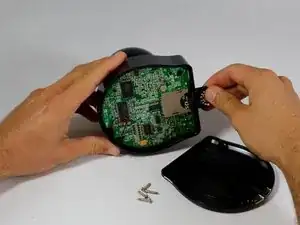
    • Remove the SD card.

  4. 6N2WyXxcquB61Owm
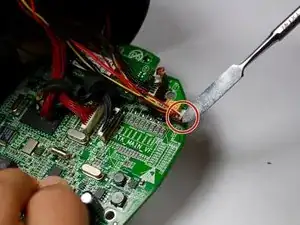
    • Pry up the motherboard on the four points using a spudger.

    • The regular black nylon spudger should be used whenever possible, especially around sensitive internal components.

  5. Xcsn6HRiseDjV2Rt
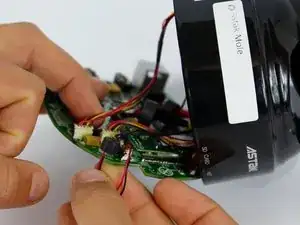
    • Gently pull back the motherboard to expose many of the component's wired connections.

  6. tULwmUAXsQwCJZ3H
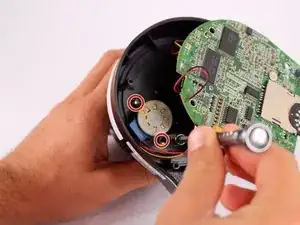
    • Unscrew both screws using the Phillips head (PH1) screw bit and set aside for reassembly

    • Screw Measurements: Length: 7.1mm

    • The motor should be free of its housing and only be attached to the motherboard by its wires.

  7. NymkRvSBBQcJBWPY
    • Sever motor connection to motherboard and remove wire carefully.

    • Optional: Use electrical adhesive to prevent dislodging of new wired connection.

    • The regular black nylon spudger should be used whenever possible, especially around sensitive internal components.

Abschluss

To reassemble your device, follow these instructions in reverse order.
Andrew Birch

Mitglied seit: 15/09/16

204 Reputation

0 Kommentare