Einleitung

If you are experiencing microphone problems, you may have to repair or replace the microphone. Before this can be accomplished, you must access the motherboard. This guide will show you how to do this.

  1. q5AsWsBJinXuO3Z2
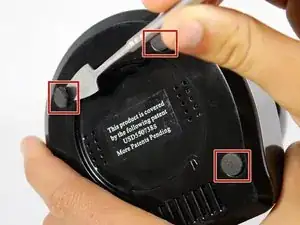
    • Remove the four bottom tabs in order to access the bottom screws.

  2. fvepsUId5FVg6fv1
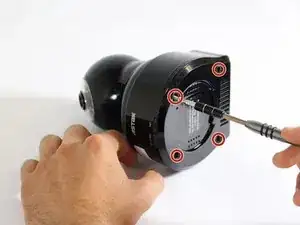
    • Remove all four 14 mm Phillips #1 screws.

  3. I3FLVHjKl6CemveS
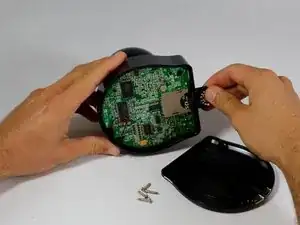
    • Remove the SD card.

  4. 6N2WyXxcquB61Owm
    • Pry up the motherboard on the four points using a spudger.

    • The regular black nylon spudger should be used whenever possible, especially around sensitive internal components.

  5. Xcsn6HRiseDjV2Rt
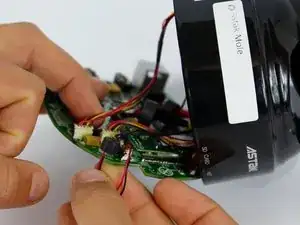
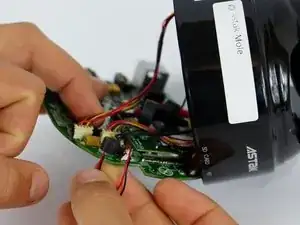
    • Gently pull back the motherboard to expose many of the component's wired connections.

  6. TdNnYGbdJjdeVTQa
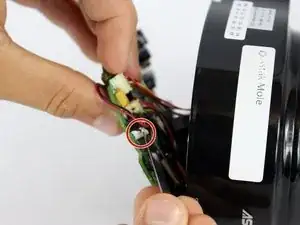
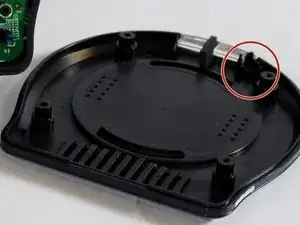
    • Remove microphone from its holder on the bottom section of the casing.

  7. nnJXpaVI1eeEhhdQ
    • Access microphone and assess damage.

  8. LjFgExAKEJCiRrCd
    • Remove microphone input with metal spudger. Be sure to sever electrical adhesive in order to separate input and output.

    • It is advised to re-apply adhesive to the cable once the new microphone cable is replaced.

    • The regular black nylon spudger should be used whenever possible, especially around sensitive internal components.

Abschluss

To reassemble your device, follow these instructions in reverse order.
Joseph Bello

Mitglied seit: 20/09/16

228 Reputation

0 Kommentare