Einleitung

A faulty Bluetooth Module can cause delayed or no connection to peripheral wireless devices such as mice, headsets, and microphones. If the problem cannot be solved by installing an update, replacement may be necessary. Follow this guide to replace your Bluetooth Module. Note: Before beginning this guide, remove the battery by referring to the Battery Replacement Guide.

  1. kTCYldyvpDOYK15M
    kTCYldyvpDOYK15M
    eIXO1lhSHbOSAmtN
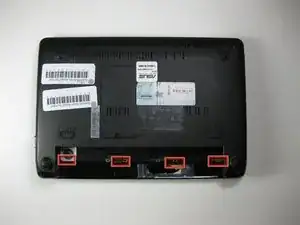
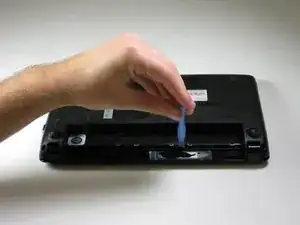
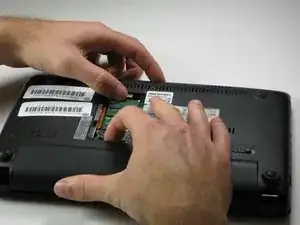
    • Use a plastic opening tool to pull up the four metal latches in the battery cavity that is located on the bottom of the laptop.

    • Do not apply too much pressure. The latches can not be removed and will bend if forced.

  2. vth1xHClrRt4La2d
    vth1xHClrRt4La2d
    wF4sHgYXJrYGIWNj
    e2KAJhdBWTXuUJiR
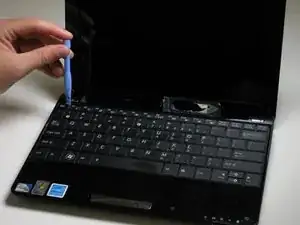
    • Flip the laptop over, and open the display.

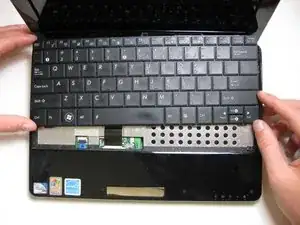
    • Use a plastic opening tool to lift the edge of the keyboard that is nearest to the screen.

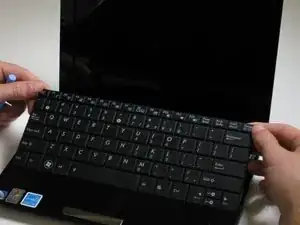
    • Gently lift the keyboard and slide it toward the screen.

    • Do not remove the keyboard completely. This can damage the ribbon cable connecting the underside of the keyboard to the laptop.

    It must be mentioned that you need to put the plastic opening tool above the F1, F6, between F10 and F11 and the Insert (Num Lock) Keys . It has 4 clips in total.

    Jakab Szilárd -

  3. pIJOdNQRPYUUJ2D1
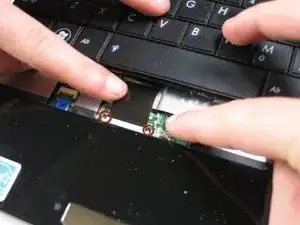
    • Use a spudger tool to release the tabs on the ribbon cable ZIF connector that is attached to the underside of the keyboard.

    • Depending on the model, the tabs on this ZIF connector will either flip up toward the display or push out toward the display.

    • Once the ZIF connector tabs have been released, remove the keyboard.

  4. lQGQVRHQrnPkNfKS
    lQGQVRHQrnPkNfKS
    PNpgNfET461HoBVD
    • Flip the laptop over.

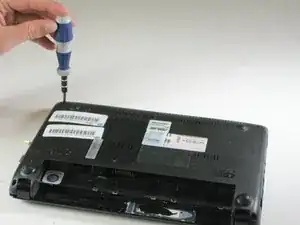
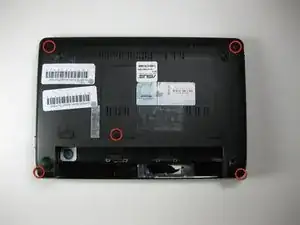
    • Using a Phillips #1 screwdriver, remove the five 5.65 mm screws.

    • The screw that holds the RAM compartment cover may be permanently connected. This screw is the center most screw of the five.

    • Be sure to have a designated place to hold the different sized screws removed in this guide.

  5. CgC2RwsdLZADG5Nq
    CgC2RwsdLZADG5Nq
    5QHEWPTjWYYH3WOA
    DXqabgRoTmBvtmmx
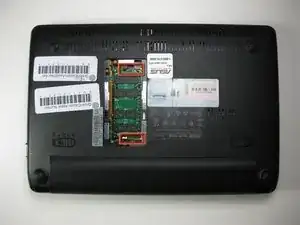
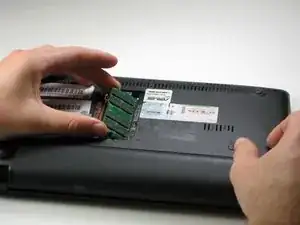
    • Remove the lid to the RAM compartment, if possible.

    • To remove the RAM, depress the tabs that are holding it in. These tabs are bound in red in the picture.

    • Use a spudger to unclip the edges of the cover if necessary.

    • The battery is shown still attached in the picture, but it should be removed prior to beginning this guide.

  6. IbKrNUhPt1rShckT
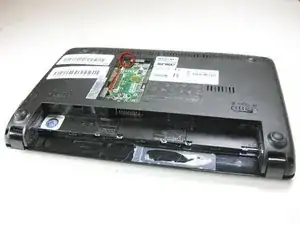
    • Use a Phillips #1 screwdriver to remove one 6.5 mm screw located next to the RAM.

  7. LfdbXUF5UiqtoWfO
    LfdbXUF5UiqtoWfO
    IVGJsFWfFBRWEPOr
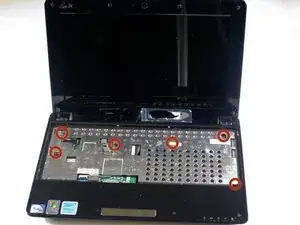
    • Flip the laptop back over, and open the display.

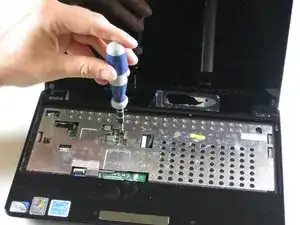
    • Use a Phillips #1 screwdriver to remove the six 5.5 mm screws on the inside covering.

  8. YTTUtcT24eAkP2wi
    YTTUtcT24eAkP2wi
    xbbRAHmWsiP1ZwV4
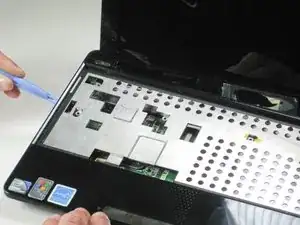
    • Detach the five plastic clips holding the upper and lower halves of the laptop together. These can be undone by carefully running a plastic opening tool between the top and bottom casing. There will be an audible audible "click" as the clips come undone.

    • The top plastic is fragile. There are also two miniature LEDs exposed along the top edge of the bottom casing at the bottom right that are easily damaged.

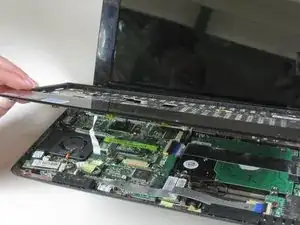
    • Once the five clips have been undone, carefully remove the upper half of the laptop.

  9. mrjnHsBFUQFrIC5k
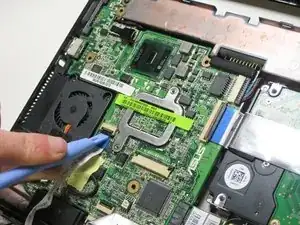
    • Detach the track pad ribbon by using a plastic opening tool to raise up the black pad.

  10. OOMadiNQOffxDmNm
    OOMadiNQOffxDmNm
    IaT6LZEHFC4GgkBH
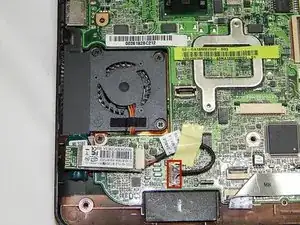
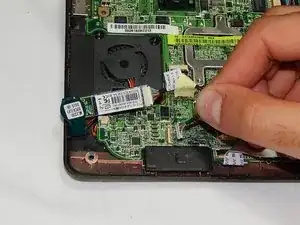
    • Detach the Bluetooth wire located below the fan by gently pulling it upward.

Abschluss

To reassemble your device, follow these instructions in reverse order.
Maged Hanna

Mitglied seit: 13/03/14

666 Reputation

0 Kommentare