Einleitung

If you are looking to upgrade your hard drive or replace a faulty one, this guide will give you the knowledge on how to do so.

  1. giPt1IrVrWkE6OuA
    • Ensure the laptop is powered down before continuing.

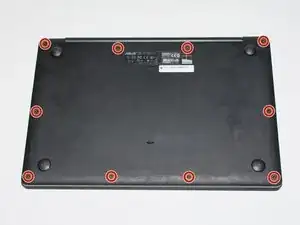
    • Use a Phillips #0 screwdriver to remove the ten 3mm Phillips head screws on the base of the laptop.

  2. ttDHIrGGSWeuO3bh
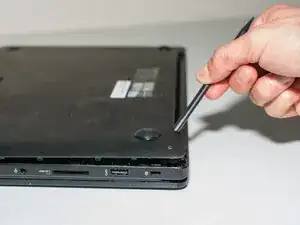
    • Use the spudger to pry open the rear cover at either hinge.

  3. BAUSiFtptlQUBgGU
    BAUSiFtptlQUBgGU
    fML2U1pqmHxacMWk
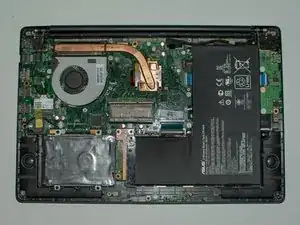
    • Grab the cover with your fingers and gently lift it away from the board.

    • Be careful not to break any tabs on the cover when lifting it off.

    This step took me about an hour of careful prying. I didn’t break any real tabs, but tiny rectangular chips of plastic still came off. It felt like the cover had been sealed to the board, so I couldn’t just lift it off.

    Suzanne Yee -

  4. Fs44VRGOnbjCpVSg
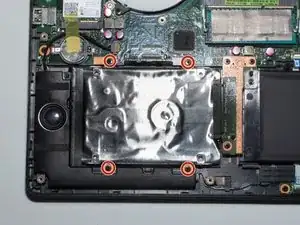
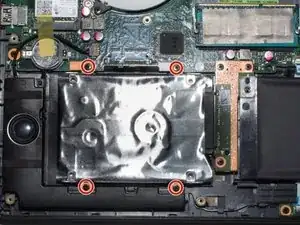
    • Remove the four 3mm Phillips #0 screws shown.

  5. ygfYe2JpAqDKBli5
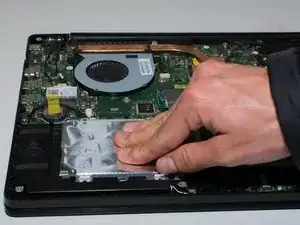
    • Take hard drive out of the port by sliding the component to the left.

    • There is only one way it comes out of the connector. If it seems too hard to push out you are probably going the wrong way.

  6. lMbg3SUfOGmE2LOK
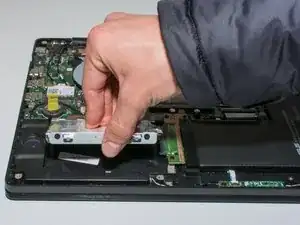
    • Once the hard drive has been removed from the connector, use your thumb to get under and lift the hard drive out.

    One more step for newbies like me: The hard drive is held in place with two brackets that are screwed to the edges. Save those brackets, you’ll need them for the replacement drive.

    Suzanne Yee -

Abschluss

To reassemble your device, follow these instructions in reverse order.
Aodhan Arias

Mitglied seit: 26/01/17

288 Reputation

0 Kommentare