Einleitung

Use this guide to replace the RAM in your device.

  1. SqmPEcWP2qRFQULv
    SqmPEcWP2qRFQULv
    OiHHO4WRkWmTWeBK
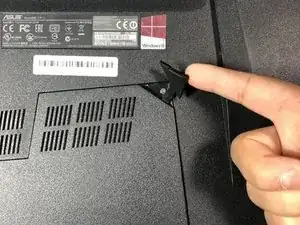
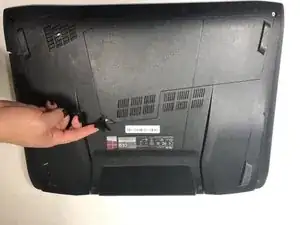
    • Lift up the rubber tab located in the upper-right corner of the backing plate.

  2. frsDZrZTv6ut6oGn
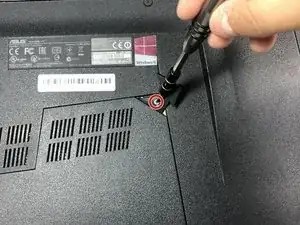
    • Use a Phillips #1 screwdriver to remove the 5.2 mm screw behind the rubber tap.

  3. UJXTiwGAQgCkEoVb
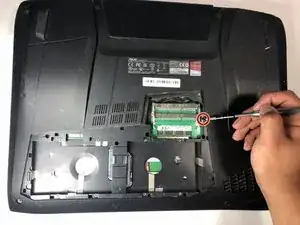
    • Carefully pull the backing plate off. If you have a pry tool, you can pry on the edges carefully.

  4. 5NhTEPrbMpSAHNyi
    • Use a Phillips #1 screwdriver to remove the 5mm screw on the right side.

  5. WdKDPitVc3TRcksO
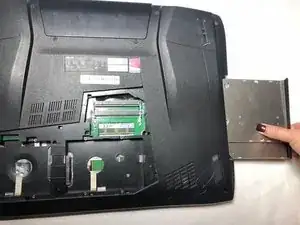
    • Pull out the optical drive to revel the screws holding the laptop cover.

  6. tVDv5B5hDDbGJ5Af
    tVDv5B5hDDbGJ5Af
    yP2TmkYsKSELjiqQ
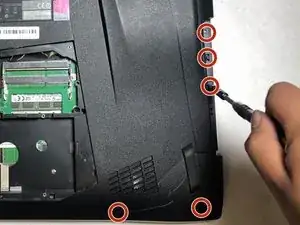
    • Remove all 10 5.2mm Phillips screws holding the main back cover using the Phillips #1 screwdriver.

  7. AdIFICcEnpdhDENG
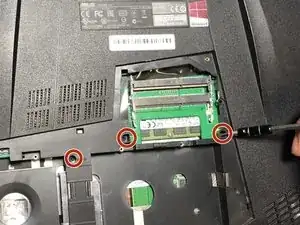
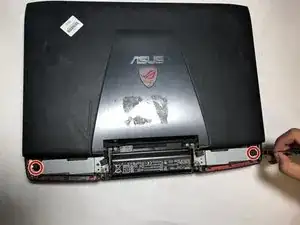
    • Remove the four 5.2mm screws directly behind the backing plate using the Phillips #1 screwdriver.

  8. IqEEafrVn6tPGNO3
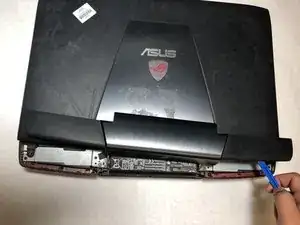
    • Flip over the laptop and pry the 2 vent covers off.

  9. s1qtv6lYVfBeaPbt
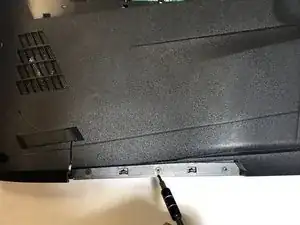
    • Remove the two 6.8mm Phillips screws directly below the vent covers using the Phillips #1 screwdriver.

  10. tt5lK4PqshPisVsN
    tt5lK4PqshPisVsN
    JnSIyb42Y6URIqUF
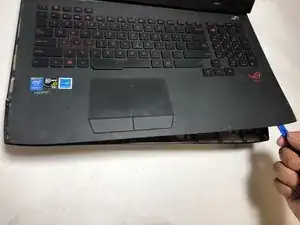
    • Pry along the edges of the keyboard to lift it up.

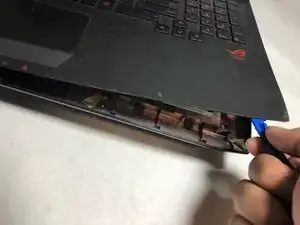
    • Be careful not to damage the ribbon connectors.

  11. oekYkrnRrI1DFWnm
    oekYkrnRrI1DFWnm
    Wfg4ukhV2nutvioS
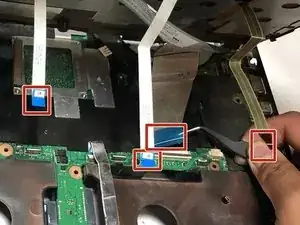
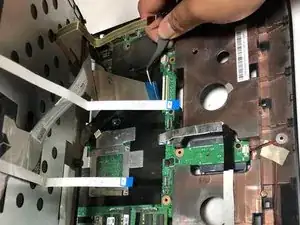
    • Disconnect all 4 ribbon connectors with a tweezer.

  12. 6kUpYHVbNelfMHKL
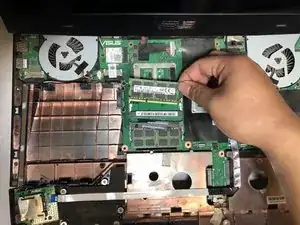
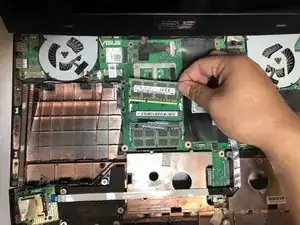
    • Carefully, pull on the side tabs to release the RAM card.

Abschluss

To reassemble your device, follow these instructions in reverse order.
Anum Haidari

Mitglied seit: 22/10/18

558 Reputation

0 Kommentare