Einleitung

  1. bStEk1jWOGGBPwcD
    bStEk1jWOGGBPwcD
    OYyCDLgOaBZWBRNt
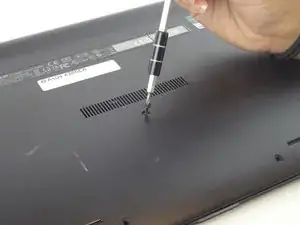
    • Remove the 8 black 4.7mm screws securing the keyboard to the bottom cover.

    • Remove the black 14.5mm screw from the center of the bottom cover.

    The screws under the leg support pads are a different length from stated - the same as the center screw at 14.5mm - resulting in 6 screws at 4.7mm and 3 at 14.4mm.

    Craig Peroutka -

    Typo - 14.5mm x3.

    Craig Peroutka -

  2. ANjvY6LKUNWpDPkD
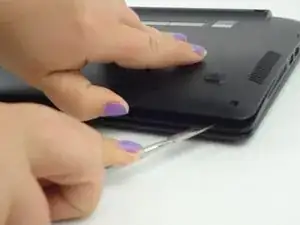
    • Wedge a metal spudger between the keyboard and bottom cover and slide it around the perimeter until all edges separate.

  3. uNZGybWcGp2m1R1J
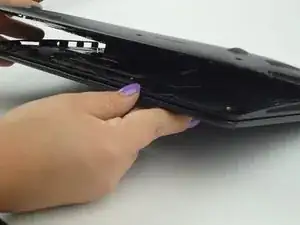
    • Pull apart the keyboard and the bottom cover using your hands.

    • The keyboard and trackpad cables are still connected to the mainboard via a ZIF connector. Carefully disconnect them before completely removing the keyboard to prevent damage to the board or cables.

    Note that there are two ribbons that need to be disconnected here, not quite sure why these are not mentioned here as they need to be disconnected by lifting the white flaps to release the ribbons or it will likely cause damage. Once these are released then the two parts can hinge open and then you can access the battery to remove it.

    The two ribbons are a little tricky to reconnect, you may need tweezers to put them in place. I suggest propping the two parts of the case open leaving both hands free to re-attach them, you will need to use a spudger to push the flaps down on the ribbons. Be careful to push the ribbons straight into their connectors before folding down the connector flaps.

    I would strongly recommend updating the instructions with this additional information.

    Rick Curran -

    An important step overlooked is that pulling the keyboard and bottom apart requires the laptop must be opened up in order to lift the keyboard away, allowing the two to be separated, NOT as shown in the above picture. If one carefully lifts and flips the keyboard over, disconnecting the cables is not required.

    BTW, using a metal spudger as stated in step two is a dangerous way to damage critical electronics. I suggest a plastic or nylon tool, or just strong fingernails...or even a plastic picnic knife.

    Craig Peroutka -

Abschluss

To reassemble your device, follow these instructions in reverse order.
Jacqueline Collier

Mitglied seit: 09/10/17

1047 Reputation

0 Kommentare