Einleitung
If your battery is giving you a hard time on your laptop, follow this guide.
Werkzeuge
-
-
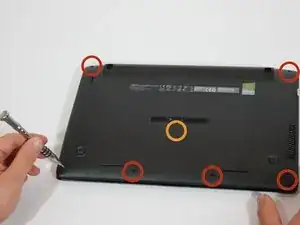
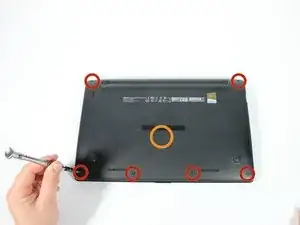
Remove the following six screws:
-
Six 4 mm screws using a Phillips #0 screwdriver.
-
Remove the following one screw:
-
One 14 mm screw using a Phillips #0 screwdriver.
-
-
-
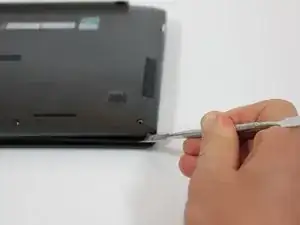
Use a plastic or metal spudger to separate the keyboard from the back panel and lift the keyboard out of place.
-
-
-
Remove the following two screws under the rubber caps.
-
Two 14 mm screws using the Phillips #0 screw driver.
-
-
-
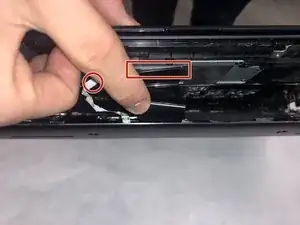
Flip up the following:
-
The two latches holding the two cables shown(white and black)
-
Pull the cables free from the latches
-
Lift the keyboard from the computer
-
-
-
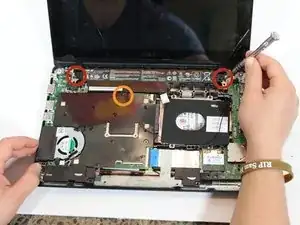
Remove the following screws from the inside of the laptop:
-
Two 4 mm screws using the Phillips #0 phillips screwdriver.
-
One 5 mm screw using the Phillips #0 Phillips screwdriver located in the center a little below the battery.
-
To reassemble your device, follow these instructions in reverse order.
8 Kommentare
Merci super!
Thanks for the write up! Easy to follow, Great photos, and worked great!
thanks it worked
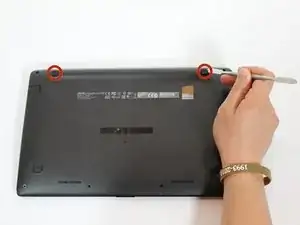
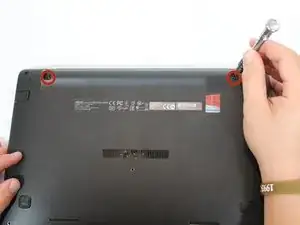

There are also two other screws under the rubber feet above the battery.
digg1024 -
I agree. Two another 14 mm screws under the rubber feet.
shao.onii -