Einleitung

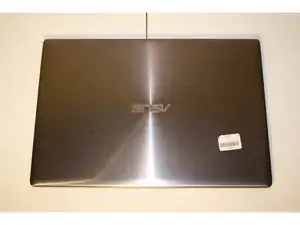
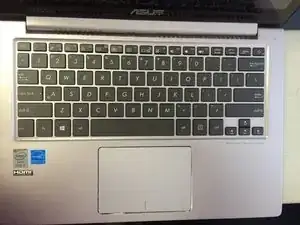
If your Asus Zenbook UX303L laptop has stiff or unresponsive keys, use this guide to replace the keyboard.

The keyboard inputs character data to the laptop through key presses called keystrokes. Faulty keys may cause unregistered keystrokes with no input of character data. An on-screen keyboard available through Windows or an external USB keyboard may be used until internal keyboard issues are resolved.

Before using this guide, be sure to review the troubleshooting page - unresponsive or stiff keys may be resolved without replacing the keyboard. Debris may be interfering with the keyboard or internal cables may have become disconnected.

Before starting a repair, make sure to power off your device completely and disconnect from any external power source.


  1. purlu1afyDDAbVPm
    • Make sure the device is turned off and disconnected from the battery charger.

  2. 5GiBQh3SgaTrVCA2
    5GiBQh3SgaTrVCA2
    3EUOgDKeFPRJLTss
    MvJLWY6OKRffpQPH
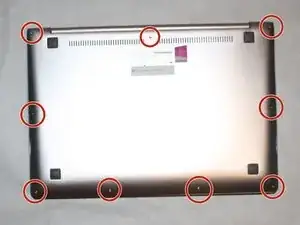
    • Remove all the nine screws from the bottom of the device using a T5 screwdriver.

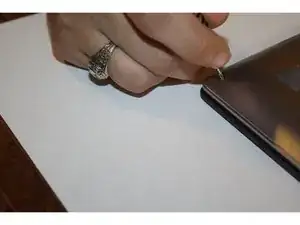
    • Carefully remove the bottom cover.

    There are two silver long screws under each caoutchouc tabs on the back of the bottom case to remove too.

    Those screws hold the hinges.

    Bernardu Cesari -

    Thank you for the comments about the additional screws. This should be added to the original article.

    Kinu Grove -

  3. 3hBx5jta4pvZGnvM
    3hBx5jta4pvZGnvM
    xHYAoa2rXZUrY5M1
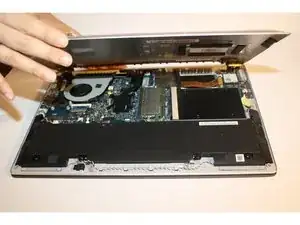
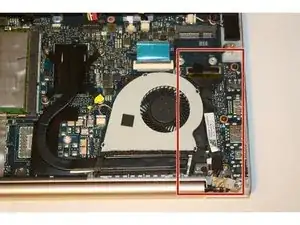
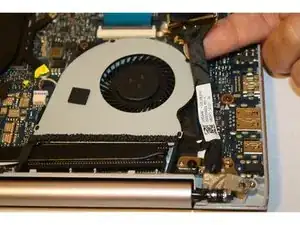
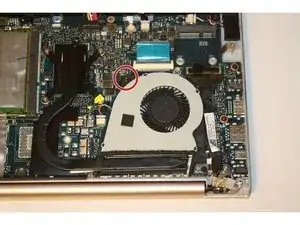
    • Remove the LVDS cable next to the cooling fan.

    Thank you for burning my nephew's CPU, ifixit) Shouldn't we disconnect the battery before LVDS and the rest?

    Nikita M -

    Thank you I took your advice just to be safe.

    Kinu Grove -

  4. lwMAimWWLrIRpluu
    lwMAimWWLrIRpluu
    DFyxCBw2HT2CHtaL
    WykGshlRfplhSgjV
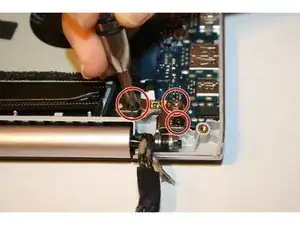
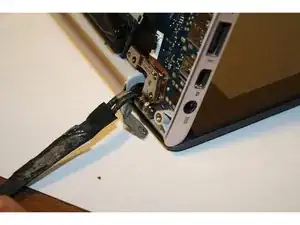
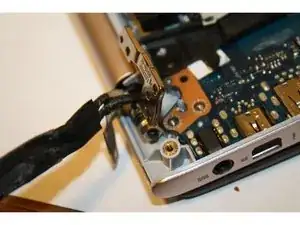
    • Remove the three screws from the hinges using a PH-1 screwdriver.

    • Open the device at a 90 degree angle to free the hinges.

  5. 4d3PXlHVALOCaxjc
    4d3PXlHVALOCaxjc
    giEx5xqsh2Ee6aMZ
    xsxma4BaCPJM1IQs
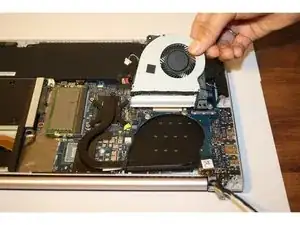
    • Remove the screw attaching the cooling fan to the motherboard by using a PH-1 screwdriver.

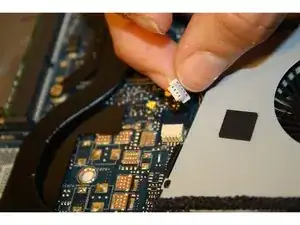
    • Disconnect the wire attaching the cooling fan to the motherboard.

    • Gently lift and pull out the cooling fan.

  6. hWZoIWJGEofNnQbN
    hWZoIWJGEofNnQbN
    m5QBGIFIsqIaIy6R
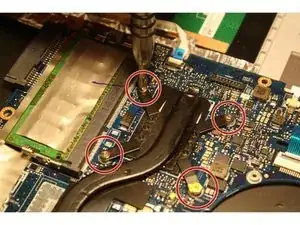
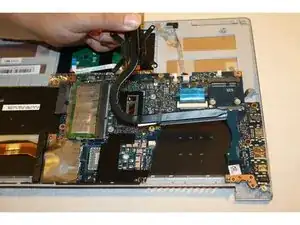
    • Remove the four screws attached to the black covered copper bar next to the cooling fan using a PH-1 screwdriver.

    • Gently lift and remove the copper bar.

  7. yWKSGXBWVZeIEBKq
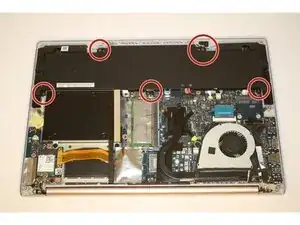
    • Remove the five screws from the battery pack using a PH-1 screwdriver.

  8. ZERbhTOQ6cwImJxP
    ZERbhTOQ6cwImJxP
    PSEYuIJJETJw6GXg
    rpaABucDuISXGYKa
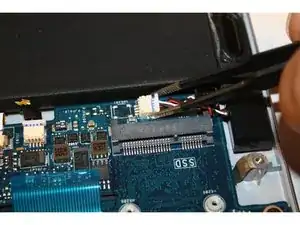
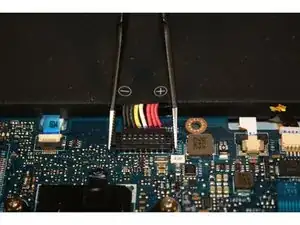
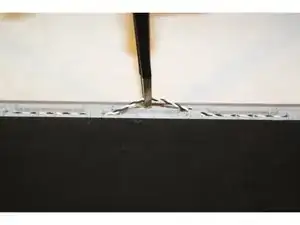
    • Unhook the black, red, and white switch using the tweezers.

    • Detach the positive and negative red, white, yellow, and black switch.

    • Unhook the black and white coiled wire.

    • Lift and remove the battery pack.

  9. x4SlaSIOdShOlDGY
    x4SlaSIOdShOlDGY
    VMVyThnW4mcN2Cnb
    wxGUlIM3gGmmVaFM
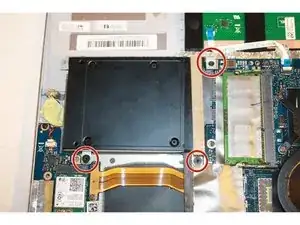
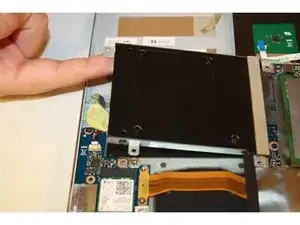
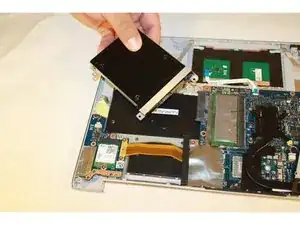
    • Remove the three screws attaching the drive to the motherboard using a PH-1 screwdriver.

    • Gently lift and pull out the drive.

  10. kbiiWe5PI6SXoGp6
    kbiiWe5PI6SXoGp6
    f2LuQ21X4K2suodY
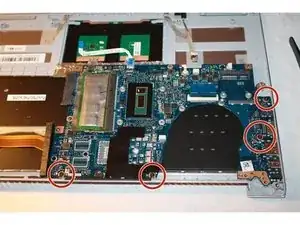
    • Remove the silver tape to free the fourth screw attaching the motherboard.

    • Remove the four screws attaching the motherboard using a PH-1 screwdriver.

  11. XkUHllbFDPXZHOrh
    XkUHllbFDPXZHOrh
    fytGXuFQ42fl34Pa
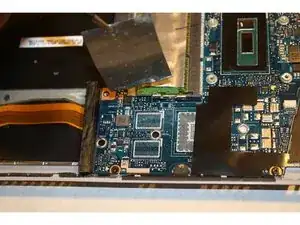
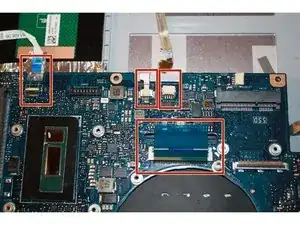
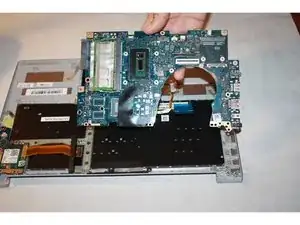
    • Detach the four wires connected to the motherboard using tweezers.

    • Gently lift up and pull out the motherboard.

    Which cable is the right one for the led of the keyboard? Since my keyboard's led doesn't work anymore. Maybe I forgot to plug in a cable for the led?

    Sphere -

  12. yqOM3JHxfTeDUylN
    yqOM3JHxfTeDUylN
    pRM6PeKLvlIiAujp
    iBq5fHmo6NeGB4Kd
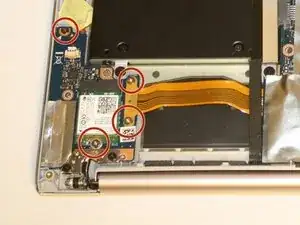
    • Remove the small piece of the motherboard on the lower left hand corner by removing the four screws using a PH-1 screwdriver.

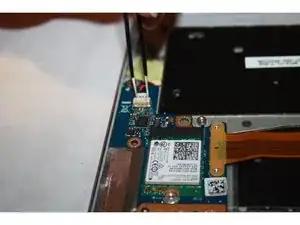
    • Detach the black and red coiled wire from the motherboard using tweezers.

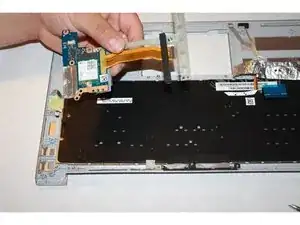
    • Gently lift and remove the small piece of the motherboard.

  13. 1hf1kQpEPmPDVBCr
    1hf1kQpEPmPDVBCr
    HeMRxCxCRqTZude5
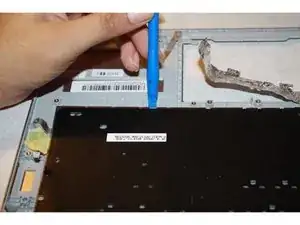
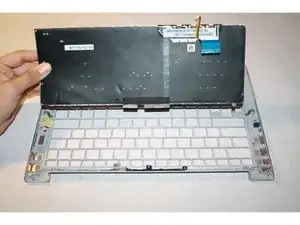
    • Place the plastic opening tool under the corners of the keyboard and use it to detach the keyboard all around.

    • Gently lift and remove the keyboard from its place.

    When you remove the keyboard, you’ll see that plastic circulars rivets will be broken. That’s frightened me, but it works witout them…

    I received a two parts keyboard, they must be pasted. I first put the keys part in place and then pasted the black film on it.

    Bernardu Cesari -

Abschluss

To reassemble your device, follow these instructions in reverse order.

Bianka Castaneda

Mitglied seit: 13/10/15

469 Reputation

8 Kommentare

Please tell me where did you buy the keyboard replace, I am looking for it in order to do the replacement for an UX303L (with spanish or english layout with big enter key). Thanks.

Pm -

Step 2: There are screws under the rubber pads (at least on the UX303L).

Peter Sutton -

Step 9: Its removing the hard drive/SSD not RAM.
Peter Sutton -

Step 13: Please show me how to remove the keyboard out. It will break some plastic to pull the keyboard out.

Thanks,

Quang

Quang Nguyen -

Battery pack should be removed first (at least before step 3) in order to avoid possible power surge

Andrey Arkhipov -

Is better to get from Taobao Keyboard + chassis (they call case C). As ASUS keyboard is permanently attached to the case. Otherwise you have to break the plastic and use hot glue to glue back replacement keyboard.

cscs1956 -

I’m sorry, but this guide is just completely irresponsible. The keyboard is held in place with plastic tabs that must be broken off, but this is never mentioned before we start. As others have pointed out, the battery must be disconnected before proceeding. Finally, the ‘black bar’ from step six is part of the cooling system, and once removed should be reapplied with fresh thermal paste.

Don’t waste your time or risk your electronics following this awful advice.

Dan -

To remove back lid you should use T0 screwdriver not T5, you should edit this.

Emre Tuncer -