Einleitung

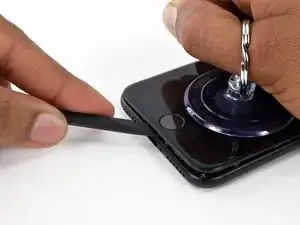
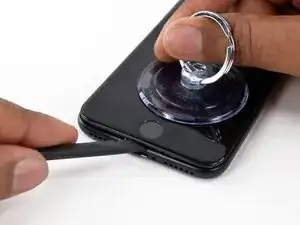
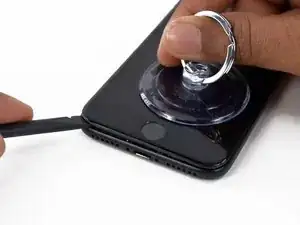
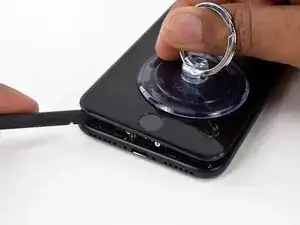
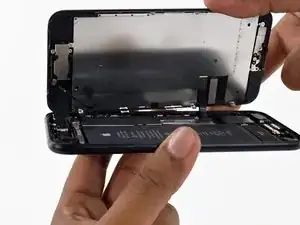
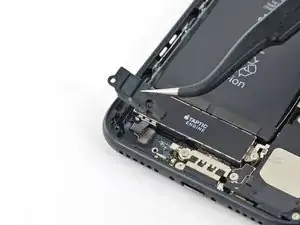
Grundständige Anleitung zur Entfernung der barometrischen Entlüftung vom iPhone 7.

  1. ELMlFSUOebPWtXjT
    • Vor dem Beginn sollte der Akkuladestand des iPhones unter 25 % liegen. Ein geladener Lithium-Ionen Akku kann bei Beschädigung Feuer fangen oder explodieren.

    • Schalte das iPhone aus, bevor du es zerlegst.

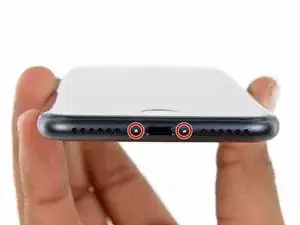
    • Entferne die zwei 3,4 mm Pentalobe Schrauben an der Unterkante des iPhones.

    • Beim Öffnen des Gerätes werden die Dichtungen für den Spritzwasserschutz beschädigt. Halte Ersatzdichtungen bereit, bevor du fortfährst. Wenn du diese nicht ersetzt, ist dein Gerät nach der Reparatur nicht mehr gegen Spritzwasser geschützt.

    Can anyone confirm 7/7P's pentalobe screws have a ring of seal near the screw head?

    Cooper Chase -

    Confirmed, the screws have a black ring seal around the head.

    rcheing -

    Can’t get the display front

    Bernadette Pfeifer -

    From personal experience, I highly recommend before doing this procedure or any other, that you do a backup of your phone (preferably local) in case your procedure goes south.

    ballina5ny -

    I purchased the repair tools with the replacement battery from iFixit. The tools include a screw driver and three heads none were labeled 3.4 mm. I think the one that fit the pentalobe screws was labeled Y000. The guide should identify the screw driver head supplied by the kit not 3.4mm.

    Mark Lieberman -

    in the iphone 7 replacement battery kit from iFixit, the screwdriver that fits the 3.4 mm pentalobe screws is labeled P2 (and not Y000)

    Jan-Tijn Oppermann -

    3.4 mm is the height of the screw and is not related to the screw driver code.

    Ahmad Vaziri -

    the screwdriver PH000 does not work i wasted two screws and now they dont have the 4 cross mark they are now a circle, i buyed it all from Paraguay and it doesnt work, had to assembly back the parts because i got stuck like i mention with some screws, well im just going to send to a professional to install, thanks

    Martin Frutos, Nuñez -

    The bottom screws are Pentalobe, not Phillips.

    Bram Driesen -

    Before starting, I would recommend backing up your Iphone’s data just in case.

    Jon Moylan -

    If you managed to make it to this section, just send the phone into apple for 50 + 6 dollars shipping. The ribbon cables on the screen are designed to break. I can literally twist on the rest of the cable and it won’t fall apart but there is a diagonal section where it snaps. This is the fault of apple and the fault of ifixit for misrepresenting the fragility of the cables.

    Ryan Huebert -

    Had to reheat it a few times for a minute each with a hairdryer to get the seal to break after pulling and rocking the suction

    Cynthia Lamb -

    I’m technically challenged. Is there a premier national service who can professionally install a replacement battery got my 7 +?

    Richard -

    Do the screws come out in total?

    YVES THEUGELS -

    Is it the P2 you should use for the bottom??

    YVES THEUGELS -

    I heated the bottom of the phone with a hairdryer and then used a syringe to put a couple of drops of acetone directly into the bottom two screw holes. I GENTLY pulled on the screen with the suction cup and used the pry tool to GENTLY separate the screen. The sealant is applied around the entire display so be very careful pulling it off so you don’t break the fragile display cables.

    Anthony Scaminaci -

    At first it was very difficult to open, per instructions. I used a heat/ice pack and nuked it for 1 minute. The pry tool wasn’t working so I carefully used my pocket knife to wedge the cover open. The rest of the procedure went well until I cracked the glass while trying to get the top right corner to pop off. Other than that mistake, all went well. Tip: before setting the new battery, attach the battery connector first and leave enough room for the taptic engine, or better yet, place the taptic engine before adhering the replacement battery. This way you’ll have a small gap between the two, whereas mine barely fit. Good job on hosting the video, Gwendyl.

    Klaus Preiss -

    I love the fact that the screw bit and shaft are magnetic! I almost lost a screw and found it attached to the magnet.

    I used a heat/ice pack and nuked it for 1 minute. At first the display cover was very difficult to open with the pry tool, per instructions. The pry tool wasn’t working so I carefully used the blade of my pocket knife to wedge the cover open. The rest of the procedure went well until I cracked the glass while trying to get the top right corner to pop off. Other than that mistake, all went well. Tip: before setting the new battery, attach the battery connector first and leave enough room for the taptic engine, or better yet, see the taptic engine in place before adhering the replacement battery. This way you’ll have a small gap between the two, whereas mine barely fit because I placed it almost too low.

    Good job on hosting the video, Gwendyl.

    Klaus Preiss -

  2. PFpjwVSYrnq3JQap
    PFpjwVSYrnq3JQap
    RFsyoneYVYQDPSht
    • Wir empfehlen die Mikrowelle vor dem Gebrauch zu reinigen, da sonst Essensreste oder Ähnliches am iOpener hängenbleiben können.

    • Lege den iOpener in die Mitte der Mikrowelle.

    • Für sich drehende Mikrowellen: Stelle sicher, dass der Teller sich drehen kann. Wenn der iOpener hängenbleibt kann er überhitzen und sogar Feuer fangen.

    I didn't find this to be as hard as I had built it up in my mind to be; HOWEVER, saying that I need to say years ago I was the local Nokia service center in my town. But many years ago right after they got rid of analog times. Yeah. A classic installer/repairer mistake when starting something they haven't fixed or installed before is picking up the instructions, flipping through them; maybe even reading a section that is new-then tossing the instructions over the shoulder. "I got this." This usually comes right before something major gets broke. And I can tell you when you try to do it yourself and then mess it up horribly then take it to the repair shop. Well we called that "I can do it myself" syndrome and charged extra to put back together what they brought in in the box. Now knowing all this - I can't stress this enough because I am stupid, stupid, stupid. COVER YOUR SCREEN IN CLEAR BOXING TAPE AND READ ALL THE INSTRUCTION BELOW THROUGH TO THE END BEFORE EVEN ATTEMPTING THIS FIX. Take my advise.

    windizy -

    I didn't have an iOpener, so I used a wheat type heat bag. If you do this though, make sure you put a layer of plastic between your Mac and the bag, or you'll get condensation in places you don't want it.

    Martin Gray -

    I started out using the iOpener but switched to my wife's hairdryer. A heat gun or hair dryer proved to be much more convenient and is a time saviour. You can heat more and the glue becomes more fluid make the next steps with the opening picks much easier

    Jan Van Puymbroeck -

    I know this is obvious, but backup your iPad with iTunes before you start. I'd also turn off your passcode if you have one.

    Laurie Higgins -

    Ther first time you heat up the iOpener for this repair when its room temperature I had to heat it up for more than 30 seconds. I remember I had to heat it up for around 45 seconds. However, after that when you need to reheat it again during the repair 30 seconds will be enough.

    Yousef Ghalib -

    I used the wheat bag in a sensor microwave heating up to 65-70 deg C (155 def F).

    ian cheong -

    Get yourself a cherry pit bean bag the size of your iPad. Heat it, put the iPad on it for 3 to 5 minutes or so, reheat the cherry pit bean bag, again put your iPad on it. Then heat the iOpener and start working. The cherry pit bean bag will have to be reheated several times, but it will soften the adhesive so you have less problems with the iOpener

    Tim Feyaerts -

    The heating can be done very effectively (and quickly) with 3d printer heated bed. Make sure the bed is clean. Set the temperature to 60c, (130f ) and put the ipad face down for +/- 10 minutes. Repeat as needed throughout the “gentle prying” stages.

    polleyphony -

    The iOpener did not work at all for me.

    I had to use a heat gun and bring the edges of the case up to ~200 degrees (used an infrared thermometer to measure) before the glue would weaken. This obviously superheated the metal frame, so I also had to wear gloves to handle the phone while prying the back off with the included picks.

    Mike Jeanette -

    Repair instructions worked like a charm. Had to be patient with the iOpener and getting the screen off. I tried repeatedly without success until shifting the suction cup a bit to the left side where perhaps the glue had loosened up a bit more.

    Kyle -

    The iOpener, in my opinion, is of no help. Many warnings to say “don’t warm it too much”, but the glue doesn’t melt if not warm enough. As a result, a complete waste of time and energy. In addition, too much liquid in it, so it doesn’t lay on the device on a sufficient surface. I took a hairdryer and it worked much much better.

    laurentvidu -

    I used an immersion bath to heat this to 180F and applied it to the device until the outside temperature of the opener read 150F with an IR thermometer. Removing the screen took very little force with this method.

    breadandbits -

    My experience. I was replacing the screen which had been cracked and a little shattered in some places. The iopener is pretty much useless, so was the suction cup. The suction cup would probably be more useful if I was doing something besides the screen. Also you probably want the clean the screen before using it so it can get good suction. I used a hair dryer on high for a couple of minutes at a time (someone on this tread suggested that). I used my exacto knife and a razor blade to get into the adhesive. First the exacto to get the initial cut, then the razor blade to go a little deeper. Could have probably just used the razor blade, but the exacto has a little more finesse. I got the razor blade in and a little under the glass then I used the picks to wedge in. I didn’t want to risk anything using the razor blade too much. Used tape to keep the shattered glass together.

    trebor65 -

    My experience pt2

    Fortunately the shattering was mostly on the edges and most of it had adhesive on the back so it stuck together. Just take your time and work your way around following the guide to get the screen off. Have some goof off or goo be gone to clean the frame when putting the new glass on or putting the existing one back. (someone suggested that also, very good idea). Be careful of the LCD (you should know that). The cable on my LCD was pretty tight, so I propped it up while taking the cable cover off and when I put it back on I did the same thing. I just put a bottle on the battery and leaned the back of the LCD on that while attaching the cables and putting the screws back on the cover. Also be careful with the home button and the bracket on the back of it. I had enough old adhesive on left on the bracket that it stuck back to the new glass fine. So far only 12 hours in, so we will see how that holds up when the kids get at it.

    trebor65 -

    Another alternative if you do not have the iopener is to use a bed time hotwater bottle. Do not over fill it though. Just put enough hot water in to support the phone while you work around the adhesive.

    I use both the hot water bottle and iopener together on Samsung's. It makes life easier

    gazza667 -

    I followed the directions and heated my iOpener for 30 seconds in a 1000 watt microwave, and it came out at 160 degrees F, as verified by a infrared thermometer. This allowed me to separate the last bit of the back of my Samsung S8, which was already coming off due to a swollen battery (hence the reason for the repair).

    Dennis -

    Hallo,habe den Akku erfolgreich getauscht.Doch seitdem gibt es bei Telefonaten eine Rückkopplung für den anrufenden.Bei mir ist alles normal.Woran liegt das?Mfg

    Manu R -

    If you follow these instructions, you will crack your screen like I did. Heating the iOpener for 30 seconds, using it to melt glue, then waiting 10 minutes to reheat is useless. The iOpener can be used to maybe warm the glue on whatever side you aren’t working on. You need a hairdryer and/or a heat gun to melt the glue and separate the glass from the iPad.

    Anyone want to buy an old iPad with broken glass and a dead battery?

    mpulliam -

    Not everybody has a microwave. You should provide a target temperature for the iOpener and instructions for a conventional oven, or pot of warm water, or whatever. Although I will probably use a heat gun …

    Esmond Pitt -

    Three times heating opener and no luck. Tried pressing down gently on opener with a towel, and the opener broke. Wondering if I now replace table mats, fancy table cloth, etc. or will this stuff wash out.

    Not impressed so far. Maybe the hair dryer next.

    doug -

    I support the comments about the iOpener. Everyone has a hair drier, FHS, so get a cheap IR thermometer (£18) and blow heat until the area is 60+ deg C. Still takes w while, and getting the screen off is v scary, but just add more heat if you feel resistance.

    The rest of the kit is good, esp the magnetic screwdrivers.

    Richard O'Brien -

    No, everyone does not have a hairdryer. Some of us don’t even have hair. Thank goodness I already had an IR thermometer, though.

    nin10doh -

    #### WARNUNG WENN MINIMALSTER SPRUNG IM DISPLAY IST FUNKTIONERT DAS NICHT!!! ######

    Hatte einen winzigen, minimalen Sprung im Display. Ich dachte es könnte gehen, weil der Sprung “abgeschlossen” war. Er hat in einer Ecke ein winzige Glasteil rausgeschnitten. NEIN! Geht nicht. Habe alles mit viel Geduld dem iOpener und einem Föhn erhitzt. Es ist trotzdem sofort über das komplette Display zersprungen…

    T z -

    I’ve started with iOpener but changed very quickly to a heatgun. That was more efficient.

    Mizzoo, s.r.o. -

    I could not get the iOpener hot enough to melt the glue on my ipad 6. I heated for 45 seconds once and it was boiling and it still never worked. Thank goodness contributors mentioned using a hair dryer. Using an 1700w hair dryer on high did the trick to get the screen off. Still took some time and the case got pretty hot but be patient. It took twice as long and a lot more patience to get the battery out.

    Randal Haufler -

    I have an Ipad with touch screen issue, if i replace this part it should be Ok?

    janderson martin -

    WARNING - DO NOT MICROWAVE ON A METAL MICROWAVE RACK

    The metal microwave rack can heat up and melt through the iOpener cover letting the contents leak out.

    Not a big issue for me as I have a heat gun and used that instead.

    Run Up A Tree -

    I opened my iPad with the iOpener. Be patient! It may take quite a bit longer to it the iOpener in the microwave than it says in the guide. My microwave can only do 800W and I had to put the iOpener in several times (maybe a total of 90-120 seconds). I recommend that you have the transparent side up an watch the bag carefully. As long a the bag doesn't bloat up and the liquid doesn't start bubbling you should be fine. But I recommend to take the iO out from time to time to check it. (More comments in Step 6.)

    marcelflueeler -

    I gave upon the I opener and used a hairdryer. (Fixed an iPad 6)

    Tom Weber -

    iPad mini gen5. I used the iOpener. My microwave is 1200w with carousel. 30 sec got the iOpener to 155ºF. For the 2nd heating, after 10 minutes sitting, the temp was still around 125º so I only cooked it for 15 sec. Not enough increase so +5 sec more which me to 165-170ºF. This should be considered ballpark info because who knows the real output of the various microwaves and the quality of the IR tool used to determine temp.

    To successfully open my iPad mini I applied the iOpener twice to the left edge and twice to bottom. & once to R edge. Using the suction cup was difficult for me (I'm in my 70's so my hands don't work too well anymore). I had trouble holding the guitar pick and slipping them in (at an downward angle). In the end, sliding my thumbnail along the edge opened it very slightly and allowed the pick to get into the gap. I marked the ends of all my picks with a sharpie pen for the recommended 2mm insertion to avoid going in too deep. To get the screen open it took me approx 1 hour.

    jharrison -

  3. ylYXoFMbBeXNAIyj
    • Erhitze den iOpener für dreißig Sekunden.

    • Im Verlauf der Reparatur kühlt sich der iOpener wieder ab. Erhitze ihn dann noch einmal für dreißig Sekunden.

    • Achte darauf, den iOpener während der Reparatur nicht zu überhitzen. Eine Überhitzung bringt den iOpener möglicherweise zum Platzen.

    • Berühre niemals den iOpener, falls er aufgeschwollen aussieht.

    • Falls der iOpener in der Mitte immer noch zu heiß ist, um ihn anzufassen, dann benutze ihn weiter, bis er ein wenig herunter gekühlt ist, bevor du ihn erneut erhitzt. Ein ordnungsgemäß erhitzter iOpener sollte für bis zu 10 Minuten warm bleiben.

    I had to heat mine up for more than 30 seconds. After 30 seconds on high it was only warm. It had to keep trying different times and checking it until it got hot. I think the initial time that I put it in for was over a minute.

    whale13 -

    DO NOT USE IN NON ROTATING MICROWAVE! It will pop a hole. I had it in for 45 seconds the first time. It wasn't very hot inside and I saw it started to leak on the paper towel I put under it. Just a fair bit of advice. I think I will just stick with the heat gun. Loud but useful.

    Alex Jackson -

    I heated mine up for 30 seconds, tested, then again for 30 seconds. It felt adequately hot. Leaving it on the left side, per the instruction, for a minute did not loosen the adhesive. I ended up pulling the suction cup hard enough to shadder the old screen. Moral of the story, I don't think it gets hot enough safely to have an affect.

    Travis Dixon -

    There is a clear problem here with the heating part using the iopener things....no details are given. Whoever is testing them needs to make it clear - What temperature does it need to be? And for which phone models, because they differ in what's needed. It's only £10-15 for a laser guided temp sensor unit, and the designers/repairers should have one of those already for doing these kinds of repairs. Explaining half a repair, is worse than not explaining at all :-(

    assortedrubbish -

    All phones/devices differ it’s unrealistic and unsafe to put a exact time/temperature needed to soften the adhesive. It’s really quite simple you warm the device evenly and in a controlled manner just enough to enable pry tools and picks to begin separating. Best tool in my opinion but again this is because I have experience is a hot plate and heat gun both of which are used at nearly the lowest settings and I can handle flat palming the plate for almost 10 seconds I leave the device to conduct heat until approx it’s about 110 at most 120 ish this will be plenty to soften all the adhesive if any problem areas I use heat gun while prying. Again you need go slowly and learn with a throw away phone

    Greg Latta -

    I used a hot water bottle, works well as it covers the whole screen and stays hot for longer.

    dave -

    If I may suggest include your microwave wattage so people can get an idea on time for there own

    Patrick Storey -

    I agree with this.

    Jarl Friis -

    I ended up using a hair dryer. That iOpener thing took forever.

    mark fitzgerald -

    30 seconds sure isn’t cutting it… 45 didn’t get the screen of my iPad air 2 to budge either… even after resting on the ipad for 4 minutes.

    60 seconds in the microwave, the iOpener burst.

    I’ll get a new one and try once more with heating it 45 seconds and repeat that for 30 minutes like others have said here. If that doesn’t work it’ll have to be the heat gun.

    K

    Karl Marble -

    I can’t recommend the microwave. If the the iOpener becomes too hot, it bursts. Better put the opener in cooking water. Dry it and use it. Instead of an iOpener you can use hot/cool packs as well.

    Bernhard Keim -

    Great idea with using the heat packs. I will try that next time. Thank you

    Collins -

    Trust the directions! I forgot and left it in the Microwave too long and after 1 minute I had Mt Vesuvius - the iOpener burst and spewed the goodies out. The problem is, the Digitizer can be damaged by a hot air gun, so I had to tough out and remove the glue the hard way. I made it … with lots of patience! Tough lesson.

    Larry Bennett -

    I also used a hairdryer. I used it on the low setting and I cut a piece of carboard to protect the rest of the screen. The iFixit tool and method is vert tedious and very time consuming in comparison. With the hairdryer method you can literally have the display apart in a few minutes. Using your other hand nearby the area you are heating it should be very hot but not enough to burn your hand. You only have to heat metal part of case near glass edge. If you have a cellular model then you need to be very careful because the black antenna area is plastic. So less heat and work your way up in adding heat just enough to separate around the area but not so much you melt the plastic!

    Fixrights -

    iOpener was the worst part of the kit. Followed directions for :30 in microwave and took 4 trips to the microwave to loosen adhesive on left side of home button. I thought I was figuring it out and it was working well… even set a timer to wait 10 minutes between heating it up. Was on the right side and was on my 12th heat up when it exploded in the microwave. My only tip is that if you set it clear side up, as soon as you see any bubbles or boiling in the liquid, STOP! If you put a pot holder over the iOpener and press slightly to make good surface contact, that seemed to help. I finished heating with a “Corn Sack” that held heat better than the provided iOpener.

    digital_only -

    Mon iopener n'a pas tenu une réparation. Je ne vous conseille pas ce produit

    Berard Romain -

    Bonjour,

    Nous sommes désolés que votre réparation ne se soit pas déroulée comme prévu. Il se peut que le produit était défectueux. Veuillez contacter notre service client support@ifixit.com (boutique américaine) ou eustore@ifixit.com (boutique européenne) en décrivant ce qui s’est passé.

    Claire Miesch -

    Readers looking for temperature advice might check the comments of the previous instruction, as there are more there. I used an immersion bath to heat this to 180F and applied it to the device until the outside temperature of the opener read 150F with an IR thermometer. Removing the screen took very little force with this method.

    breadandbits -

    Thank you for posting some actual temperatures. I have a heat gun with a very fine self-temperature regulation setting capability.

    I will set it for 150-180 F, and use that to soften the adhesive.

    G Trieste -

    Get a heat gun.

    alesha adamson -

    I followed the directions and heated my iOpener for 30 seconds in a 1000 watt microwave, and it came out at 160 degrees F, as verified by a infrared thermometer. A second heating about 15 minutes later in the micro and it came out at 190 degrees F. Plenty hot enough to soften the adhesive for removing the back on my S8. Based on the comments above I think people just need to use more patience.

    Dennis -

    I used various time settings. It got very hot. It would soften the glue but not a whole lot. If my screen had been intact and I was replacing something that was not a digitizer, it may have worked. A broken screen makes the process significantly more difficult. I ended up breaking the home button cable. Good bye TouchID…

    cvela90 -

    After reading previous comments I didn't even use the i-opener. Used the heatgun ( hairdryer ) which works great for me. Maybe I was lucky as this is my first attempt at replacing a cellphone battery. Motoz 3

    Collins -

    It appeared 30 seconds were not enough, so I heated it more, by 5 seconds at a time until I got the right temperature about 70 degrees Celsius (measured with infrared pistol) to get the screen heated up to 60 C, the best for softening the glue. But the heat was quickly dissipating by the big aluminum back cover, so the best I got in 2 minutes of applying iOpener was around 45 C, which made the procedure difficult and having risk of breaking the screen. So I eventually abandoned iOpener and user a hot air gun with precise temperature setup. I set it to 90 C, which allowed me to open my iPad quickly and safely.

    Sergey Kofanov -

    I, too, ended up using a hot air gun. I’ve done earlier versions of iPad before but the adhesive used on this IPad 5 A1822 was particularly difficult to remove.

    Also, while the suction cup worked great when the glass is in tact, any cracks in the glass make the suction cup useless.

    manningrl -

    You need to remember here are different sizes of microwaves. I had the same issue.

    Heating on a smaller unit I used 45-60 seconds. That worked but was time comsuming

    William Draheim -

  4. Q3OPkaQyxV6cdnx3
    • Halte den iOpener an einem der flachen Enden und vermeide die heiße Mitte, während du ihn aus der Mikrowelle nimmst.

    • Der Beutel wird sehr heiß, sei vorsichtig beim Gebrauch. Lege dir am besten einen Topflappen bereit.

    I did this repair. I used a hair dryer, I think it works better: gets very hot fast.

    Cobus de Beer -

    I did too, you get far more control and no expense on fancy equipment.

    Billinski -

    Readers looking for temperature advice might check the comments of the previous instruction, as there are more there. I used an immersion bath to heat this to 180F and applied it to the device until the outside temperature of the opener read 150F with an IR thermometer. Removing the screen took very little force with this method. I don’t know how much microwaves vary in heating consistency with these pads, but knowing how inconsistent the temperature of a bowl of plain rice gets in my microwave, I wasn’t interested in even trying to use it for this.

    breadandbits -

    I used an electric griddle set to the lowest setting. It seemed to work very well.

    John -

    I vote for the hair dryer. The other methods work too but if you aren’t having any luck, switch to the hair dryer. While holding the iPad in my hand, I found that I am aiming the dryer at my finger at the same time and it gauges how hot it is. I stop when my finger can’t take it - maybe five seconds up close. Repeat as needed like I did.

    Robin -

    This thing melts when placed up side down in the microwave…

    Mark -

    If the maximum temperature for this iOpener is lower than the gadget glue minimum temperature, this device does not make sense.
    I think the maximum temperature for this iOpener is below 100⁰C and most gadget glue minimum temperature is higher than 100⁰C. So the iOpener is useless for many opening steps in repair guides. But who knows because temperature range is not specified for this iOpener.

    Jarl Friis -

  5. 2Nj3CEcEUHn2EtLQ
    2Nj3CEcEUHn2EtLQ
    lgRIBJjmHo2vTdda
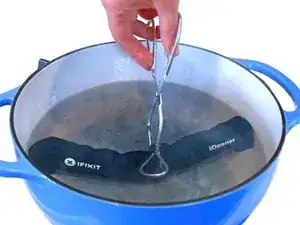
    • Solltest du keine Mikrowelle haben oder benutzen wollen, folge diesem Schritt, um den iOpener in kochendem Wasser zu erhitzen.

    • Fülle einen Topf oder eine tiefe Pfanne mit ausreichend Wasser, um den iOpener komplett damit bedecken zu können.

    • Erhitze das Wasser (ohne den iOpener) bis es kocht. Schalte die Wärmezufuhr (Platte) aus.

    • Lege den iOpener für etwa 2-3 Minuten in das heiße Wasser. Stelle sicher, dass der iOpener komplett mit Wasser bedeckt ist.

    • Nimm den iOpener mit einer Küchenzange aus dem Wasser heraus.

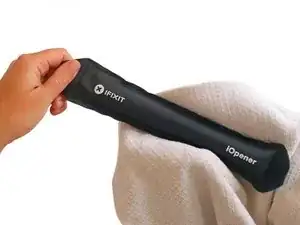
    • Trockne den iOpener gründlich mit einem Küchen- oder Handtuch ab.

    • Der iOpener speichert die Hitze, und ist daher sehr heiß. Sei vorsichtig, und halte den iOpener nur an den Endlaschen, nicht in der Mitte.

    • Der iOpener kann jetzt verwendet werden. Solltest du den iOpener erneut erwärmen müssen, erhitze das Wasser nochmal bis zum Siedepunkt, schalte die Wärmezufuhr aus, und lege den iOpener wieder für 2-3 Minuten vollständig in das Wasser.

    What do I do if I don’t have a iopener?

    alexdelarge103@gmail.com -

    Use a hair dryer

    Edited To the max -

    2 or 3 cups Rice in a sock, heat for about 2 minutes. But, I recommend the iopener.

    Robert Garcia -

    When boiling in water you can put the iopener in a ziplock to keep it dry.

    Robert Garcia -

  6. AWjJ5uej3RjES1UB
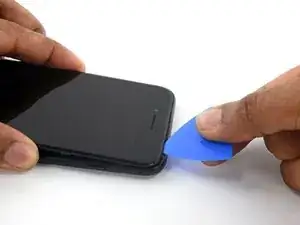
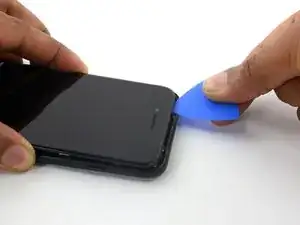
    • Durch Erwärmen der unteren Kante des iPhones lässt es sich leichter öffnen, weil der Klebstoff darunter weich wird.

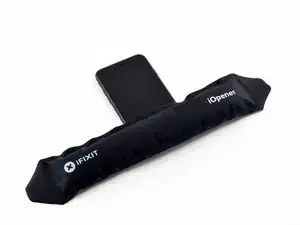
    • Benutze einen Haartrockner oder erwärme einen iOpener und lege ihn etwa eine Minute lang auf die untere Kante des iPhones, um den Kleber darunter aufzuweichen.

    ¿Cuántos segundos son los recomendados?

    joscarlos91 -

    Sesenta segundos

    Krutav Shah -

    It is a process. I heated the lower area of the phone with a hair dryer on and off (1min each) about 3-4 times before I was able to get the provided tool in.

    Dan -

    I suggest using a hairdryer. I used the iOpener for maybe 30 mins to no avail. However, when I used the hairdryer the screen came of much quicker.

    Michael -

    I totally Mr. Myagi’ed it, by rubbing my hands together until they burned, then held the phone un my hot hands. I did this 5-6 times over a couple of minutes. It was a good zen way to get started!

    Ark -

    Can a heat gun be used?

    Lee -

    Absolutely. Just don’t overdo it—the adhesive usually softens up pretty easily. If you are experienced with a heat gun, you’ll have no problem. (If you are inexperienced, it’s easy to cook the display or cause other damage.)

    Jeff Suovanen -

    If i use this process, will iphone 7 still be sealed, water/ splash resist after that?

    Marius Serban -

    Opening the iPhone's display will compromise its waterproof seals. Have replacement seals ready before you proceed past this step, or take care to avoid liquid exposure if you reassemble your iPhone without replacing the seals.

    Angel Hermida -

    Can I use a cpb heating pad to soften the adhesive ? If yes how much time and temperature ?

    davidecongiu -

    Will doing this compromise the screen protector (Zagg) that I have on my phone?

    Eric Nance -

    Hairdryer worked for me but I needed to use a razor to pry it open at the bottom then used the spudger

    Gina Torres -

    Is there a reason why you wouldn’t put the iopener over the entire length of the phone, instead of just the bottom corner?

    BPX -

    The motherboard is extremely sensitive to heat.

    Neal Reasland -

    Hello can the head damage the id touch bottom?

    After heating opening it stoped working.

    Qrizmasex @ gmail . Com

    aratovski -

    It definitely can. That happened to me.

    Steve Naylor -

    mine didnt come with a heat pack do i use a hair dryer

    Shy Rose -

    I just threw a hand towel in hot water, and then stuck it into a plastic bag. Dryers work fine, too.

    hiroo yamagata -

    Thanks for this, the other instructions make it seem SOOOOO simple to open up the case with the suction cup! It actually is hellish. The instruction here about the pre-heating and the required patience really helped!

    hiroo yamagata -

    For those of you who don’t have an iOpener or a girlfriend, I used a ziplock bag with some instant mashed potato inside. It worked perfectly first time and you can fold the bag around the ID button in order to prevent damage to it.

    You also get to celebrate by eating the mash afterwards, HUZZAH!

    Adrian -

    🤣 You made my day Adrian, thank you!

    Jicey -

    I found this to be completely useless. It didn’t help at all. I had to use a heat gun instead. Waste of money.

    David Gordon -

    I’ll experiment with leaving the phone in the sun until the Temperature Warning comes up so the phone tells me when it’s too hot to be safe.

    Maybe it will be hot enough, maybe it won’t—

    edmk5000 -

    I use a rice pack in the microwave. White dry rice in a sock sown or tied, then microwave (1 minute +/-). The dry rice heats and retains heat for a long time. My kids loved them in in bed during cold winter nights.

    Todd Oeftger -

    I have changed now Iphone 5 Battery, IPhone 7 front camera & another iPhone 7 rear camera. The instructions along with the comments are really important. Be patient & read them several times. By using your heated gel pack 3-4 times for 2 mins or so on the bottom end near the touch button you will be able to pry with your razor & then you can use your spudger. Thanks for this great guide.

    Kala -

    I would DEFINITELY recommend to NOT use direct heat (hair drier, etc.) on the phone. I used a hair drier to help heat the phone and ended up damaging the home button (would not work after the replacement and I did not touch or take apart the home button). Note that a damaged home button cannot be replaced so I will end up using the alternative “screen” home button going forward with my phone. Instead I would recommend preheating something else (example - metal / coins / ceramic / beads / glass stones / cookware / etc..) to a warm-to hot (but not burning hot) touch and place the heated items on the IPHONE (or visa versa) to heat and soften the adhesive.

    Ed Scannell -

    I used 1-gallon Ziploc back and poured 1qt of boiling water into it. I placed my iPhone on a corkboard and the bag on top for 120 sec.

    It worked like magic. I just pooled the screen with the suction cup, and it got loose from the case. No heat damage. Everything works.

    it500 -

    I placed the iOpener heat bag over the bottom of the phone, disregarding the home button. Now it doesn’t work. All subsequent procedures went well as I was very careful. I should have read all the posts! Protect the home button from direct heat. Fortunately, now using the Assistive Touch feature is better than buying a new phone or replacing the home button.

    Kurt Bee -

    It’s better to choose an iPhone back case to cover and protect your phone from bumps and scratches. Choosing premium cases is the best option for long-term safety. If you need ***iPhone 7 phone cases*** then you can check them out!

    FLAUNT -

  7. IF2qJWX5ZTGHyFN1
    IF2qJWX5ZTGHyFN1
    xMDRKmeU5dWeTob5
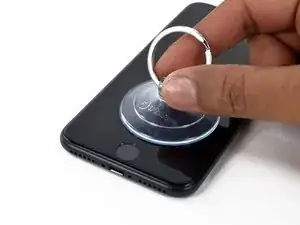
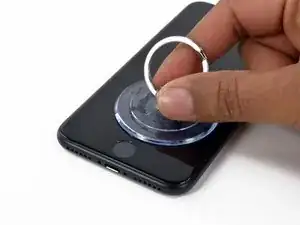
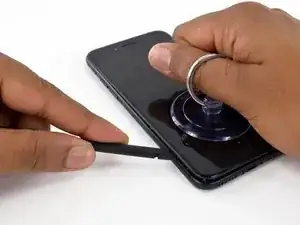
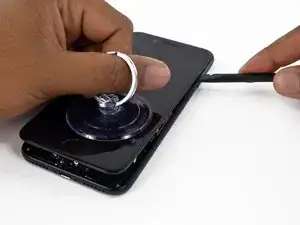
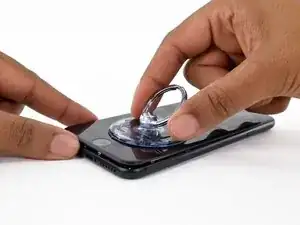
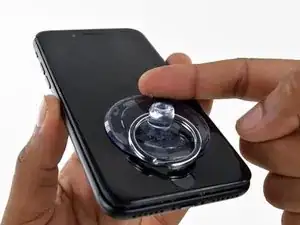
    • Setze einen Saugheber auf die untere Hälfte der Displayeinheit, knapp über dem Home Button.

    • Achte darauf, dass der Saugheber nicht den Home Button überlappt. Das würde verhindern, dass sich ein Vakuum zwischen dem Saugheber und dem Glas bildet.

    • Wenn dein Display stark gesplittert ist, dann haftet der Saugheber vielleicht besser, wenn du das Display-Glas mit durchsichtigem Paketband abdeckst. Du kannst anstelle des Saughebers auch Panzer-Tape benutzen. Wenn das alles nicht hilft, dann klebe den Saugheber mit Sekundenkleber am zerbrochenen Display fest.

    The glass is completely cracked and the suction cup doesn't work because it gets air in between. any tip?

    Display is glued and doesn't come off.

    support -

    A wide, single strip of packing tape, well placed, will solve this for you. :)

    Mimic44444 -

    Last comment works well. Thank you !

    Using packing tape for a cracked screen should be included in the description in Step 3.

    Cracked screen is most probably the reason you are replacing it.

    Arni Benediktsson -

    I agree that using packing tape for a cracked screen should be included in this steps description. I don’t have wide but turned mine horizontal and that worked great.

    Mary Knapp -

    Bekomme die Oberschale einfach nicht runter! Trotz mehrmaligem erwärmen durch den iOpener und seitlichen bewegen! Weiß nicht mehr weiter!

    Stephan Lienhard -

    Wouldn’t that screw up the Touch ID?

    Rexx Havok -

    The suction cup that is. supplied with the essentials kit doesn’t work that well.

    Laurence -

    Agreed, the iFixit suction cup was useless. I borrowed one from the sponge holder in my kitchen sink. It lacked a grip so I held it with needle-nose pliers, resting them on a bit of wood to keep pressure off the phone.

    ephraim -

    I am not getting this open at all! Why an I provided with tools that can't help me ??‍♀️

    Bray Joseph -

    I couldn’t get the bottom to lift first, but the left side did, so I started there and worked my way around the horn.

    selimnairb -

    Hold the suction cup provided in almost boiling water with tongs for about 30 seconds, then it will actually work :-)

    AKA -

  8. nYYkQCYEhWsRQgPY
    nYYkQCYEhWsRQgPY
    2QVpcp5uXY5R1TBA
    qgxSKCOYJSgwPFQm
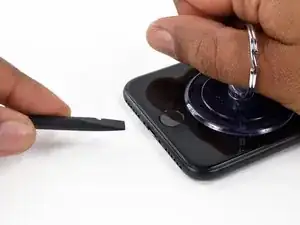
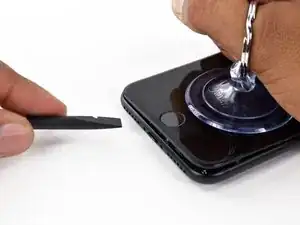
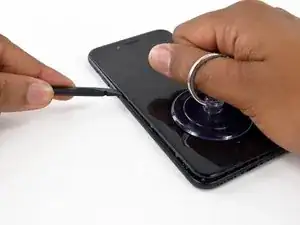
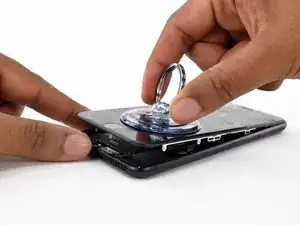
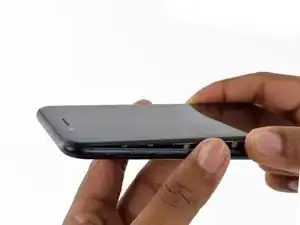
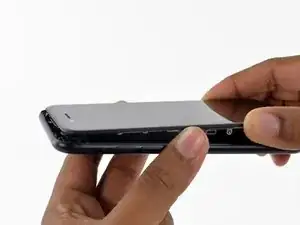
    • Ziehe etwas am Saugnapf, bis sich eine kleine Lücke zwischen der Displayeinheit und dem Rückgehäuse bildet.

    • Führe die flache Seite eines Spudgers in diese Lücke ein.

    • Der wasserdichte Klebestreifen, welcher das Display in Position hält, ist sehr stark. Es kann viel Kraft brauchen, um diese erste kleine Lücke zu schaffen. Solltest du dabei Schwierigkeiten haben, wackle das Display etwas auf und ab, um den Klebestreifen zu schwächen, damit du den Spudger leichter einführen kannst.

    This was SO hard for me to do with the spudger. I couldn’t get a gap to insert it because my phone was so cracked (even though I used tape on the front) to get a solid seal with the suction cup. I ended up taking a VERY thin knife and inserting it straight down to make the initial break that allowed me to insert the spudger.

    jessica harlow -

    I’ve given up using a plastic spudger to try to open any of these phones. I use a metal one with a flat base and a very sharp end…close to a razor. As long as I’m careful, it won’t slip and scratch the base. It’s much easier than using these plastic spudgers.

    mcr4u2 -

    I confirm that the plastic spudger it’s not the best tool for this operation. I suggest to use a larger metal tool like a “Jimmy” or “iSesamo open tool” (I used the first one)

    Cristef -

    Im trying to get the screen off right now and my phone is not cracked and its still a pain

    Jordon Johnson -

    Using a blow dryer was extremely helpful and using the suction cup towards one of the lower edges was also helpful

    Jordon Johnson -

    This is not working for me. How long does the heat need to be applied? Still trying right now…. =/

    Chris Gallego -

    Apply hair dryer for at least 1 minute. I inserted the tip end of a thin mini screwdriver and with some force, pryed it open and inserted my plastic spudger to continue the separation process. It worked, just be patient.

    Please wear protective glasses! My iPhone glass was severely cracked, when separating the glass a corner area of broken glass exploded in my face. Apply transparent tape over the broken glass to contain the shards.

    amberron -

    I second Jessica’s January 8 comment.  I just finished a battery replacement on my iPhone 7 and this step was the most nerve-wracking part.  I ended up using a sharper (but not razor-sharp) metal object to get this done with confidence (tried the spudger and guitar pick but not thin enough).  The tool I used was the exact duplicate of what iFixIt calls “iSesamo Opening Tool” in their tool selection.  I did the heat up with a hair dryer (after attempts with an iOpener hot pad) and the secret (as Jessica also noted)  was to not use the angle of attack shown in the pictures, but to push it in more vertically along the bottom edge while pulling up on the suction cup.  From there you can easily lever the tool to the lower angle-of-attack (as shown in the picture).  I actually used the metal tool for most of the perimeter as well, just don’t go deep (you don’t need to).  Notes: my display was intact, and I was able to pull up fairly hard with a glass screen protector still on it.

    Ted -

    This is frustrating. I heated the lower edge with a hair dryer for 1 min on high about 3-4 times. In between each heat cycle, I rocked the suction cup back and forth. I was eventually able to create significant space for the provided tool. This takes a lot of patience. Once the space was created, it was very easy to remove the screen.

    Dan -

    use a fingernail, then the blue tool, then the spudger

    Therese Peffer -

    The iOpener worked just fine for me. Had to keep it on for a few minutes. I also was able to get the suction cup seal right close to the edge, over top of the home button for added leverage. Used the blue tool and transitioned to the spudger. Slow, steady pressure…and patience. ;)

    johnhall918 -

    Unable to open an iPhone 7 display assembly. Used gell pack at 150 degrees F. The phone wouldn’t budge when I used the iFixit suction cut. Part of the problem is that the cup doesn’t adhere for long before it looses suction. I suspect it would work better on unbroken glass, but that doesn’t help me now. After spending a lot of time at this, I changed heating methods to a hot air heater. I raised the temp of the bottom end of the phone to, ultimately, 175 degrees, and used a variety of tools to try to pry the glass apart enough to get a spudger (or anything) in, but it didn’t even lift enough for a double-edged razor blade to get in. I’ve been trying this for hours now, and about to give up and throw a lot more money at this to have a service perform the work. I figured that 175 was as high as I should need to go to soften the adhesive without damaging the electronics. Should I have gone higher? I see no mention of measured temps in any instructions or comments.

    ted -

    Have you tried applying tape to the broken screen? This will help a lot with keeping the suction cup on it.

    Christian Groothuis -

    It doesn’t need to get very hot; pulling up on the display is mainly what does the trick. Make sure the two pentalobe screws have been removed and then try the tricks in this step. If all else fails, superglue the suction cup to your display and let it cure, and then pull. Keep in mind you only need a tiny gap to insert a plastic pick and start cutting the adhesive. Good luck!

    Jeff Suovanen -

    Just a question. After this operation the impermeability function was compromitted?

    bentek86 -

    The trick I found, was to add packing tape right across the bottom over the home button then use hairdryer on the end, then suction cup on the very bottom and it lifted enough to get a gap. No one mentioned how it would be impossible to handle the phone after the hairdryer ;)

    Andrew Lansdowne -

    Didn’t have an iOpener and 60 seconds on a hairdryer wasn’t doing it for me. Still wouldn’t budge. I had to take a very sharp razor along the seam at the bottom between the speakers. It took about 20 passes for it to separate enough to get the spudger in. Make sure you keep the razor at a 90-45˚ angle and that it goes no more than 1-2mm into the phone. The bottom of the phone is metal, but the casing for the screen is plastic. So if you cut lower than a 45˚ (flat with the phone) you risk cutting into the casing. Apply light pressure when making the passes. I would just do the razor on the flat part on the bottom.

    minimalist -

    I used a hair drier while lifting up at the same time until I could get the too inside. The seal is pretty finicky. Just take your time and you should be fine. Work the hair drier and the tool all the way around before lifting the screen up and off. There will likely be sealant stuck between the screen and phone. You can just break it with the tool.

    Ray Bieze -

    This step was impossible for me despite using a blow dryer and having no cracks on the screen. I finally took it to a local repair place and had them do battery replacements for two iPhone 7’s. The girl let me watch her do it. She used a razor blade (just until she had a small opening that she could hold open with her fingernail) and confirmed that she too would have difficulty opening it with a plastic tool and suction cup. The plastic tool was great for prying the rest of it open once a crack was there, but she said she would never try to use that as the tool to initially open it. The tools provided for initially prying open the screen are inadequate.

    Chad Twedt -

    Hopeless - no chance to get the screen off without any damage. No matter what tools, heat etc.

    Anatole Beams -

    I second what others have said, definitely use a razor blade to break the seal! Heat helps some, but too much direct heat is bad for the screen. Would have been impossible if I hadn’t read the comments, thanks everybody!

    Kit -

    Use extreme caution on this step. I was just replacing my battery and now i’m buying a new screen. The screen was very stuck, I pulled to hard and it popped off suddenly, completely destroying the screen.

    moose -

    When the right heat is reached, the easiest way is to use a metal iFlex to create the initial gap, then insert the Jimmy or iSesamo next to it so the gap gets bigger, at this point you can get in with the flat edge of a plastic spudger and slowly slide it in the borders to cut the adhesive. You will still need to force a bit the upper end to separate the screen by pulling it down while keeping up the screen, and twist to the right. I hope this is clear enough. Never apply too much strength too quickly anyway.

    Stefano Restuccia -

    I used the short blade of my swiss knife to make an initial opening. Using the sharp edge, inserting about 1 mm straight down and twisting down into a 45° angle. Then I was able to insert the spudger.

    John van de Loo -

    This is a difficult step. Fortunately, I had another suction cup from an earlier repair available, so I applied one to each side of the phone. After warming with a hair dryer, I was able to pull the two suction cups far enough away that another person could easily insert the spudger.

    The third hand was essential.

    Mark -

    I found this tactic to be the best solution for us. I used two suction cups, one on each side of the phone, and another set of hands to get a pry tool under the display. We still had to take our time prior while heating the adhesive, but were able to pry the display fairly easily using the two suction cup method.

    Lucas -

    It was a really excruciating process of heating, lifting with the suction cup, trying to slide in the spudger/pick, and repeating the process for 20 times or so. But in the end, my patience paid off!

    hiroo yamagata -

    I used a hair dryer, then used a safety razor blade parallel to the bottom edge to push straight down (from the glass side, towards the back) while lifting with the suction cup. I wiggled the blade (top to bottom) while pressing down gently, until I saw a gap that would accept the spudger. It did not take much force on the blade or much wiggling, just patience.

    Gene Merritt -

    Followed Gene’s approach with heat and a razor blade. I was nervous, but went slow; it was very easy and effective. Great tip. Just be patient and don’t rush yourself.

    Michael J -

    I would skip right to using a single edge razor blade and a hair dryer to create the gap needed for the spudger.

    Logan Brown -

    Think plunging the toilet - it did not work for me for a long time. the suction cup would not stay held on a long pull. I found that tiny push-pull repeated motions, reseating the suction cup with each push slowly overcame the adhesive, and contributed heat :). I had it after about 50-70 cycles

    Andrew Balanda -

    seconding this comment from Ted ~~~ “the secret (as Jessica also noted)  was to not use the angle of attack shown in the pictures, but to push it in more vertically along the bottom edge while pulling up on the suction cup.  From there you can easily lever the tool to the lower angle-of-attack (as shown in the picture).”

    natjpollard -

    I echo what everyone is saying here, the spudger just isn’t good enough for this and neither is a pick. The razor is the best way to go. I tried using a very sharp penknife blade and managed to damage my LCD (somehow!) and the bezel so I ended up having to buy a new screen display as well as a new battery. Think twice before doing this. Be prepared to shell out for a new screen just in case it goes wrong. You’ll also need the heat gun (the iopener was useless). If you do need to buy a new screen, make your life easier and get one with the speaker, forward-facing camera, home button, etc., already attached (you can then replace the home button) or you’ll end up having to transfer all these from your old display.

    David Gordon -

    I finally got the screen up but shattered it in the process. I was replacing it anyway but if the screen is not what you’re replacing, take EXTEME caution. The suction cup and spudger were not working for me to get it started. Thanks to the comments, I used a razor blade and a heating pad and went back and forth, back and forth, between heat and pressure from the blade. Once you get a gap, the spudger works great and the screen comes up easy.

    Nick Nave -

    The suction cups that iFixit sells are crap. They don’t stick at all. Glass on the phone is pristine.

    Nick -

    More feedback on this “guide”:

    “Pull up on the suction cup.” What does this mean? If I just pull up on the suction cup (with a real one that actually sticks) it just lifts the phone off the table. You need a description of what you are pulling against. Do I try to hold the frame of the phone? Do I try to stick something in the lightning port to pull against? Do I try and get something against the edge of the rounded metal on the edge of the phone (this usually just slips off). What am I pulling against???

    Nick -

    I found a combination of iOpener, suction cup and razor blade, all applied at the same time, worked for me and I didn't need to use a hairdryer.

    Peter Gray -

    Dumbly, I thought that with the Spudger I'd had to hold the phone from the charging hole while pulling the screen. .. In the end I inserted the two ends of the tweezers(bends the tweezers and may damage it) in the screwdriver holes and pushed the screen out upwards so that I could insert the sharp side of a knife.

    Claudiu Cezar -

    This was my first iPhone battery replacement and I can say this was the hardest part.

    Be wise, go for a hair dryer and heat up the phone bottom (long enough). iOpener did not work at all for me. Heat up, use the suction cup and push the opening pick under the frame as soon as you see movement along the frame.

    Then use the spudger to wander around the whole frame (leaving the pick where it is). Done!

    Guenter -

    True about sputter i cracked my screen trying to lift it up while using this device back in 2021

    DJSan -

    One little corner at a time. Don't try to do the whole bottom at once. I heated with a hair dryer. Applied the suction cup to one side and worked the corner till it started to give. Took a minute or two. Use a magnifying glass to help see when it's starting to come loose. It's not hard to do.

    Some Idiot -

  9. w14updH4DLqGvKqR
    w14updH4DLqGvKqR
    vuiQTgWBpbxmOHdm
    JWXGXqbFuvDBKIsX
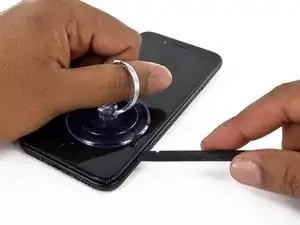
    • Ziehe das Werkzeug nach links, entlang dem unteren Rand des iPhones.

    • Drehe das Werkzeug, um die Lücke zwischen dem Display und dem Rückgehäuse weiter zu vergrößern.

    Didn’t have an iOpener and 60 seconds on a hairdryer wasn’t doing it for me. Still wouldn’t budge. I had to take a very sharp razor along the seam at the bottom between the speakers. It took about 20 passes for it to separate enough to get the spudger in. Make sure you keep the razor at a 90-45˚ angle and that it goes no more than 1-2mm into the phone. The bottom of the phone is metal, but the casing for the screen is plastic. So if you cut lower than a 45˚ (flat with the phone) you risk cutting into the casing. Apply light pressure when making the passes. I would just do the razor on the flat part on the bottom.

    minimalist -

    I used a hairdryer and a razor

    Gina Torres -

    The photos are a con. You cannot get a spudger in unless you can lift the screen. You cannot lift the screen because of the adhesive. Using a anything metal will damage the paintwork or the glass edge.

    Anatole Beams -

    I agree, these guides are half imaginary idealism it seems. A thin metal edge pushed vertically down just a fraction of a mm will cause the adhesive to weaken better than any amount of heat, but affects the final appearance sadly.

    Jesse de Vries -

  10. eGMj41HNdZWr5M4e
    eGMj41HNdZWr5M4e
    MTmDdGUmuVcLsCqR
    SeQbunK6NGTReuWi
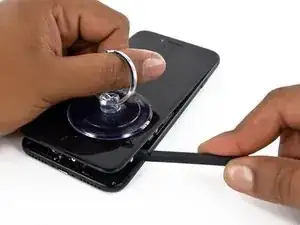
    • Ziehe das Werkzeug von der unteren Ecke die linke Seite hinauf zu den Lautstärketasten und dem Stumm-Schalter.

    • Heble nicht am oberen Rand des iPhones, sonst riskierst du es, die Plastikclips zu beschädigen, mit denen das Display befestigt ist.

    Be VERY careful on this next step going up the right side of the phone. There is a ribbon cable 1/3 of the way up from the bottom that is very close to the edge. Do NOT use the blue triangle!!!! Just lightly rotate the spudger to get separation on the edge.

    Timothy Varvais -

  11. VRLM1rHAJU2xcurG
    VRLM1rHAJU2xcurG
    6SPMeyXsAqif4dVj
    V5iOwSapGYfkPj3P
    • Führe das flache Ende eines Spudgers in die rechte untere Ecke des Geräts ein.

    • Drehe den Spudger, um die entstehende Lücke zwischen der Displayeinheit und dem Rückgehäuse zu vergrößern.

    • Ziehe die flache Seite des Spudgers entlang der rechten Seite nach oben, um den Klebestreifen zu lösen, der das Display fixiert.

    • Schiebe den Spudger nicht tiefer als den Klebestreifen ein, damit die empfindlichen Flachbandkabel am rechten Rand unbeschädigt bleiben.

    Shoot. I broke the sensitive ribbon cable because I didn’t quite understand what the instructions meant with not to insert the spudger further than the adhesive. It means depth wise, not up the side. Sigh.

    Leo Hwang -

  12. dZLSFZcIKfWkKTnv
    dZLSFZcIKfWkKTnv
    YslmbTTTPZovLuX6
    • Ziehe am Saugnapf, um das Display anzuheben und das iPhone zu öffnen.

    • Hebe das Display nicht höher als bis zu einem 10 Grad Winkel, denn rechts sitzen Flachbandkabel, welche das Display mit dem Logic Board verbinden.

    do not pull up pull sideways it will brake

    Riley Patterson -

    Made this mistake

    rachael.grime -

    Somehow my phone turned itself back on during the opening. Scared me a little, like a patient coming out of anesthesia during the operation. I was able to turn it back off. Gotta be more careful where you grab this thing.

    Bryant Larsen -

  13. ONIoVumIs3Nf5wkE
    • Löse den Saugnapf vom Display-Glas und nimm ihn ab.

    very nice

    iPhone 7 back cover

    http://WHITEWINGS.IN/

    Vikash Kumar -

  14. 5tw1LZVqOQwDWmtx
    5tw1LZVqOQwDWmtx
    dnsUKLGhtAKtvNQu
    • Fahre mit einem Opening Pick am oberen Rand des iPhones, zwischen dem Rückgehäuse und dem Front Panel entlang, um den restlichen Klebstoff, der das Display hält, zu lösen.

    • Achte darauf, nicht die Plastikclips am oberen Rand des iPhones zu beschädigen.

    The plastic clips mentioned are on the top of the screen being replaced… so not sure why it matters not to break them. Trick here was to pull the screen downwards to open a gap at the top and then insert as shown and raise to break the seal.

    Andrew Lansdowne -

    This is relevant for other guides than the display replacement guide.

    jvalaamo -

    プラスチックのクリップという

    表現に混乱しました。

    上部に食い込んでいる

    差し込みのことだったんですね。

    下に引っ張ったら抜けました。

    情報ありがとうございました。

    MARU -

    The opening pick is packaged with the battery, not the tools, so I didn’t find it until I was past this step. Made do with careful use of the spudger and a lot of wiggling the display to break the glue.

    ephraim -

  15. vwYGVPMyP3GJgO4i
    vwYGVPMyP3GJgO4i
    JDP4yDhEj3dIyMHh
    idMKdstsO4fFgyxf
    • Ziehe die Displayeinheit etwas von der oberen Kante des Telefons weg, um die Clips zu lösen, die sie am Rückgehäuse halten.

    • Öffne das iPhone, indem du das Display von der linken Seite her aufklappst, wie die Rückseite eines Buches.

    • Versuche nicht, das Display schon komplett zu entfernen, da empfindliche Kabel das Display immer noch mit dem Logic Board verbinden!

    I just broke the cable to the battery!

    No Bama -

    same dude im such a freak lol omg haha

    Aiden Polaski -

    Are there replacements ribbons?

    Blax Bently -

    Has anyone else noticed very small squares of rubber with a circle cut through it (I think they fall off into the phone when dismantling)?

    I just replaced my screen and worked out that these are actually a wee pocket that slips over the pentalobe screw holes on the replacement screen. I’m not sure if it’s an additional water resisting mechanism or if it’s to add additional traction for the screws

    richarddillon -

    Thanks, I was wondering where those were from!

    Albert -

    Same, I only had one fall out and I had no idea if important, and didn’t re-add - because I wasn’t sure where it fell from - but it was definitely from the home screen button….watch it be important. -__-

    Nicole Crome -

    I just broke cable connecting camera and earpiece speaker to logic board. Be careful with it.

    Natan Haładyn -

    This section is missing a critical step - to lay some Post-It notes or something below the right half of the phone when you swing it open, so the ribbon cables don’t get sliced by the sharp edge of the phone case. I broke the Home Button ribbon cable because there was no strain relief when I laid it open.

    neila -

    I also broke the home button cable and now I have to use assistive touch.

    Laurencio Gonzalez -

    Keep the suction cup on the display to keep it propped up while you disconnect the ribbon cables.

    minimalist -

    I broke the short ribbon cable that attaches underneath the lower connector bracket. Be SURE when you lift the display, you do it from left to right. I thought I had the phone oriented correctly in my hand, but I was mistaken.

    John Murray -

    Put the suction cup on the right side of the middle of the screen when you rotate it up and out. It serves as a nice stand to take the pressure off the connectors.

    Ray Bieze -

    no mention of what you do once u open the book. are the ribbons long enough to lie flat  or do we have to keep screen raised while removing screws,, like when we hold screen up 45 degrees while removing 5 screw plat when at top of phone. I only realised how fragile the ribbons are and how important it is to use suction  cup to rest screen on an angle so ribbons don't stretch or cut on frame.

    thanks for the above comments and probably the most important section. I just hope I closed t before I fdid any damage. its lke the fragility of iPhone 3’s all over again.

    scallyteacher -

    I just broke one of the cables… yeah, it is not nice… I’m lucky in the sense the screen is still working, but the button is not.

    Trying a cheap screen on Ebay (that contains the cable) do 20$, after that, it’s a new cellphone…

    Vincent Poirier -

    Be EXTREMELY careful when you lift up the screen. I broke 3D touch cable, and the home button stopped working. Had to replace the whole display.

    Sizun Cho -

    Attention ! J’ai cassé la nappe de la caméra avant !

    arnauldjouanny -

  16. QVGa5KTCal3B6epN
    • Entferne die vier Tri-Point Y000-Schrauben, die die Abdeckung der unteren Anschlüsse befestigen, sie haben folgende Längen:

    • Drei 1,2 mm Schrauben

    • Eine 2,4 mm Schraube

    • Passe während der ganzen Reparatur gut auf die Schrauben auf und sorge dafür, dass sie genau an ihren alten Platz zurück kommen, sonst kann das iPhone beschädigt werden.

    Ahhh shoot! accidentally ordered tri-wing vs tri-point (must have just looked for y000).. It seems they only did this to annoy repair folks because not everything is tri-point on the phone...

    Steve -

    These screws just spin for me. They don't back out, but the heads aren't stripped either. I've tried applying backpressure to help lift the screws, but no luck

    Jeff Hurst -

    The Y000 took out one of the screws but not the other 3. I even tried the PH000 as suggested but nothing.

    dbright -

    What driver do I need to remove these screws i’m stuck

    Nasser Nader -

    i cant use, the Y000 it isnt working.

    joscarlos91 -

    What if I stripped a screw what do I do??

    Jacob Ramos -

    Yep, only the 2.4mm came out, other 3 won’t budge, and worried I’ve stripped the heads. Anyone got any ideas?

    Stephen Babbage -

    It’s the screwdriver bit that is the problem. I had the same issue with 2 Y000 bits not grabbing the screw properly. I fixed it by using a small 3 sided file to slightly grind the groves in the Y000 bit just a bit deeper. Then the bit worked like a charm on these screws.

    Jim Staples -

    Use Y000 on all 4. U have to be very sensitive on the 1.2mm screws. Put the bit in the screw, put the left pointing finger on top of the screwdriver and turn the driver carefully to the right until you feel a “bump”, thats the trick :-), then you are able to screw the screw out.

    Magne Eivindson -

    For me the key here was a LOT of downward pressure to ensure the Y000 bit caught in the screw. Not sure i can describe how much exactly, but is was significant. Otherwise the bit would not catch.

    Erik Fredriksen -

    What do I do if I Stripped one of them?

    Adam Corral -

    Can’t get them removed what to do ?

    cowling_luke -

    Managed to get the central one out. The upper one won't move, the lower one I've popped out with some force. This allows you to rotate the cover enough to unplug the various bits. Not ideal, but works. I've tried applying a lot of pressure, using the tighten/ loosen method, but the heads have just got mashed… no wonder Samsung are now No1, sigh…

    jimpoolio -

    You need to be careful when just rotating the cover as you can accidentally slice through the two black antennas! You only need to nip them…As you can tell I have done this in the past :/

    Kyle Webb -

    The first, longer screw came out fine, but the other three wouldn’t budge, regardless of more/less pressure or a slight angle or anything. I finally filed down the tip of the Y000 bit ever so slightly, and then it worked. Hope this helps someone.

    Harmony -

    Filing down the bit worked for me. The tip about putting an index finger on the end of the screwdriver handles and then turning gently until it clicks into place was very helpful! Using these 2 tips I didn't need much downward pressure. Screws are out in a few turns.

    Chris Bennett -

    If you can’t get the bit to grip the screw properly, you can use a little bit of the water-proof sealing between the bit and the screw. That worked for me. Hope this helps anyone.

    jvalaamo -

    Mine came out easily. I placed the screws in the area where the bit goes in my kit so I can keep track.

    Gina Torres -

    I used a bunch of medicine cups to track my screws. You need like 12 if you want them all in cups. I ran out. There are so many different sizes that literally vary by 1mm. The tolerances on these things are tight.

    Ray Bieze -

    I use a 28 day pill box and keep every screw separate and reburn to exact slot because they all vary in length, width and can really damage u phone if too long and nt secure if to small.  use a magnetised screwdriver,  or make the cheap freebees magnetic for a short period by rubbing it up an a magnet. lol

    scallyteacher -

    Absolutely ridiculous had to go get a different one just stupid

    mark golling -

    I couldn’t get the lowest one out and just turned the metal bracket out of the way and replaced battery.

    qwerty77x -

    Was able to get the outer bracket screws out using fine needle nose pliers 90 degrees straight down for the outer ones by pressing down a little and using medium gripping force. Had to take these out first before i could use tweezers on the middle one, for which I had to use tweezers to hold the screw, then rotating the bracket (not the screw) counter clockwise a few mm many times over to slowly unscrew it 1/32th of a turn at a time, repeat. (this loosened middle screw). Think ‘rotating bracket 3minutes/degrees counterclockwise at a time while holding screw in place.) You are gonna need really small/fine pliers and tweezers for this because the heads are countersunk into the bracket.

    Galen Wollenberg -

    The top screw in the step was much longer than 1.2mm. It has the same head as the 1.2mm, but different than the 2.4mm. It’s good to keep track of where they came from.

    All are so small that I thought I’d lost one, when it was still sitting in the phone.

    Mark -

    To help tell if the screw is turning, put a small dot from a marker on the head of the screws.  This helped me to know I wasn't just stripping the head.

    Darren Thibodaux -

    try heating the iPhone with a hairdryer or a bag of rice or about 60 degrees in an oven for 3 minutes . It has worked for me. If the screws don’t come out while hot the will come out as the iPhone cools.

    David Howard -

  17. G1PuHnw2PiNeAdMC
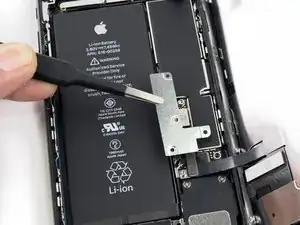
    • Entferne die Abdeckung der unteren Anschlüsse.

    my battery cable connector was stuck to the bottom of this metal bracket plate so be careful when you lift it off

    Josh Martin -

    This may have been intentionally done by Apple to make sure the battery gets disconnected before any other connector is disconnected. So always make sure to disconnect the battery before disconnecting and reconnecting the connectors for the display.

    Oscar Moreno -

    So…I forgot to put this bracket back on when reassembling. Now I’ve adhered the display to the case and don’t have another adhesive strip…so I’m wondering: what purpose does this bracket serve? The phone is powering on and seems to work okay.

    Am I going to run into trouble with this bracket missing?

    Ian Fritz -

    Well, that didn’t last long. The phone shuts down without warning. So I guess that plate is important…

    Ian Fritz -

    I also forgot to put the battery shield in, and adhered the display. I’m tempted to leave it like that. However, your negative experience is a good data point telling me to not be cheap.

    Ordered a new adhesive , under $2 shipped from eBay.

    Yishai Sered -

    Thanks, Josh Martin! Mine was stuck too, so I lifted carefully.

    Cynthia Lamb -

  18. kagyl1qcW4AtoBlf
    kagyl1qcW4AtoBlf
    ewZDHDrtMTUxnlnK
    NUEP2PSRVV54cedx
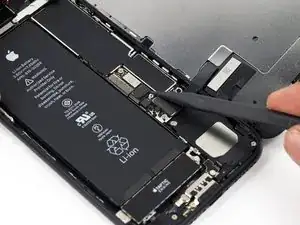
    • Mit der Spitze eines Spudgers kannst du den Stecker der Batterie vom Anschluss auf dem Logic Board heben.

    • Biege das Kabel leicht nach unten, um zu verhindern, dass es mit dem Anschluss in Berührung kommt und das Telefon mit Strom versorgt.

    Was kann passieren wenn man diesses Kabel vergessen hat zu entfernen `?

    Julian Eltrich -

    Reconnecting the battery poorly can cause the iPhone to appear to be properly powered and functional, but then suffer a reboot loop.

    I had difficulty after a screen replacement, and the Console app on my Mac showed that the ‘thermalmonitord’ process was throwing lots of errors from not getting any sensor readings from the battery. It would never charge past 1% and just kept rebooting.

    The contacts on this conector looked fine so even though I had reseated this connector several times already, I reconnected it very firmly using my thumb and a spudger to really press all the corners and middle and really gave it a good massage and then finally it showed the normal dead battery screen and started properly charging and eventually booted back up to normal functionality.

    It seems the battery has to be able to transmit data to the phone to say it’s not overheating or iOS will not allow any current into the battery to recharge it, and the kernel will panic from the null readings and just reboot over and over again.

    jason -

    In my case, the battery connector was attached to the bracket. We just left it connected bracket when we pryed it up.

    Dave Miller -

    Reconnecting the battery connector was a bit difficult in my case. The cable that comes out of the battery was a tiny bit too long, or that I placed the battery a bit too high (i.e., too close to the top of the phone). It took me several frustrating minutes of fiddling with the connector for it to sit right into the socket. I was not sure if that was connected correctly but, alas, the phone came back to life when it was turned back on.

    Tomoharu Eguchi -

    VERY IMPORTANT NOTE: Please READ the reply here by jason.

    It is very easy to knock off or nudge the little pins near the battery socket, see https://guide-images.cdn.ifixit.com/igi/... and https://guide-images.cdn.ifixit.com/igi/....

    Those pins are the data lines to extract battery info: temperature, charge, etc. If you accidentally nudge/knock off them the phone could appear to work normally, even for a few days. But then you will start getting wrong battery reads and then after that it may suffer a reboot loop. If you enter settings > privacy > analytics & improvements and you scroll down you will find panic errors from thermalmonitord that there are missing sensors (TG0B or TGXXX) and you will have to micro solder them. DO NOT NUDGE THEM and double check the socket connector when reconnecting the battery.

    PJM -

  19. EANVBZGXJyqVmVFq
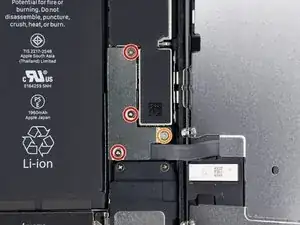
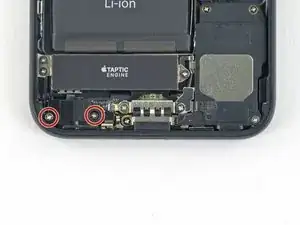
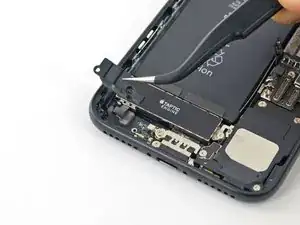
    • Entferne die beiden 1,9 mm Kreuzschlitz Schrauben, die die barometrische Entlüftung am hinteren Gehäuse befestigen.

    The barometric vent seems to have some foam cushioning towards the bottom of the case? does this get damaged via removal I wonder?

    Phil -

    I’m stucked with the right screw, can't get it out. Any ideas?

    Racecar -

    Edit: I’ve lifted the taptic engine without unplugging it. Removing the battery stripes didn't cause any issues.

    Racecar -

  20. 4KWmdocYM1eJoNce
    4KWmdocYM1eJoNce
    BPclKUrXSm5WUkRq
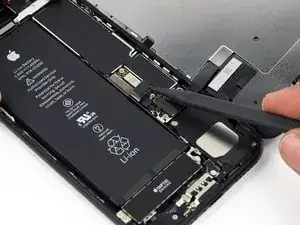
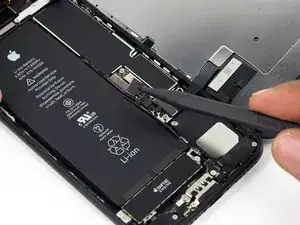
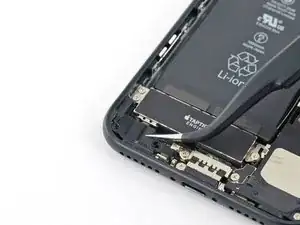
    • Entferne die Entlüftung.

Abschluss

Befolge die Anleitung in umgekehrter Reihenfolge, um das Gerät wieder zusammenzubauen.
Evan Noronha

Mitglied seit: 06/02/15

219164 Reputation

0 Kommentare