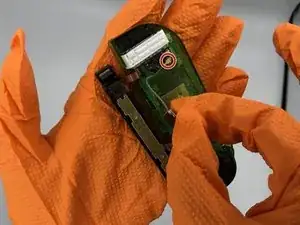
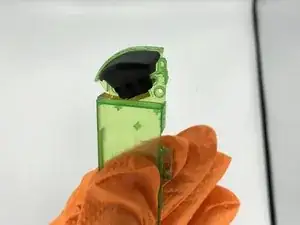
Einleitung

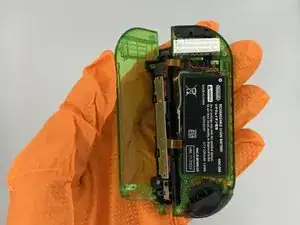
Nach starkem Gebrauch oder übermäßiger Gewaltanwendung kann das Gehäuse des Nintendo Switch Joy-Cons abgenutzt werden oder Risse bekommen. Dadurch kann die Elektronik der Joy-Cons freigelegt werden, wodurch die Gefahr weiterer Schäden besteht. Die Joy-Cons können jedoch auch ohne ein neues Gehäuse funktionsfähig bleiben. Wir empfehlen, das Gehäuse auszutauschen, bevor du ein neues Paar Joy-Cons kaufen musst. Wenn du ein abgenutztes Schaltergehäuse reparieren möchtest, verwende diese Anleitung, um das rechte Joy-Con Gehäuse zu ersetzen.

Beachte, dass die Anleitung für den linken Joy-Con anders funktioniert.

Obwohl der Tausch eines Joy-Con-Gehäuses nur das Abschrauben und Bewegen elektronischer Teile beinhaltet, erfordern einige Schritte Präzision, um kleine Teile wieder anzubringen.

Da die Joy-Cons vom Hauptsystem getrennt sind, musst du deine Switch nicht ausschalten, bevor du das Joy-Con-Gehäuse austauschst.

  1. JG4F4lwVDWd5Nfrr
    • Entferne die 4 Tri-Wing Schrauben auf der Rückseite des Joy-Con.

    • Dies sind die einzigen Tri-Wing Schrauben auf dem Joy-Con. Alle anderen Schrauben erfordern einen Kreuzschlitzschraubendreher.

  2. TY1I2YNADeMd1mva
    • Klappe die hintere Schale auf, um den Akku freizulegen.

  3. QJHUwltO2SmaVCAf
    QJHUwltO2SmaVCAf
    5QfWFYarWySUCpGS
    • Entferne die Schraube, die die Schiene mit der Rückenschale verbindet.

  4. SOenGyoi2MWIVr5h
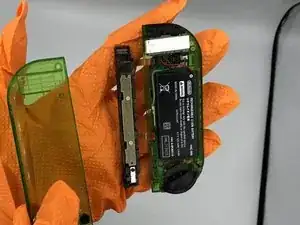
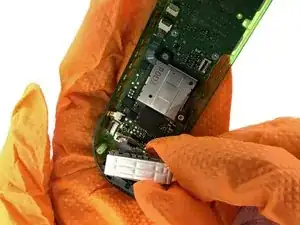
    • Entferne den Akku und trenne ihn von der Hauptplatine ab. Du kannst die Kabel mit einer Pinzette oder mit den Händen von der Hauptplatine abziehen.

    • der Akku lässt sich möglicherweise aufgrund von Klebstoff nur schwer entfernen. Ein Spudger kann helfen, ihn vom Gehäuse zu lösen.

    I messed up the pins for one of the ribbon cables trying to remove the battery connector, be careful with this one, had to order a new motherboard for my joycon

    Milky Manz -

  5. VHaUnOdIfF42TS1j
    VHaUnOdIfF42TS1j
    tqnwFjXCsOBdLJRQ
    • Bevor du den nächsten Schritt durchführst, merke dir den Sitz des Antennenkabels für den korrekten Wiederzusammenbau.

    • Entferne den kleinen Antennenchip (im zweiten Bild) und trenne ihn von der Hauptplatine.

  6. EvLRPHpVIHURmyvV
    • Entferne die 3 Schrauben, mit denen das Akkugehäuse im Gehäuse befestigt ist.

  7. KGJuyPdtStmKHFYY
    KGJuyPdtStmKHFYY
    HJYJvgwhPYZh1IOT
    vyAmGbdeoTv6ssm4
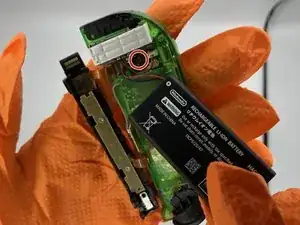
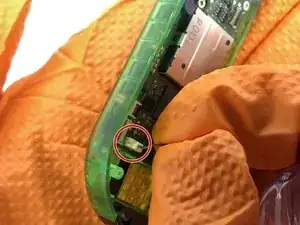
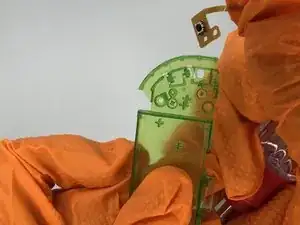
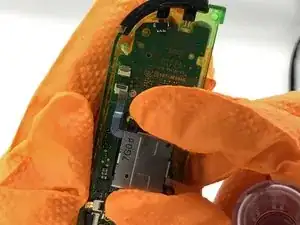
    • Entferne die Flachbandkabel, die die Schiene und das Akkugehäuse mit der Hauptplatine verbinden. Entriegle die Kabel, indem du den Steckverbinder mit einem Spudger nach oben klappst, und dann das Kabel aus dem Steckverbinder herausziehst.

    Gibt es die Platine für die beiden Taster an der Ladeschiene auch als Ersatzteil? Wenn ich der Joy-Con zusammengebaut ist und damit das Flachbandkabel zusammengedrückt wird funktionieren die beiden Taster nicht. Wenn der Joy-Con auseinander gebaut ist und das Kabel langestreckt ist, dann funktionieren die beiden Taster.

    Ich hoffe, dass es am Kabel liegt und nicht am Kontakt auf dem Motherboard.

    Schulte Kippen -

    HEY, BE CAREFUL WITH THOSE RIBBON CABLE CLIPS.

    The clip towards the R/ZR buttons releases from the side the cable plugs in.

    The clip towards the rumble motor releases from _the opposite side_ as the cable.

    Mr. Llama -

    Thank you for this! I was wondering why it wasn’t coming up lol

    pattie -

    Um… what happens if you accidentally push on the gray part of the one near the rumble motor?

    Elise Glover -

    I found out… it breaks the ability to dock your controller to your switch, you will only be able to play wirelessly and won’t be able to charge your controller. Don’t be like me.

    el15ecg -

  8. EtBWeKrgQG35HUbd
    EtBWeKrgQG35HUbd
    j45DbrWC3jBfTO1W
    fmUuZVJYNpOQvllF
    • Entferne den Vibrationsmotor, indem du den weißen 2-poligen Stecker abziehst.

    WARNING

    do not attempt to remove the connector if it can be avoided- it is held in place by two incredibly thin metal strips that can easily bend and warp, making it impossible to put the connector back into place.

    The Nones -

  9. wo6kIsCpKC4UFLE4
    wo6kIsCpKC4UFLE4
    GNi2dmBJyN3AYi6O
    Myyd2vSwcij4sdFy
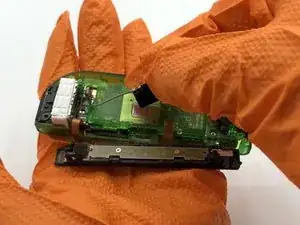
    • Entferne den schwarzen ZR-Knopf aus dem Akkugehäuse.

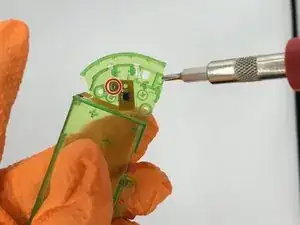
    • Entferne den Knopfsensor, indem du ihn aus dem Akkugehäuse herausschraubst.

  10. nSxVaFQPN5cJK6H1
    nSxVaFQPN5cJK6H1
    OXnTeHtUENTrOXxa
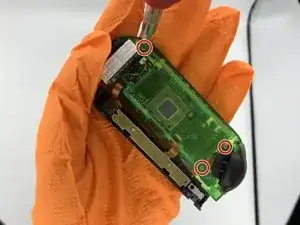
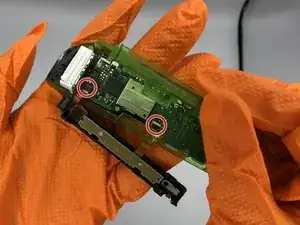
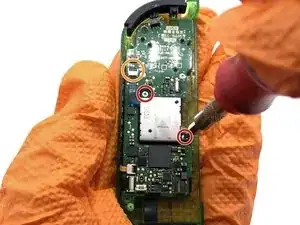
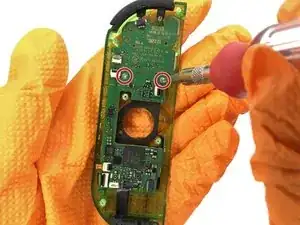
    • Entfern die beiden Kreuzschlitzschrauben, mit denen der Joystick an der Hauptplatine befestigt ist.

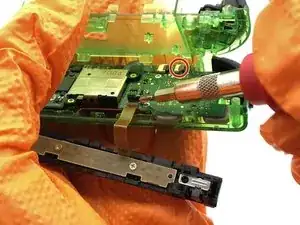
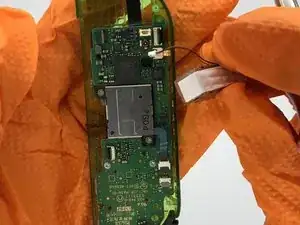
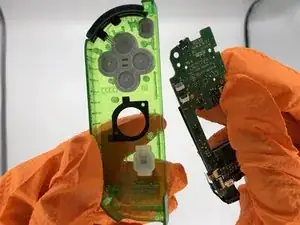
    • Ziehe das Flachbandkabel des Joysticks von der Hauptplatine ab.

    The joystick ribbon cable releases from the side _opposite_ where the cable plugins in.

    Mr. Llama -

  11. OoUDypUeFgIrmtSw
    OoUDypUeFgIrmtSw
    5ENT6JNDQCEIbxFW
    • Entferne die beiden Schrauben, die die Hauptplatine mit dem Gehäuse verankern.

    Notable omission: be sure to disconnect the Ribbon cables near the bottom left (directly next to the rumble motor connector). You will have to swap the IR sensor and whatever the gold ribbon cable goes to/is (apologies, I don’t really know). Both are loosely held down with adhesive so just do that when you swap the buttons in the next step. When reconnecting the ribbon cables to the motherboard, I found it MUCH easier to put the ribbon cables back in place before screwing in the motherboard. I am amateur at this (only have fixed a couple iphones and few sets of joycons) but I found the angle to be particularly challenging if the motherboard was screwed in.

    Garrett Catlin -

    Also omitted: be sure to transfer the NFC antenna. It’s the black rectangle that surrounds the joystick that connects to the motherboard with a light brown cable. It’s lightly held in with adhesive, so a little prying should get it loose.

    Mr. Llama -

  12. ua3gxTkkm5pGYUGI
    • Übertrage alle Knöpfe auf das Ersatzgehäuse.

    • Wenn irgendwelche Silikon-Knopfabdeckungen fehlen, könnten sie noch auf der Rückseite der Hauptplatine kleben.

Abschluss

Um dein Gerät wieder zusammenzubauen, folge diesen Anweisungen in umgekehrter Reihenfolge.

Matthew Cheney

Mitglied seit: 16/01/20

935 Reputation

2 Kommentare

Not quite as thorough as the other Joy-con tear down but always a handy thing to have, going by the pictures it gave me all the information I needed personally concerning the screws, so I was able to strip the whole controller down and swap it into another shell. It is straight forward once you get in to it and have to give the author their much deserved credit for posting this up!

Lee Whittaker -

Very good detailed guide, only thing I would change is I’d probably take the rumble motor out right after of even before the battery. It’s pretty easy to remove, you can do it at anytime after opening, and it gets the wires out of the way to make other parts easier.

Dominic Garcia -