Einleitung

  1. QFn52eG1bQ3nGQN2
    QFn52eG1bQ3nGQN2
    RQjE6endr1j6ABJb
    • Make sure you disconnect the batteries completely before starting! Disconnect the solar charger, then the node battery and finally, the autosampler battery.

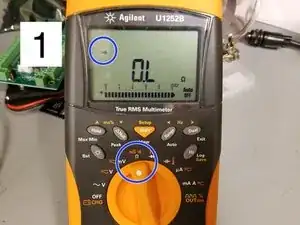
    • 1. Set the multimeter to the setting with the noise symbol (blue circles). On our version, turn dial to the noise symbol then press the setup button to display the noise symbol on the screen.

    • Your multimeter setup may be different depending on the brand/model.

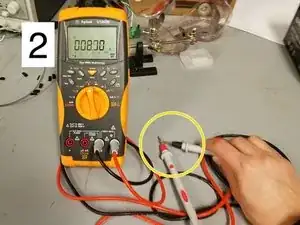
    • 2. To make sure you are on the noise test setting. Touch the red and black lead together (yellow circle). You should hear a noise.

  2. evK4mujlMVSuKBSy
    evK4mujlMVSuKBSy
    LqGtsQMBPAQYVVC5
    kemjyFrJHTjCfRQ1
    • Be sure not to cross the leads when testing a wire so as to not short the wire!

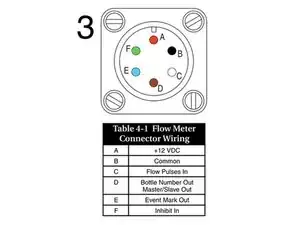
    • 3. The following color chart shows which wire is in which autosampler connector pin.

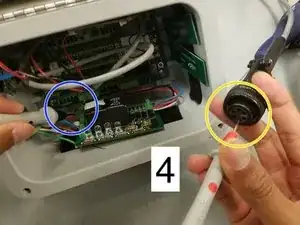
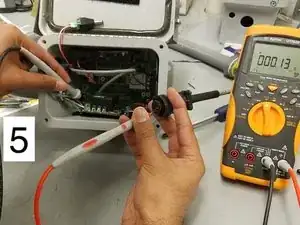
    • 4. Place one lead in one of the autosampler connector holes (yellow circle).

    • It does not matter which lead is put on either end.

    • Place the other lead on the other end of the corresponding colored wire (blue circle). It can be either on the wire itself of the metal of receptacle holding the wire.

    • If the connection is good, you will hear a sound from the multimeter.

    • 5. Continue doing this for all of the wires.

    • Note, the green wire is not used.

Brooke Mason

Mitglied seit: 29/05/19

2928 Reputation

0 Kommentare