Einleitung

The screen assembly is located underneath all of the other parts of the device. To access it, you will have to remove these pieces first. Make sure to keep track of all five screws and any connected parts.

Werkzeuge

  1. HVqX2Q5nmUjrcBEa
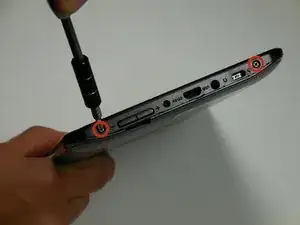
    • Remove the two 2cm screws on the bottom using the PH0 Phillips head screw driver.

  2. Qfh5iVcq6QbLdQEI
    Qfh5iVcq6QbLdQEI
    AfEUSfn36ugSyy2U
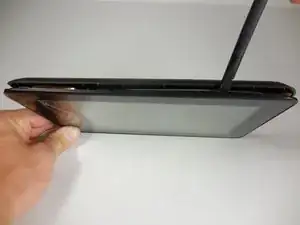
    • Pry open back piece with plastic spudger.

    • Remove the back piece of the device.

    • The back panel may be difficult to pry off, use gentle force.

  3. QHp1GtnImOcguQRs
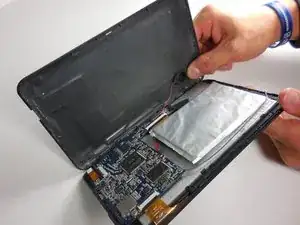
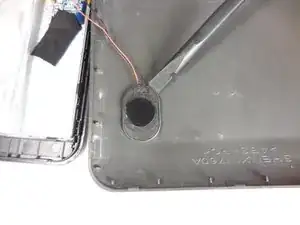
    • Disconnect speaker (which is attached by black and red wires) from back piece using plastic spudger.

  4. LTCOnSeHHD2iRykB
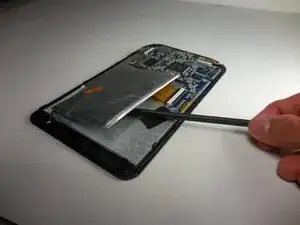
    • Gently pry the battery off of the device with the plastic spudger.

    • There is a large amount of glue holding the battery to the device.

    • Do not puncture the battery with the plastic spudger.

  5. LEcSfRLO2HB2O63Z
    LEcSfRLO2HB2O63Z
    sKwOBpDmCCqDBPs6
    b2cnFuaZLXPXfOYQ
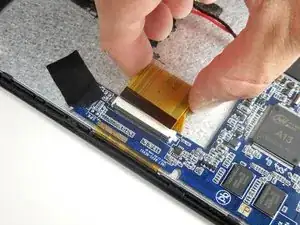
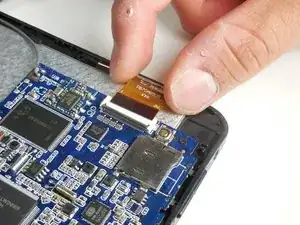
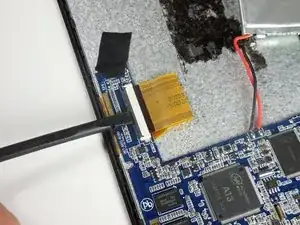
    • Disconnect the two larger of the three ZIF cables by prying open the flap with a plastic spudger and gently removing the cable.

  6. LsBVaYXmNrfYGthN
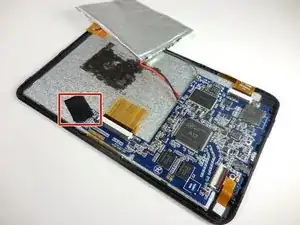
    • Peel off the black tape from the corner of the motherboard (indicated by the blue surface of the device)

  7. jWoNqZQZKbVUolDE
    jWoNqZQZKbVUolDE
    vIIBRKN2cSnlRIiR
    nfLajSLAOSYtUoje
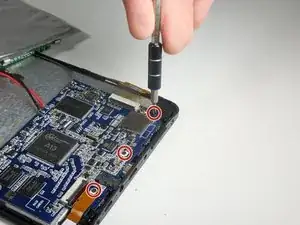
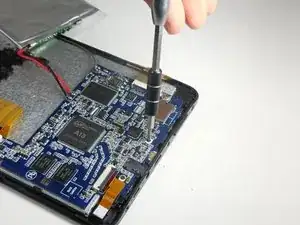
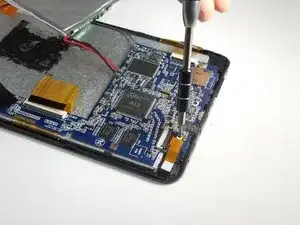
    • Use PH000 Phillips head screw driver to remove the three screws that connect the motherboard to the front panel.

    • When removing the motherboard be cautious of the gray wire connected from motherboard to actual device.

  8. HSlGjYJF6CTOqKVP
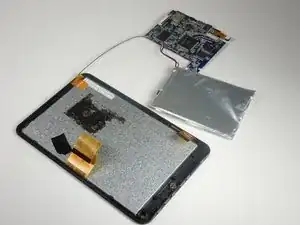
    • Remove motherboard and battery and set aside.

  9. Dpap6AeqjQByNF4N
    Dpap6AeqjQByNF4N
    F1mXUoOIjm13wLYh
    MhRSLuUnudTlpvQl
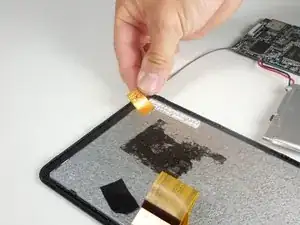
    • Remove the small orange tape attached with a gray wire from the top corner of the device. This is the antenna.

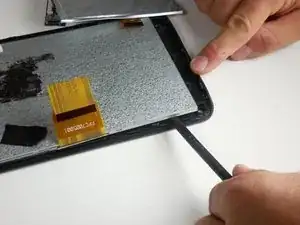
    • Use plastic spudger around silver lining within the device to pry the screen off.

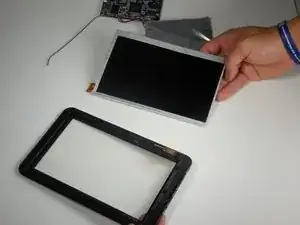
    • The metal screen assembly is two pieces. When removing the screen, make sure to pry off both pieces at once.

  10. 1pSesqPFvSQ6fEX1
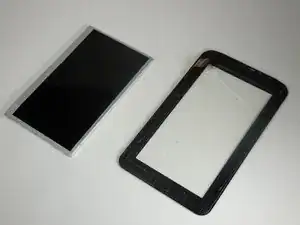
    • Replace broken screen and reverse steps to re-assemble device.

Abschluss

To reassemble your device, follow these instructions in reverse order.
Michael

Mitglied seit: 11/03/15

568 Reputation

0 Kommentare