Einleitung
This guide will walk you through the replacement of the rear and front facing camera of the Azpen A740 device. Keep in mind that there is no way to only replace one of the cameras, they both must be replaced together. This guide may be useful if your camera may have cracked due to a fall, or if your camera may just have stopped working and you are seeing a black screen when you try to take a picture. Before attempting to replace the camera, it is recommended that you take a look at the trouble shootings steps here to ensure that it must be replaced and it is not another issue. Be aware that when dealing with any device that has a battery attached to it, one must be careful to not puncture the battery or have it under extreme heat since it may explode. Be sure to power off your tablet before beginning the repair and disconnect from the power adapter.
Werkzeuge
-
-
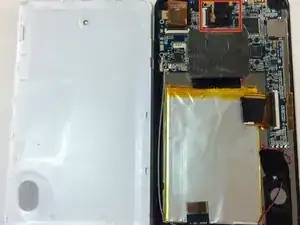
You should see the motherboard, the speaker, and the battery.
-
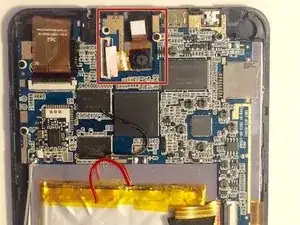
The camera is surrounded by the red square.
-
-
-
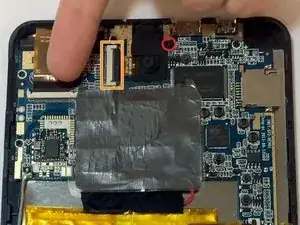
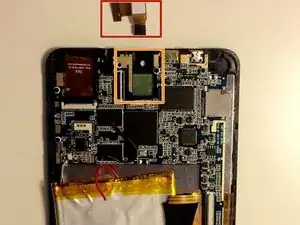
The camera is located at the top of the device and is attached by one screw with 3.75mm which is inside of the red circle. And one clip which is inside of the orange rectangle.
-
First remove the screw from the plastic connecting the camera to the motherboard.
-
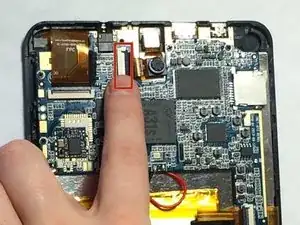
The ZIF connector attaching the camera to the motherboard.
-
-
-
With the plastic now removed from the camera, the user is able to unclip the camera from the motherboard by pulling up the black clip and sliding out the camera.
-
-
-
This is what the camera looks like once completely removed from the tablet.
-
This is where the camera was previously, it is the place where the new camera must be placed.
-
To reassemble your device, follow these instructions in reverse order.
