Einleitung

  1. dRV4XfDbL6eOnsgh
    dRV4XfDbL6eOnsgh
    BSqODd4YvlRNfuJO
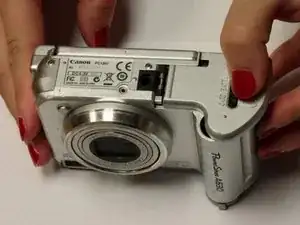
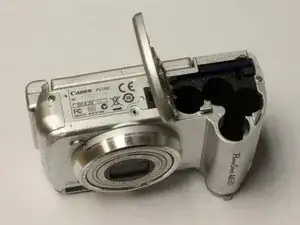
    • Open the battery door by sliding the tab on the battery door while pushing the battery door away from the camera.

    • Remove batteries.

  2. pyeARsrcEm6DCJfJ
    pyeARsrcEm6DCJfJ
    PrQwsBvsNWWvMZZE
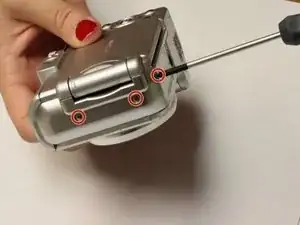
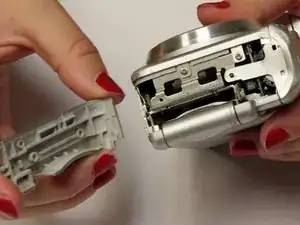
    • Remove the three indicated .2mm screws using a Phillips #00 screwdriver.

    • Gently pull off side-panel to remove it.

  3. NQbOhLKK34ZtEB5W
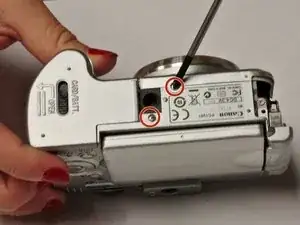
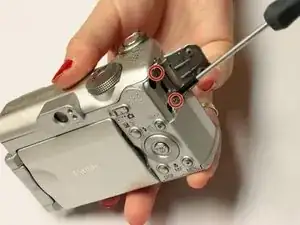
    • Remove the two indicated .2mm screws using a Phillips #00 screwdriver.

  4. Q6rxNBdRBu6YUYKT
    Q6rxNBdRBu6YUYKT
    i2KusAGuDNngItLK
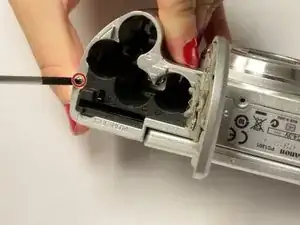
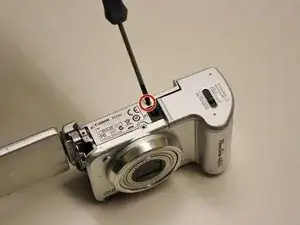
    • Remove the indicated .2mm screw using a Phillips #00 screwdriver.

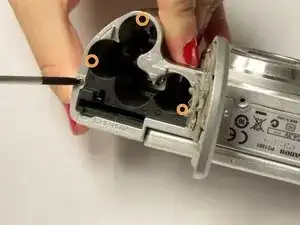
    • Remove the three .2mm screws located on the internal side of the top panel within the battery chamber using a Phillips #00 screwdriver.

  5. bgO2mIMbxSSTnFDV
    bgO2mIMbxSSTnFDV
    DyJ4Mj1Oufp3LIad
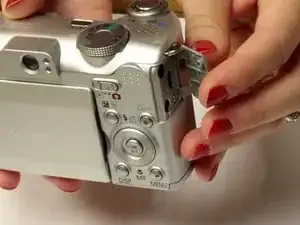
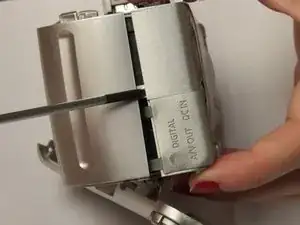
    • Open 'DIGITAL A/V OUT' door on camera.

    • Remove the two indicated .2mm screws using a Phillips #00 screwdriver.

  6. sWJIlYhseTWrKFTe
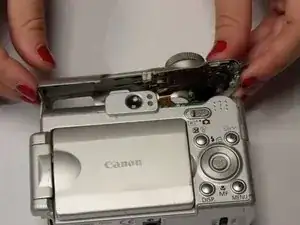
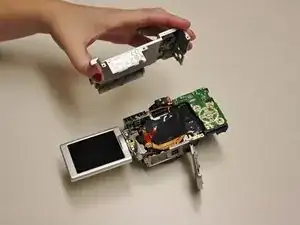
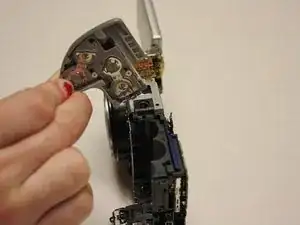
    • Grip the sides of the top panel and gently pull to separate the top panel from the camera body.

    • The top panel will not completely detach.

  7. fS3MP5FRcGeQV2Cm
    fS3MP5FRcGeQV2Cm
    WNJ6L1meYLgWtLKx
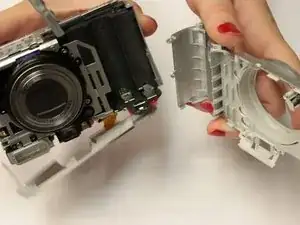
    • Gently pull the front and back panels apart, and use a Phillips #00 screwdriver to remove the screw connecting the panels.

    • Gripping the top and bottom, gently pull the front panel away from the camera body to remove it.

    There are 2 screws at the other side that need to be removed before you can seperate the front panel

    Nick Denolf -

  8. faCpryRDKu4QLlZ3
    faCpryRDKu4QLlZ3
    1PvNOOACGBvJKloA
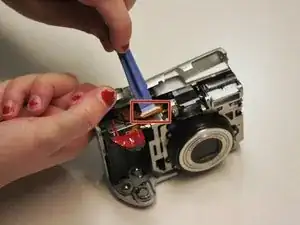
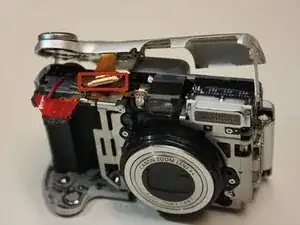
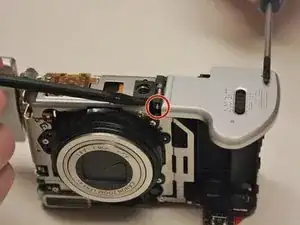
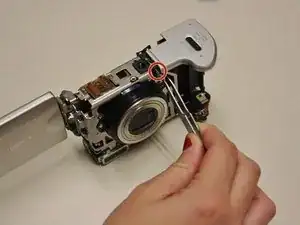
    • Use the spudger to gently pull back the retaining clip and pull the ribbon out.

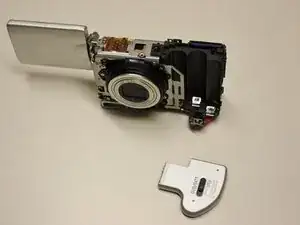
    • The top panel should now be completely detached from the camera.

    • Applying too much force to the spudger may damage the retaining clip.

    FAIL… slide the black element under the ribbon.

    marekzy -

  9. qAHkHJiyD52jvNUw
    qAHkHJiyD52jvNUw
    i3VknRNKcQrYDQ4R
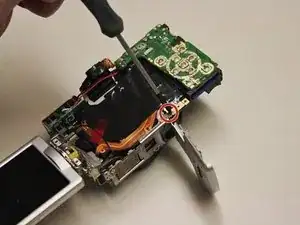
    • Remove .2 mm screw using a #00 Philips screwdriver.

    • Gently pry off back panel to remove it.

  10. DpWhAKqTcPyoCTDq
    • Remover .2 mm screw using a #00 Philips screwdriver.

  11. mFFnerIkZDFGMmNV
    mFFnerIkZDFGMmNV
    qxnrgXsWAehAUjax
    • Using tweezers, gently pull remove the small rod in the battery door hinge.

  12. 2r5lePhyAQuYjMgP
    2r5lePhyAQuYjMgP
    IFVkLHq1lSN4nZ61
    • Gently pull up on the battery door to remove it.

Abschluss

To reassemble your device, follow these instructions in reverse order.
Alicia Burns

Mitglied seit: 13/10/14

550 Reputation

0 Kommentare