Einleitung

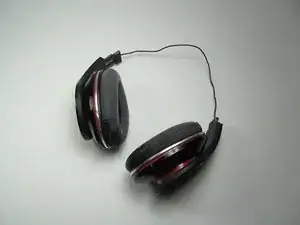
Use this guide to take apart your First Generation Beats Studios and replace the speaker.

  1. YiJCcPbLpyWQ6KDH
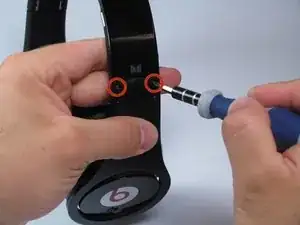
    • Using the T5 Torx screwdriver, remove the black screws on both sides of the outside of the headband.

    • 4 (2 per side) Torx type T5, 3.5mm long screws.

    not necessary !!

    John Coops -

  2. FwBmYm3akr6x3HZk
    FwBmYm3akr6x3HZk
    QcYr6h4mORKXKKHI
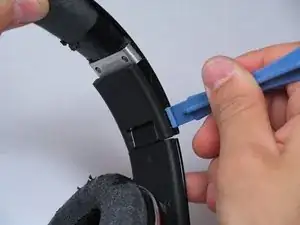
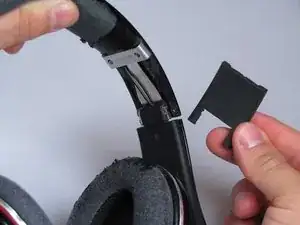
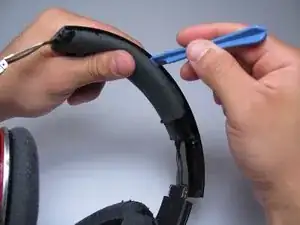
    • Use the plastic opening tool to gently pry the black plastic hinge piece directly away from the headband as shown.

    not necessary !!

    John Coops -

    where can i find this piece?

    alex -

  3. e3HvqEdtGKYwkpJX
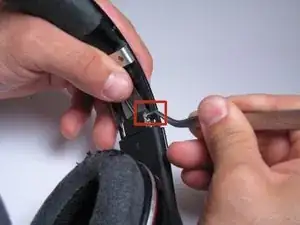
    • Remove the small metal hinges from their housings. There are a total of 4 hinges, two per side of the headphones.

    • The hinge pins may slide out upon removal of the black hinge piece from the previous step. Be careful not to lose the hinge pins.

    i need to buy one hinge pin for my beats by dre 1.0 studio

    mrfuentescisneros -

    This is DEFINITELY NOT necessary !

    John Coops -

  4. D2lsULLBDVAXyRCt
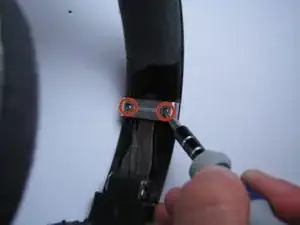
    • Using a T5 Torx screwdriver, remove the silver screws from the silver segment of the headband.

    • 4 (2 per side) Torx type T5, 4.0mm long screws.

    This step is DEFINITELY NOT necessary !

    John Coops -

  5. Fo4fSlDFtqOseWsT
    Fo4fSlDFtqOseWsT
    uRcxWyL6GlABLEQJ
    5APPP2iuttRQHrEV
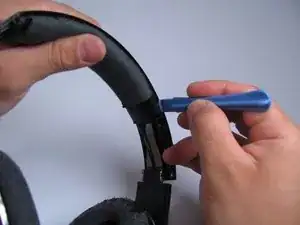
    • Using the plastic opening tool, gently pry the headband cushion directly away from the plastic portion of the headband as shown. Pry the plastic portion a small amount and then move the opening tool sideways along on the headband. Repeat on both sides until the cushion separates from the top plastic part of the headband.

    This step is DEFINITELY NOT necessary !

    John Coops -

  6. YiBaTGtb4YbR4LJH
    YiBaTGtb4YbR4LJH
    sNjLQGY1AkPLlp6F
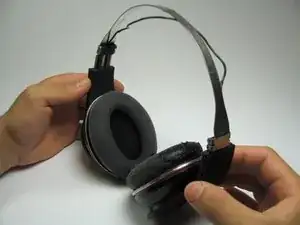
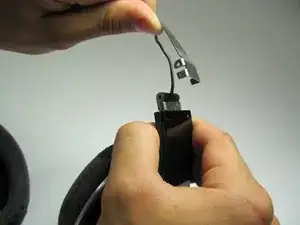
    • Carefully remove the metal band from each of the hinge housings on each side. These should come off quite easily, provided that you have removed the hinges as instructed in step 3.

    • Congratulations, you have completely removed the headband! This will allow for ease of accessibility to the speakers should you choose to delve further into the depths of your headphones.

    • The black wire connecting the two speakers is somewhat fragile! Check that it isn't frayed. If it is frayed, consider repairing it with some electrical tape, splicing it, or replacing it.

    This step is DEFINITELY NOT necessary !

    John Coops -

  7. FD6WVCWtiGTSVod3
    FD6WVCWtiGTSVod3
    hXoKJ2WNQswNxwtg
    2nrlR1CsapcZbly1
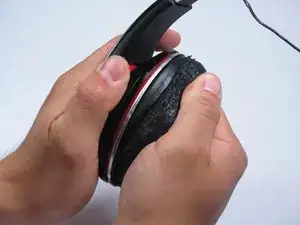
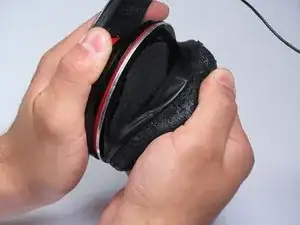
    • Pinch the ear cushion between your thumb and forefinger.

    • Be very careful when pulling off the ear cushion, as the material holding the cushion onto the plastic ring can rip easily.

    • Carefully pull the cushion directly away from the earpiece.

    • The cushion will have a thin piece of foam inside of it that may fall out upon removal. Make sure to save this for reassembly.

    • Repeat for the other ear cushion.

    i have torn my cuson inside part that helps to hold the out soft part. and i lost it how to do it

    imbd Indian medicine bd -

  8. cGB6AqP1qXsmU2p3
    cGB6AqP1qXsmU2p3
    lPwBaejgQZVLZsuL
    K4xGxIM3vSLtLfUo
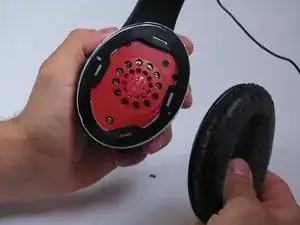
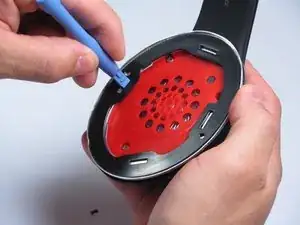
    • Use the plastic opening tool to remove the black ring from the speaker. This will allow you to access the screws on the metal ring.

    • Congratulations, you now have access to the rest of the speaker!

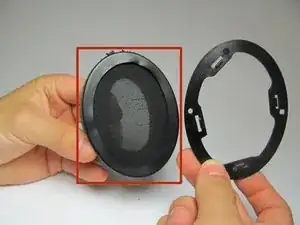
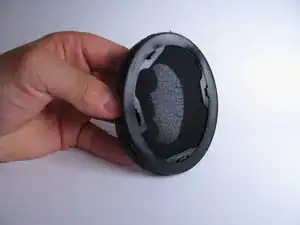
    • For reassembly, the black ring cannot snap back into the speaker the way it was disassembled. It must first go inside the black lip of the ear cushion. The black lip is located on the back side of the ear cushion. Please refer to the last two pictures on this step.

    • The black lip is located on the back side of the ear cushion.

    Hi does this work for the beats studio wireless?

    Jack -

    I bought the parts two (2) ear cushions and a head band replacement on eBay for about $10 USD

    the process described here works well if the ear pad is old and you do not mind destroying the old one to gain access - however you will destroy the ear cushion pad assembly to separate it from the headphones - so be prepared to buy replacement cushion assemblies - when you disassemble you cannot re-install the original cushions

    the disassembly process tears the plastic cover that goes around the ear cushion plastic ring

    Legacy Finance Group -

  9. l44GA41dHpqKkdqJ
    l44GA41dHpqKkdqJ
    qKejwQHQHyJMGJZx
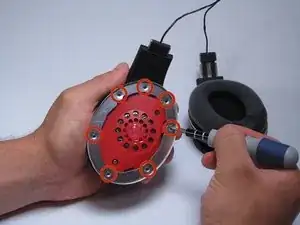
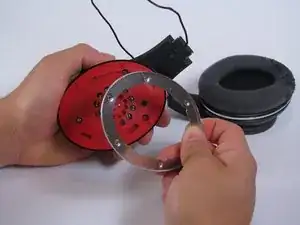
    • Use a 00 Phillips head screwdriver to remove the 3.9 mm Phillips screws holding the metal ring in place. There should be 7 in each earpiece.

    • Make sure the screws you've already removed don't fall into the speaker itself (the circular arrangement of holes on the red piece directly below the metal ring). The speaker itself is magnetic, so getting screws out can be tricky. You should have tweezers available in case a screw or other piece of metal does fall into the speaker.

    • Once all the screws are removed, the metal ring can be removed by hand.

  10. GlZUuNr2HR3BXhLV
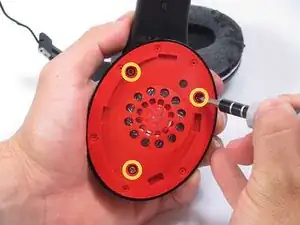
    • Use a 0 Phillips head screwdriver to remove the 8 mm Phillips screws holding the speaker assembly in place. There should be 3 screws in each earpiece.

    • When all screws have been removed, the speaker assembly can be moved by hand. Remove the speaker carefully since the wires connect to it on the backside.

    • Again, make sure no screws fall into the speaker itself.

  11. rLlHZYwAUXSPfIxp
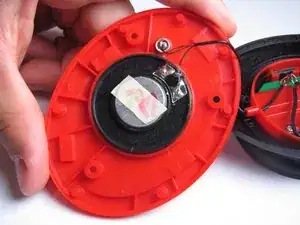
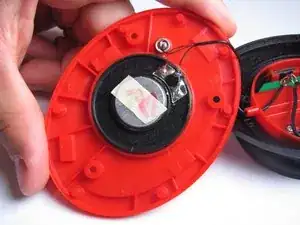
    • Flipping the speaker assembly over reveals the speaker wire connections to the speaker itself.

    • Check that the wire is intact and not frayed anywhere.

    • If necessary, the wires can be de-soldered to disconnect and replace the speaker assembly.

  12. LOVLkpQdgBpsVAjV
    LOVLkpQdgBpsVAjV
    koNQorEOgKQlD3Oy
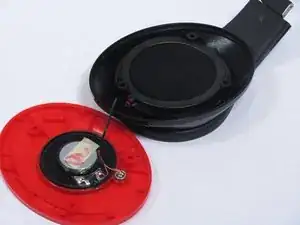
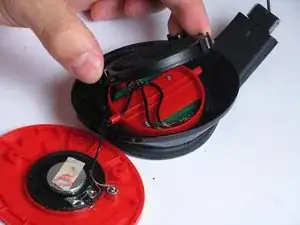
    • If the black part directly beneath the speaker assembly is broken and needs to be replaced, it can be easily removed by hand.

    • If replacing the speaker on the side of the headphones with the power button (as shown in photos), upon reassembly, make sure the foam is inserted as shown in the first picture. If it is forgotten or improperly seated, the speaker could make undesirable vibrations.

    What is that little black thing right beneath the speaker that’s coloured black and red and also connected by wires?

    Robertas Daunoravicius -

Abschluss

To reassemble your device, follow these instructions in reverse order.

Clay Jacobs

Mitglied seit: 14/04/14

463 Reputation

5 Kommentare

What are the green and gold wires beneath the speaker?

Gastani -

where do you find the replacement parts for what they really cost? not what beats by dre is trying to charge?

cory bratcher -

where can I buy the actual speaker that goes in the headphone

Michael RICHARDSON -

where can I buy the speakers for the Beats Studio headphones
Michael RICHARDSON -

where can I buy the actual speakers for the Beats Studio headphones
Michael RICHARDSON -