Einleitung
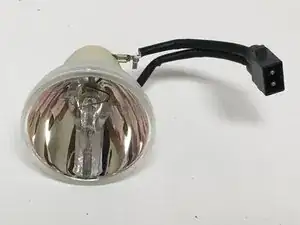
Projector lamp failure is most often due to failure with the bulb such as cracking or worse, the bulb exploding. Replacement lamps are more commonly found on the market, but naked projector bulbs are also available. Since upkeep with the lamp and bulb are necessary for producing the best image quality (not to mention safety), it is important to have these parts periodically checked and replaced. This guide shows how to properly replace the projector's bulb.
Werkzeuge
-
-
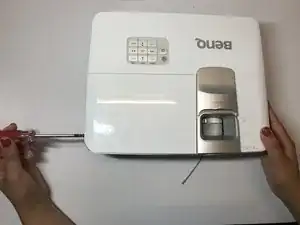
Loosen the 2.5 mm Phillips #1 screw that holds the top assembly in place using a Philips #1 (PH1) screwdriver. This will enable you to lift and slide off the top cover.
-
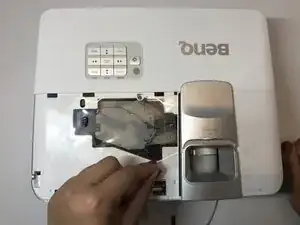
Fully remove the top cover in order to get to the lamp housing.
-
-
-
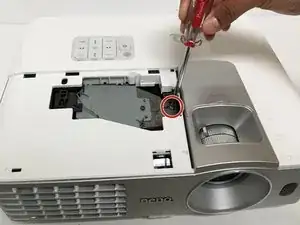
Using a Phillips #1 (PH1) screwdriver, loosen and remove the single 2.5 mm Phillips #1 screw that secures the lamp housing to the projector.
-
-
-
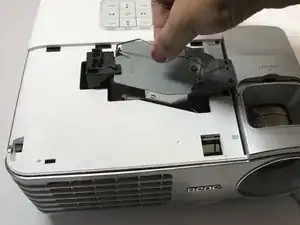
Remove the lamp from the projector by pulling on the lamp handle.
-
Apply more force on the side opposite of the newly removed screw as you pull the lamp out.
-
-
-
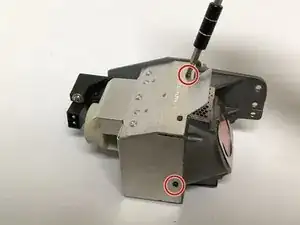
Using a Philips #0 (PH0) screwdriver, remove the two screws holding the metal case of the lamp housing.
-
-
-
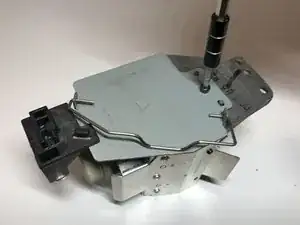
Using a 2.5mm Hex key, remove the top portion that contains the handle. This portion is also attached to the bulb housing.
-
-
-
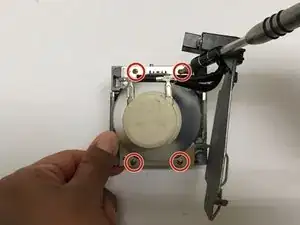
With a Philips #0 (PH0) screwdriver, remove the four screws that secure the bulb to the housing unit.
-
-
-
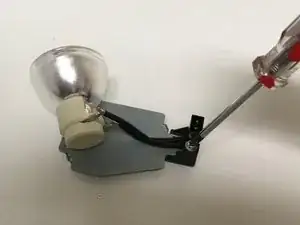
Using a Philips#1 (PH1) screwdriver, remove the 2.5 mm Phillips #1 screw that secures the wires to the detach bulb.
-
To reassemble your device, follow these instructions in reverse order.
2 Kommentare
Hey, Thanks for sharing the steps setting a Project Bulb Replacement.
we recently replaced Ht 1075 bulb after the main bulb broke. the projector runs for 10 min and them shuts off due to overheating. previously that was not the case. what could be the issue and how we can isolate and fix the issue..
