Einleitung
This guide will walk you through the steps to replace a faulty battery pack in a Black and Decker LDX172C cordless drill. Steps one through three walk you through the disassembly process and step four walks you through battery removal and replacement. Tools necessary for this operation include a Philips screw driver set and a soldering work station. Approximate repair time is 40 minutes.
Werkzeuge
-
-
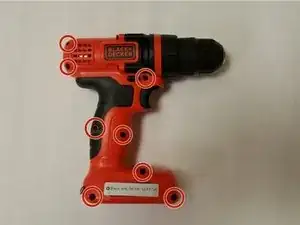
Place the drill on the work surface with the chuck facing downward. Locate and remove the two #2 X 10mm Phillips screws located right of the motor.
-
-
-
Rotate the drill to it's left side - the chuck should be facing rightward. Locate and remove the eight #2 X 5mm Phillips fasteners from the body of the drill.
-
-
-
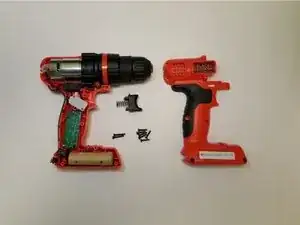
Carefully remove the right half of the body from the drill.
-
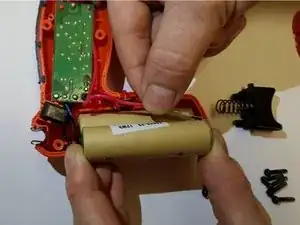
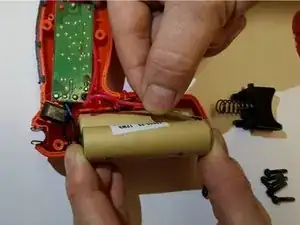
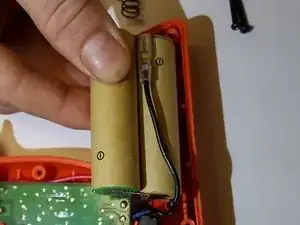
Locate the 18650-2 Lithium Ion battery in the base of the drill.
-
-
-
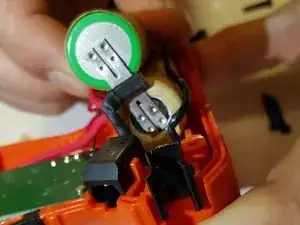
The positive and negative wires are connected to the battery via solderless connectors. To remove the battery, simply remove the wires by pulling the connectors apart. There are 3 connectors total.
-
Exchange the old battery for the new one.
-
Repeat steps in reverse to reassemble.
-
To reassemble your device, follow these instructions in reverse order.
4 Kommentare
I’m finding 18650 batteries. Is 18650-2 just 2 of the 18650’s or is it a preconnected set of 2?
I was able to pull the prongs off of the connectors, but the connectors don’t come off of the batteries, am I supposed to remove them? Are these supposed to be used/soldered to the new batteries?
What is the mAh capacity on the existing batteries, each of them? and would any mAh above that work?
I see the instructions mention soldering, but no mention in the steps of when soldering would be necessary. I’m assuming in attaching the connectors to the batteries?
Thanks,
Nav -
thanks . it helped a lot.
one comment ,i had to take out 10 fastners instead of 8 as mentioned .the extra two are those which connect red part to black part.
I have to travel overseas with the drill and need to remove the Lithium batteries each time before checking the drill into checked luggage. Is there an easy way to remove battery to carry on board?
Hi Jane,
Unfortunately, this drill is designed without an easy way to remove the batteries. As a last resort, you can try cutting out a hole in the plastic enclosure in order to access the batteries easier.
