Einleitung
Es kann sehr frustrierend sein, wenn eine Taste nicht mehr richtig funktioniert. Diese Anleitung kann dir vielleicht helfen.
Werkzeuge
Ersatzteile
-
-
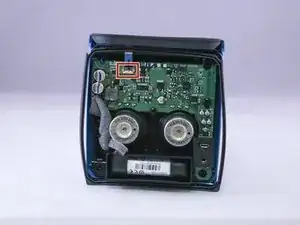
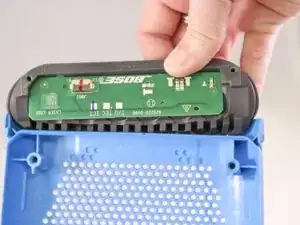
Klappe den Sicherungsbügel am ZIF-Anschluss des Tastaturkabels hoch.
-
Ziehe das Kabel gerade aus dem Anschluss heraus.
-
-
-
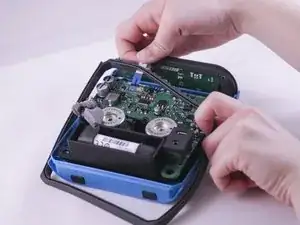
Ziehe das Flachbandkabel sorgfältig durch die Gummidichtung, welche um das Gehäuse herum verläuft.
-
Um dein Gerät wieder zusammenbauen folge den Schritten ab Schritt sechs in umgekehrter Reihenfolge.
3 Kommentare
Great guide, and I think I can manage this. But, where can I get the Replacement Bose SoundLink Color Button Pad??
Fred
I’m wondering the same thing. Where do you get the replacement Bose Soundlink Color button pad? We just bought a new charger because we thought that was the problem. But that didn’t make any difference. We still can’t turn the speaker on!
I got the bose soundlink color button panel only with bose India authorised service center in South Mumbai . That cost me in Indian RS. 2360. Including approx $35 USD.
nrirehan -
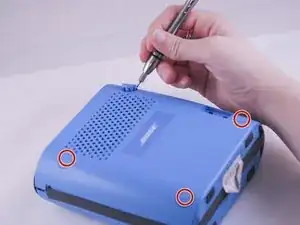
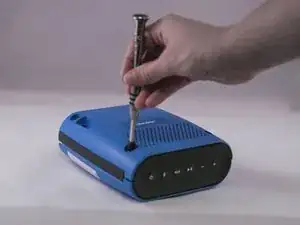
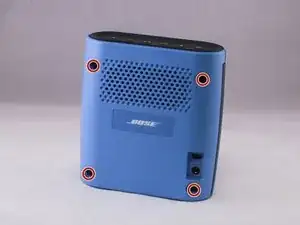

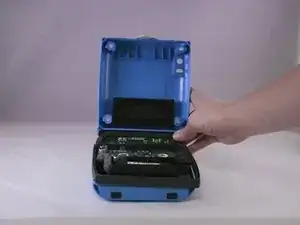
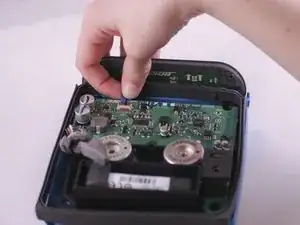
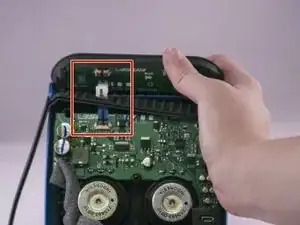

hi i just finished prying apart those round buttons. it is very important to know if you dont want to mangle the button trying to pry it loose. if your looking down at the four buttons the inside part of all the four round circles is where you put a thin small tool, that is where the opening is to eventually pull up the whole thing without having to mangle the circle. so if your looking at the four circles the opening will be in the part of circle where all rounds face each other inward i hope this helps
art -
Note that the torx plus is a 5 star tool, and was the size 15 for me. Make sure you don't purchase the common 6 sided star tool.
Mark -
Knowing you have to replace battery, why are the %#*@ things glued on? Just sayin’
Toni -
Knowing battery needs to be replaced, why are these things glued??
Toni -
Not a tool to remove! Why’re they glued in the first place?
Toni -
I’ve ruined perfectly good tools!
Toni -
This has become stupid! Posting comments that never appear!
Toni -
Should be effing impossible!
Toni -
Sorry, just now found them! Honestly, this can become impossible!
Toni -
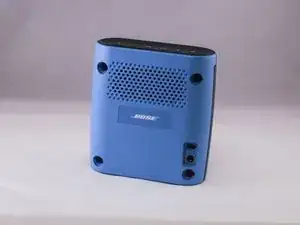
I found it not possible to remove the screw caps cleanly, without messing up the case around the caps. Here’s a new method. This method damages the screw caps, but it keeps the case from getting mangled.
1. Use a spring-loaded center punch to emboss a small dimple in the center of each screw cap.
2. Drill a hole (using a 1/8th-inch bit) in each cap, using the aforementioned dimple to center the bit.
3. Use a small screwdriver shaft to pry out each screw cap, working each cap gently up and out, in a circular motion.
NOTE: The prying action (not to mention the hole you just drilled) will damage the screw caps enough that you probably will end up just tossing them. They serve no functional purpose other than to make replacing the battery more challenging. (Thanks Bose!)
If you do elect to re-install the screw caps, note that they’re keyed uniquely (in pairs). They are not interchangeable.
I tossed mine.
Riccardo -
I used a similar method, however, I found a small screw to fit the hole, screwed it in place, I could then grab the upper part of the screw around the head area with a pair of pliers and pull the plugs out with no problem. Take note of the 5 sided torx bit. Not the standard 6 sided ones.
timjamie -
I also just filled a small hole in them and used a scre to yank them out. Tossed caps in garbage. I’ve now purchased multiple torx tools and still don’t have the right one. Trying again….
Craig Stout -
There is no such animal as a 1.8 cm Torx plus bit. A great site made poor with misleading information. Boo hoo
phpeh -
I’m also struggling to get the right tool, but now see it’s a 5 sided Torx size 15. Not the standard 6 sided Torx that I now have a few of.
Craig Stout -
It says: “1.8 cm LONG …” That’s actually not talking about the torx head size but rather the screw shaft. Just saying…
Jeremy Cotter -
These are indeed 5-sided Torx Security, size 15; however the shaft of my multibit seems too fat to fit in the plastic canal.
Which multibit (precision?) screwdriver are you guys using? The canal seems to be just 8mm wide.
Yklamin -
This set worked just fine for me : )
Yakamoz 2 Set of 7Pcs 1/4" Hex Shank Magnetic 5 Point Security Star Torx Screwdriver Bits Set | T10-T40, 2-Inch Length
https://www.amazon.com/gp/product/B07T9S...
Matt Monsour -
Yep, removal of the plugs is messy. Obviously, BOSE intended these speakers to be a throwaway! There is a “sweet spot” on the plugs where I carefully hammered a very thin screwdriver blade along the edge of the plug until the screwdriver plunged further down along the side of the plug. At that point, I could pry the plug out. There was a little damage to the case at the edge of the plug hole, and the plugs were damaged enough that I would throw them away. I might consider putting some silicone gel in the holes where the plugs used to be. Next time, pulling out the silicone has got to be easier than pulling these !@#$%^&* plugs!
Bryant Hozempa -
! WICHTIG! Deutscher Kommentar unten.
So Yeah the plugs are a nightmare, I dont know if the warning is the same but in german it says: Use a plastic tool if possible. Dont. Simply because its not possible, its a tight fit of a plug, glued at the bottom.
Same as some others here i used a screwdriver that is as thin as possible and as thick as needed for it not to bend or break.
Obviously this will leave marks on the chassis. But i dont think i they designed it as a throw away product. It is waterproof afterall and i had mine repaired when there was still guarantee. I suppose they have some industrial vacuum tool and use new plugs everytime.
DIE BESCHREIBUNG IST AUF MEIN GERÄT NICHT ZUTREFFEND!
Ich weiß nicht ob es Unterschiede in den Geräten gibt, aber bei diesem kann ich sagen: aufgrund des Klebers kann man Plastikwerkzeuge vergessen und es wird Schäden geben. Da mein Gerät nicht lädt und lange keine Garantie mehr hat kann mir das persönlich egal sein. Nur finde ich die Beschreibung irreführend.
Niero -
To get these caps out I had to drill through them, and than pull them out.
Before that I trird to pull these caps with little flat screw drivers but I ended broking 2 screw drivers
Tamir Chartarifsky -