Einleitung

The display of my canon s120 broke. Ordered a new display somewhere on Ebay and installed it. It's super easy!

  1. IL1LrVc1ATjZyDE5
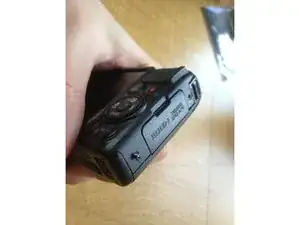
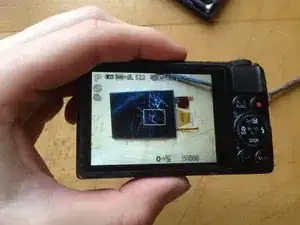
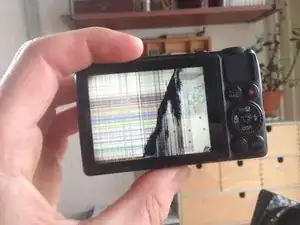
    • So that's the problem: a cracked screen. The rest still works fine.

  2. vKkC4jclDDwNB6Tp
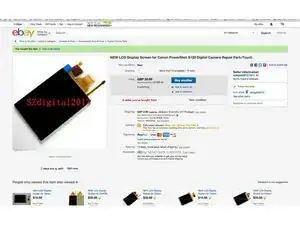
    • First step is finding a replacement part. Canon support isn't very good here. So I've been searching the web and found some good results on Ebay. Order one of these, all you need.

  3. 6MoViGjBRPBZVgfu
    6MoViGjBRPBZVgfu
    3NMCckvxc2SpxYLp
    CxlTYSMI1sBbh6Kp
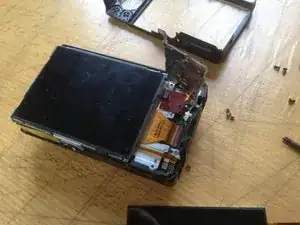
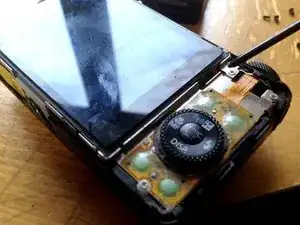
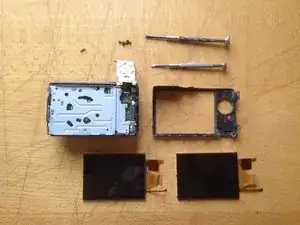
    • You only need one small cross screw head screwdriver to open up the camera. It takes 9 screws to take out the display.

  4. ebcfMQjm2bxiMmkN
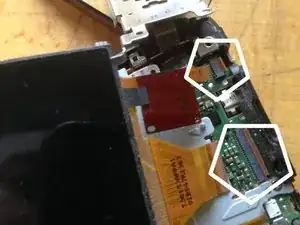
    • The display is plugged in the camera with 3 little connectors. Carefully click the hinge open and you can pull out the connector.

  5. eiOuQeCKEBxfqQAO
    • this is what it should look like when everything is disassembled.

  6. ceLVPgdQxAwvVOK1
    • replace the display, plugin the connectors, and screw it back together. It should work again right after you turn it on

    Excellent, it works ! Thank you very much indeed ! The previous comments were very useful too.

    Elisabeth LECHENET -

Abschluss

To reassemble your device, follow these instructions in reverse order.

Dave Hakkens

Mitglied seit: 03/01/16

958 Reputation

8 Kommentare

Thanks!! Very helpful

slingshotwake -

Worked like a charm! Thank you! Only the smaller connector on the bottom was a bit odd because there was no locking hinge and the flat makes a 180 degrees turn. And it takes a bit of trial and error to fit the flats in the connectors. I used a thick needle to push and center them.

Thank you again.

markogts -

I did OK until the "plugin the connectors" stage, which requires some more explanation. Because the connectors are flexible there's no way of pushing them in. You have to flip up the brown locks on top of the sockets to stand a chance, then carefully wriggle in the connectors. Took me an hour, and I almost gave up before I worked out that you needed to flip up each lock and then flip it down once you have a connector pushed in.
Andy Stephenson -

I used a small, thin piece of rubber to slide the ribbon connectors right into the housings... easy as pie. This screen swap was pretty easy, and saved a great camera from the trash bin. I have beat the snot out of my S120 and it just keeps on going. A superb little camera.

Thanks for the instructions!

P.S. - don't forget the little black piece of protective paper that goes under the upper right edge of the screen and sticks out to cover the top connector ribbon at the point where the metal bracket holds it down. My new screen did not come with one, and I found the original after I had reassembled the camera. Had to open it back up to reinstall that.

joenc -

It probably is not that easy ;/

Jan -

Thank you, I fixed my screen based on your guide. Before you remove the broken screen, pay close attention to the depth the ribbon cables slot into the connectors. I recommend installing the 2 wide ribbon connectors first as these are the awkward ones. The smaller ribbon cable slots into its socket - it does not lock into place like the others. To install the smallest cable socket, it folds back on itself. I installed the largest cables and once they were locked in place, I flipped the screen out to the right and pushed the smaller cable home. A small pair of flat-jawed electronics pliers or tweezers are helpful. Be careful and patient.

Mark Shaw -

I had problems to re insert the ribbon cables. I thought I had to lift what looked like a ZIF lever. But it was the connector itself, which broke. I keep the camera in case I find one with a stuck lens and try to make a working one with two!

Michel Martin -

It works, thank you very much indeed ! Some comments were very useful too, thanks !

Elisabeth LECHENET -