Einleitung

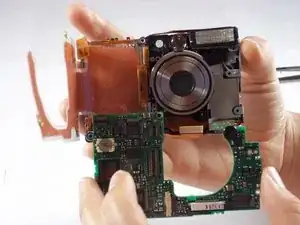
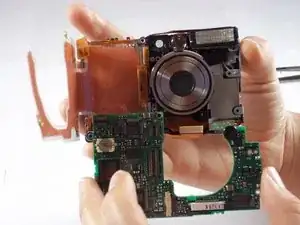
This guide will show you how to remove the motherboard.

  1. KTWRWeBH15oQEXNw
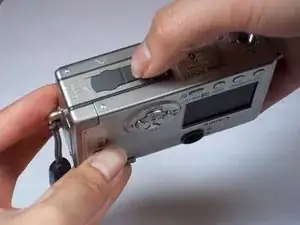
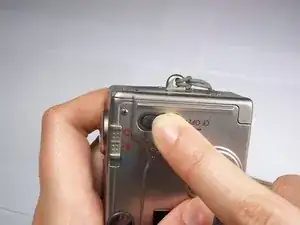
    • On the bottom of the camera, use your thumb to press the rubber battery cover towards the side of the camera with the strap base. The cover will shift to extend beyond the rest of the camera.

  2. DjBGrLRIG2eOQkXx
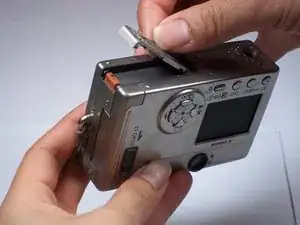
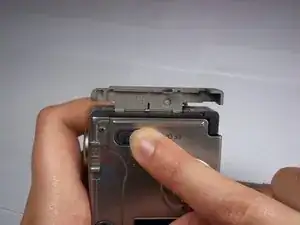
    • Hold the end of the battery cover that extends beyond the camera and lift it up.

  3. tBmHKdQaQGcq4apL
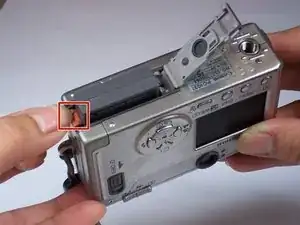
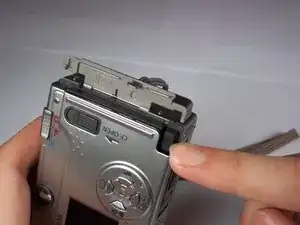
    • Locate the orange tab next to the battery. Next roll the tab back in order for the battery to come out.

  4. MFMgUJvXoY2hcbZy
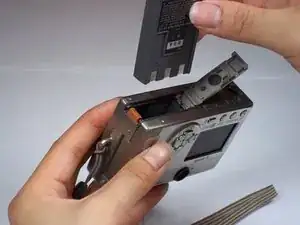
    • Pull the battery out.

  5. xiWVnLYkDjcuIYS5
    xiWVnLYkDjcuIYS5
    wYSmDCYun6YW1GYg
    ELU2GfLYLOcJ5ZtW
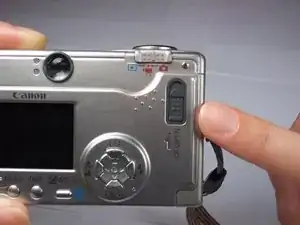
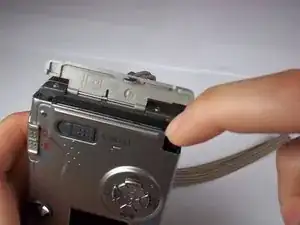
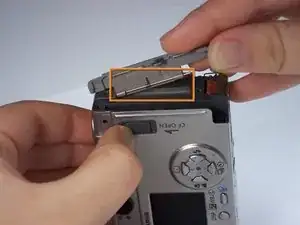
    • Locate the sliding button labeled "CF open" on the back of the camera.

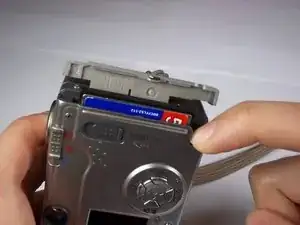
    • Press and slide down the button labeled "CF open". The memory card cover will pop open.

  6. axfAfpDiUki5FJSN
    axfAfpDiUki5FJSN
    NRO1ytwyLdqKYiVs
    JJqSrDOWmP5JwNET
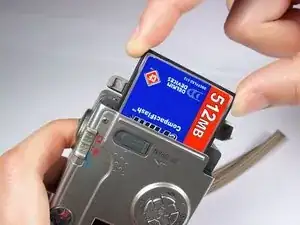
    • Push down on the black square button next to the memory card slot. This will release the memory card from the slot.

  7. 3lxbOUgo6DCcMRRW
    3lxbOUgo6DCcMRRW
    tLbP33kNKTGRbrjU
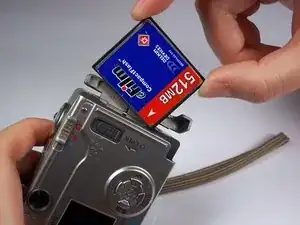
    • Pull the memory card out of the memory card slot.

  8. BAOqcKk1hmR1ELFd
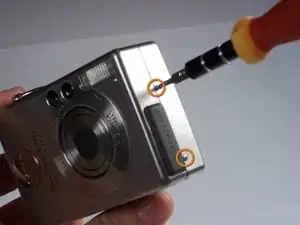
    • Remove two 2.4mm Phillips screws from the right side of the camera.

  9. B1jNCRJJK1HAqj5r
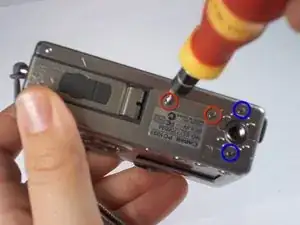
    • Remove two 2.4mm Phillips screws above the label on the bottom of the camera.

    • Remove two 2.8mm Phillips screws next to the tripod hole.

  10. RhasuYkms6yQROUn
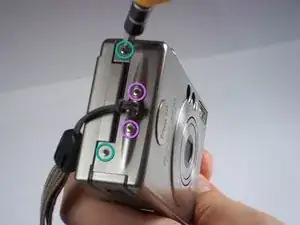
    • Remove the two 3.2mm Phillips screws that are closer to the top and bottom edges of the camera.

    • Remove the two 3.8mm Phillips screws on either side of the strap base.

  11. aInHbZxnnndrdSsZ
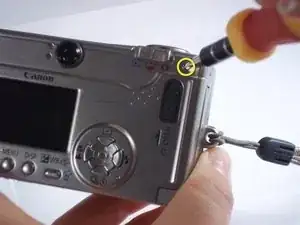
    • Remove one 1.6mm Phillips screw from the above the CF open button on back of the camera.

  12. CBnYxBkPtsmfOuSv
    CBnYxBkPtsmfOuSv
    HcsYLUCi2AOraWa1
    yoPyEQMOUYwCRHoG
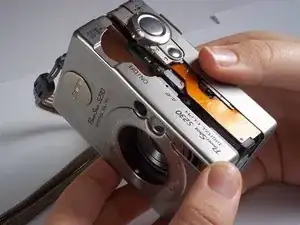
    • Gently pull the front casing from the camera.

    • The following items will either fall off or will be loose: the strap base, the gray rubber cover labeled "Digital A/V Out", and the black rubber piece over the view finder.

    • Remove the memory card cover by sliding down the CF open button and moving the pin.

  13. CKisYQZxVD1kXeop
    CKisYQZxVD1kXeop
    pnmaHqVLrd16blyx
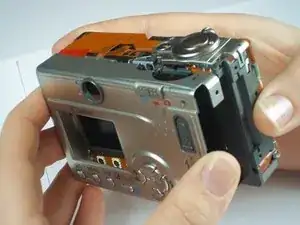
    • Gently pull the back casing from the camera.

  14. I6lQtuOxYFB1qLCK
    I6lQtuOxYFB1qLCK
    eRXCNY2pbWTihHvj
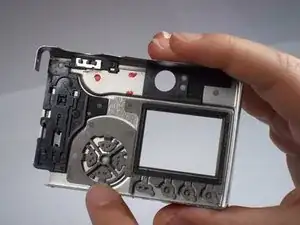
    • Locate the reverse side of the buttons by looking at the inside of the back camera casing.

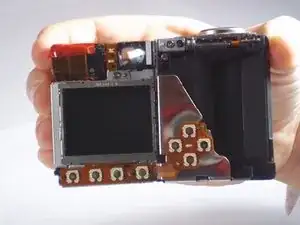
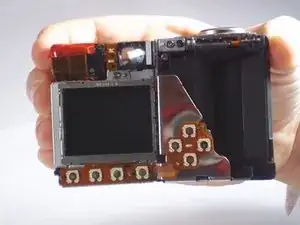
    • Locate the button sensors, which connect to the logic board by a connecting ribbon, by looking at the back of the camera once the back casing has been removed.

    • The button sensors on the back of the camera should appear to match up with the reverse side of the buttons on the inside of the back camera casing. Imagine one as being the reverse image, or mirror image, of the other. This will help you locate where a problem is occuring if a button or a button sensor has been damaged.

  15. mOoHosxGNDJ3k63V
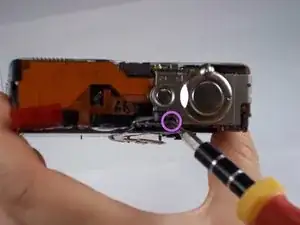
    • Remove one 4.3mm screw directly below the power button on the top of the camera.

    • This screw attaches the entire panel for the power and picture-taking buttons. Be sure you are removing the screw from the top of the camera, as it is close to another screw on the back side of the camera.

  16. HDg5JkOfukDA3dYH
    HDg5JkOfukDA3dYH
    YkZQQTXMCwllYa2C
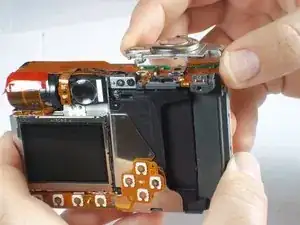
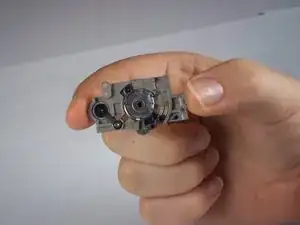
    • Gently lift the button panel from the top of the camera.

    • This is what the reverse side of the button panel looks like after removal.

  17. COFDxdVdpE3ypiCQ
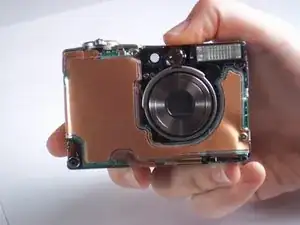
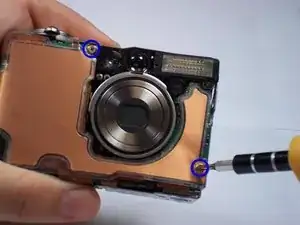
    • Remove the two 3.9mm screws holding down the copper flap that insulates the motherboard.

  18. GhZS5jiHaUQ2wYlp
    GhZS5jiHaUQ2wYlp
    MRNolxZ1h3UD4w2t
    ryY54TMyD4Z4VjPI
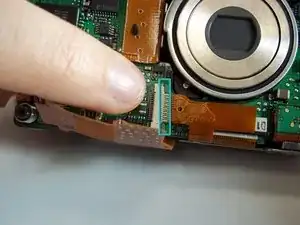
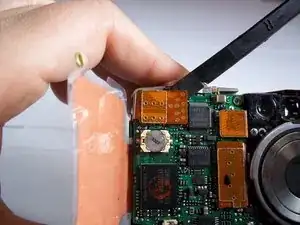
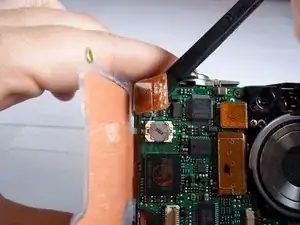
    • The motherboard can be damaged easily and must be treated with care. Try to avoid removing ribbon cables with your fingers, since motherboards are extremely sensitive to static discharge. Use a spudger or plastic opening tool to lift any flaps or tabs or to pry connectors straight off their sockets on the motherboard.

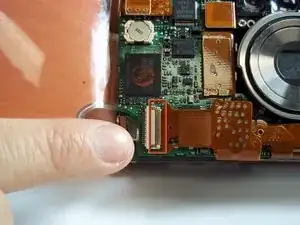
    • Before the motherboard can be removed, several ribbon cables must be disconnected from their respective ports. A few of the ribbon cables are held in place by locking ZIF connectors, which you must release before removing the cables. Removing each ribbon cable may require a gentle tug.

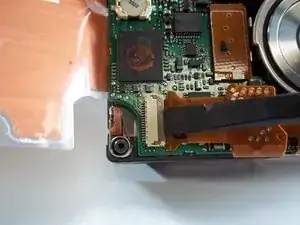
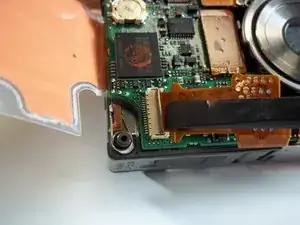
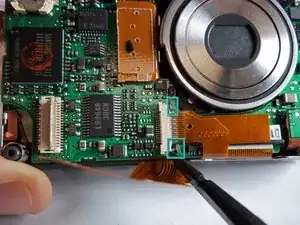
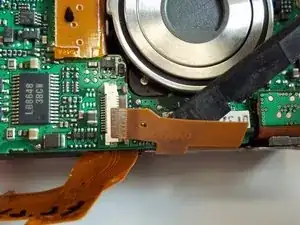
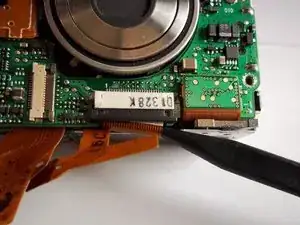
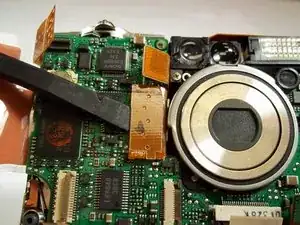
    • First, release the ZIF connector securing the ribbon cable in the bottom left corner of the motherboard. To do this, insert the flat end of a spudger under the connector's dark brown flap and gently wedge the flap open.

  19. 6lRSp5Qms2u5J2Co
    6lRSp5Qms2u5J2Co
    1aWMYVOEWPBgGVjO
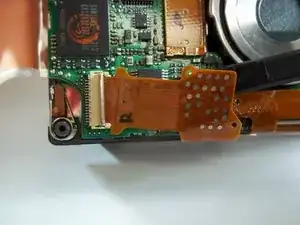
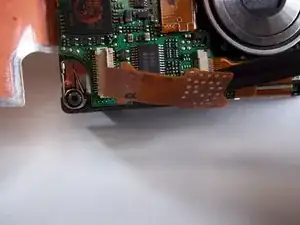
    • Now, insert the spudger under the ribbon cable and gently pull the cable out of its port.

  20. kxbfdXUBVaFD5BbT
    kxbfdXUBVaFD5BbT
    XdxolMTsJVqQtcb3
    VZCqcMEYaogi6YoU
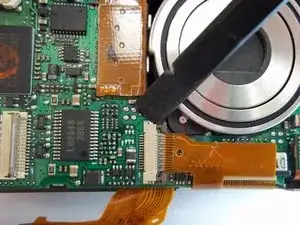
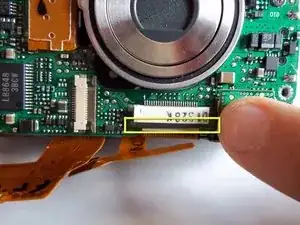
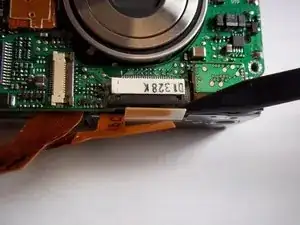
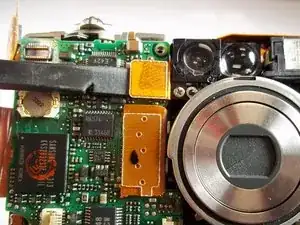
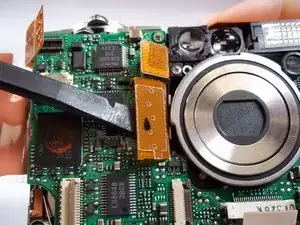
    • Release the ZIF connector securing the next ribbon cable. To do this, insert the flat end of a spudger between the dark brown piece and the white piece of the connector. Since the dark brown piece is under the ribbon cable, move this piece to the right by wedging one end at a time.

  21. YsICgOMcIATadwBG
    YsICgOMcIATadwBG
    hLUCrLLODdbl1qyk
    • Insert the spudger under the ribbon cable and gently pull the cable out of its port.

  22. KVwOgUBlXKh2VSgM
    KVwOgUBlXKh2VSgM
    OGVAlkfwjtILfBum
    CfVjQOTaNLDo5GBD
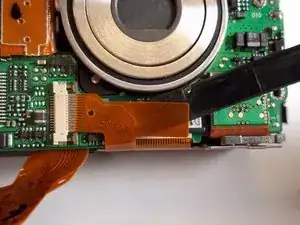
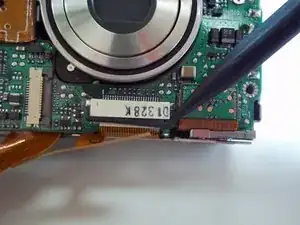
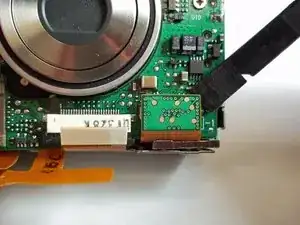
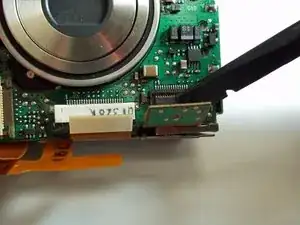
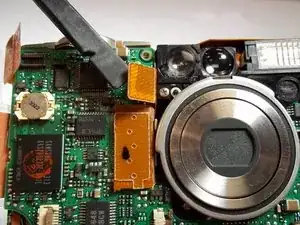
    • Release the ZIF connector securing the ribbon directly below the lens. To do this, insert the pointed end of the spudger between the black piece of the connector and the white piece. Wedge the black piece down.

  23. XtGSKZVXllGvsZiY
    XtGSKZVXllGvsZiY
    JsMZ1UAmi1gZPevm
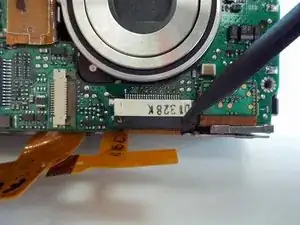
    • Insert the pointed end of the spudger under the ribbon cable and gently pull the cable out of its port.

  24. tNYVCBVWYfeAkjg1
    tNYVCBVWYfeAkjg1
    2TIvXaupAJxKUFvB
    • The rest of the ribbon cables are not secured with ZIF connectors. Remove the ribbon cable on the bottom right corner of the motherboard by using the flat end of the spudger to pry the cable from the board.

  25. Il5pG45TCjDMuhEo
    Il5pG45TCjDMuhEo
    Vg6hQmJKyHywMvJw
    • Remove the ribbon cable on the top left corner of the motherboard by using the flat end of the spudger to pry the cable from the board.

  26. RSIXQmaAwEyPmPuQ
    RSIXQmaAwEyPmPuQ
    FFyqdLBGLomoj1oF
    • Remove the next ribbon cable by using the flat end of the spudger to pry the cable from the board.

  27. TqcVv54YXXu1xYWA
    TqcVv54YXXu1xYWA
    kYdXo5AE4ONHkAOM
    • Remove the last ribbon cable by using the flat end of the spudger to pry the cable from the board.

    • When replacing the ribbon cables, keep in mind that these last four cables simply snap back onto the motherboard.

  28. jqxgyqnKMDK5f5X1
    jqxgyqnKMDK5f5X1
    uYvAuukBqJVHqbtW
    aVlHomisRHkMHPVJ
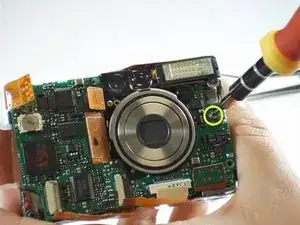
    • Remove one 3.9mm screw from the right side of the motherboard and under the flash.

    • The ends of the connecting ribbons may get caught on the motherboard as you remove it from the camera.

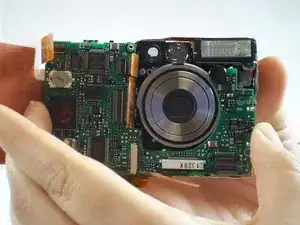
    • Gently pull the motherboard away from the front of the camera.

Abschluss

To reassemble your device, follow these instructions in reverse order.
Tanya Malalang

Mitglied seit: 13/01/11

325 Reputation

0 Kommentare