Einleitung
Use this guide to replace a control dial on a Canon PowerShot SX120 IS.
The control dial is a feature that allows you to perform different operations like switching images or choosing items. When the control dial is broken it can become difficult to navigate through different features that the camera offers.
Before beginning this process, make sure to remove the double AA batteries. To remove the batteries, slide and hold the cover lock on the top corner of the camera, then slide and open the cover.
-
-
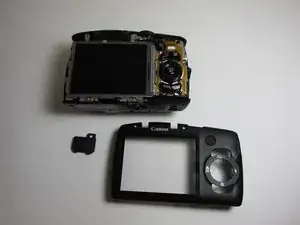
Turning the camera so the screen is facing you.
-
Remove the two black 3.4 mm screws with a Phillips #00 screwdriver.
-
-
-
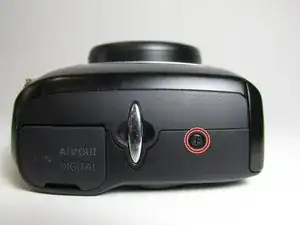
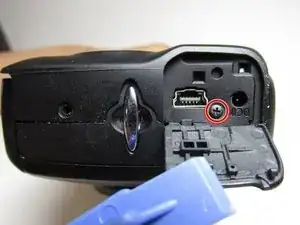
Put the camera with the lens facing up and turn it to the side so the DC IN A/V OUT DIGITAL is facing you.
-
Remove the single black 3.4 mm screw with a Phillips #00 screwdriver.
-
-
-
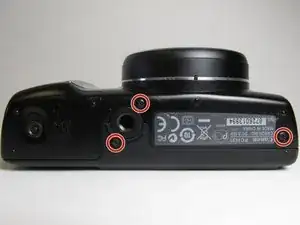
Put the camera with the lens facing up, and turn it to the side where the battery cover is located.
-
Remove the three black 3.4 mm screws with a Phillips #00 screwdriver.
-
-
-
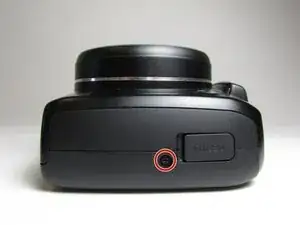
Put the camera with the lens facing up, turn it to the side where the compartment of the battery (CR1220) for time/date is located.
-
Remove the single black 3.4 mm screw with a Phillips #00 screwdriver.
-
-
-
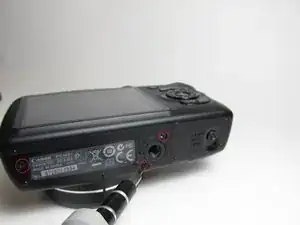
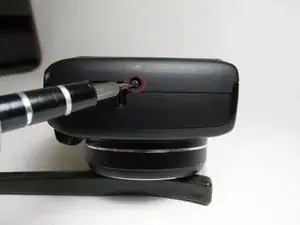
Put the camera with the lens facing down, and turn it to the side where the DC IN A/V OUT DIGITAL cover and the silver lanyard attachment are located.
-
Open the DC IN A/V OUT DIGITAL cover.
-
Remove the single black 3.4 mm screw with a Phillips #00 screwdriver.
-
-
-
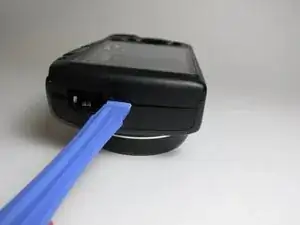
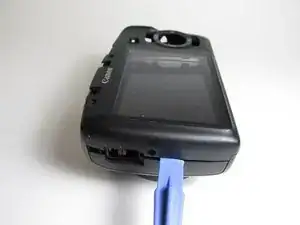
Turn the camera with the lens facing down.
-
Use the iFixit opening tool to make leverage. Insert the opening tool in the seam where the front case and the back case assemble.
-
Carefully put pressure on the opening tool so the cover can gradually open.
-
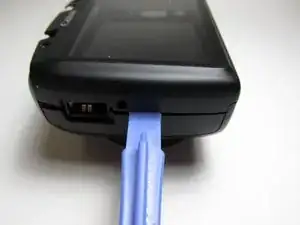
Slowly slide the opening tool along the gap and around the edge of the camera.
-
-
-
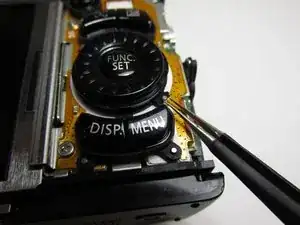
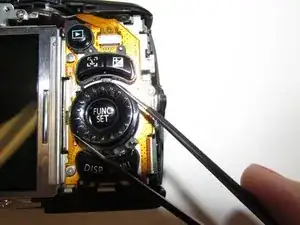
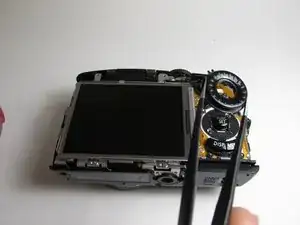
Carefully remove the pin underneath the dial using a pair of tweezers and set it aside.
-
Use a pair of tweezers to remove the old control dial and set the new control in the same place.
-

To reassemble your device, follow these instructions in reverse order.