Einleitung

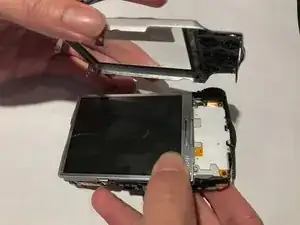
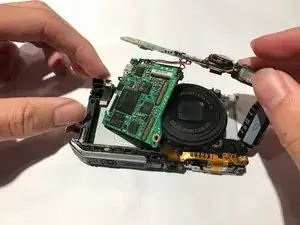
This guide will show you how to replace the motherboard in your computer if it is broken or malfunctioning. In this guide you will be dealing with fragile parts, to avoid further damage handle all parts with care.

  1. 4SIheLgnLAEh1vO5
    4SIheLgnLAEh1vO5
    VBIGxEbgWSp1cXVa
    fWs2IvIfQGURWu5s
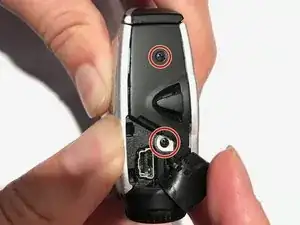
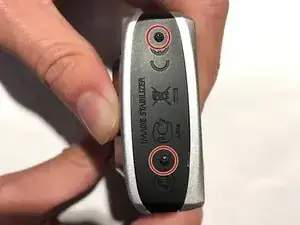
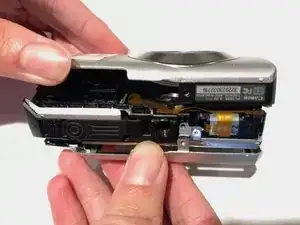
    • Remove four 2.7 mm screws, two on each side, from the camera with a JIS 000 screwdriver.

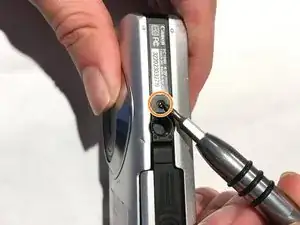
    • Remove one 3.5 mm screw on the bottom of the camera with a JIS 000 screwdriver.

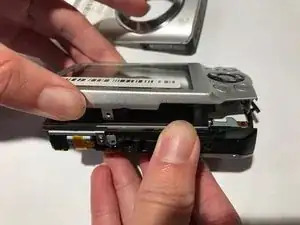
    • When removing the front and back housings, be careful to not break the tabs that hook into the top section of the chassis.

  2. iAqXSkONkONOKAoV
    iAqXSkONkONOKAoV
    QurnFRNjdEYjXUlU
    • Pull off the back cover.

  3. ZHOVw4222IcVBmbU
    ZHOVw4222IcVBmbU
    vN2pPSAUIEdVxrOn
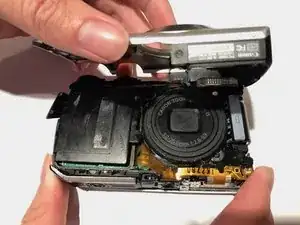
    • Pull the front cover off.

  4. CSiPSAOGyEQQ2Tve
    CSiPSAOGyEQQ2Tve
    cMcgUqAsuutmfiUa
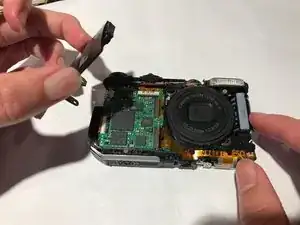
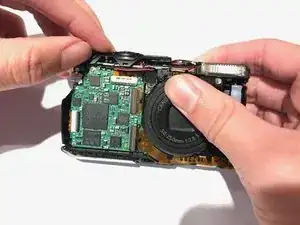
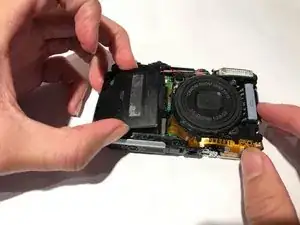
    • Remove the black cover to expose the motherboard.

  5. kZfXh4SkbfPOmS45
    kZfXh4SkbfPOmS45
    EWcdlPRhDANiMKJm
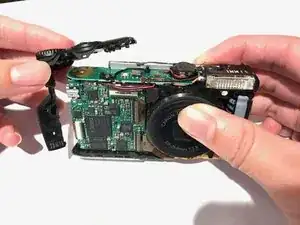
    • Remove the shutter button located at the top left of the camera.

    • This will expose the screws that need to be removed.

  6. 5vpkxv4yQvLbRW5O
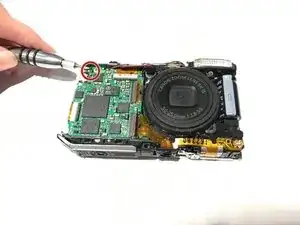
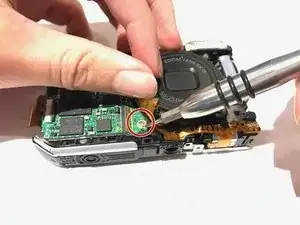
    • Using a JIS 000 screwdriver, remove the 1.2mm screw at the top left of the motherboard.

  7. PN34Jrr1qTESysC2
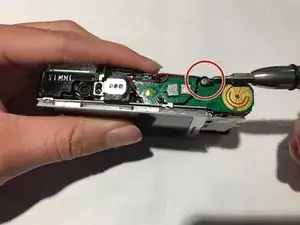
    • Remove the 1.6mm screw at the top of the camera.

  8. uC6DdDQHph26JeOh
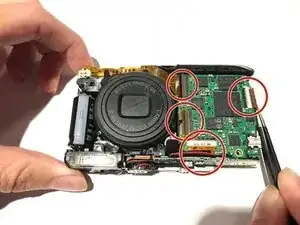
    • Use tweezers to pull out brown flat flexible wires from their connection.

    • Remember to gently wiggle the wires from the connection since they are very fragile connectors.

  9. JbKkksTnsn6vJrxS
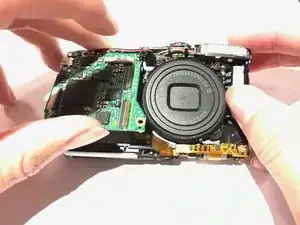
    • Remove the last 1.2mm screw to pull out the motherboard.

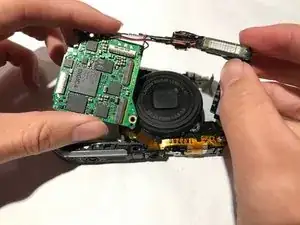
    • The motherboard should freely separate from the housing.

  10. ntuQZugqqhwNn1rB
    ntuQZugqqhwNn1rB
    6MwdmOjDXrKLJjNU
    nDRVM1Vig4bs3pDK
    • Remove motherboard and replace with a new one.

Abschluss

To reassemble your device, follow these instructions in reverse order.
Phillip Chen

Mitglied seit: 17/10/17

434 Reputation

0 Kommentare