Einleitung
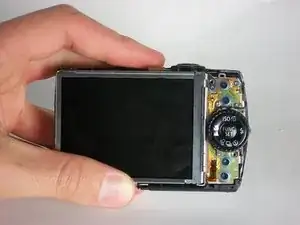
The LCD display can be removed and replaced if it is cracked or broken.
Werkzeuge
-
-
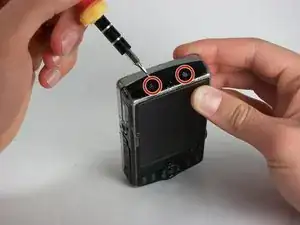
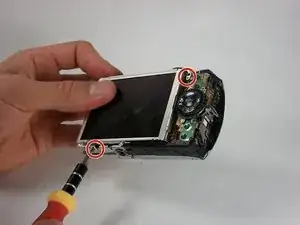
Remove the two 2.4 mm screws on the side of the camera that are next to the LCD screen using a Phillips #00 screwdriver.
-
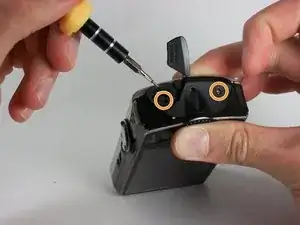
Remove the two 4.1 mm screws on the other side using a Phillips #00 screwdriver.
-
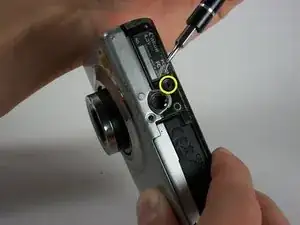
Remove the single 2.6 mm screw from the bottom of the camera using a Phillips #00 screwdriver.
-
Slowly pull the back cover off of the camera.
-
-
-
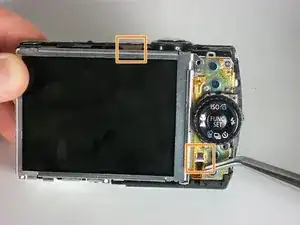
Remove the two 2.9 mm screws at the top-right corner and bottom-left corner of the LCD screen using a Phillips #0 screwdriver.
-
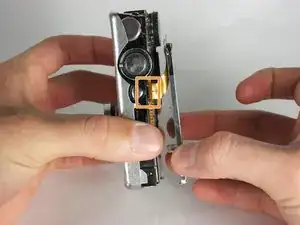
Disconnect the ribbons that connect the screen to the camera.
-
Lift the screen off.
-
To reassemble your device, follow these instructions in reverse order.
Ein Kommentar
Hm. "Disconnect the ribbons" resulted in a torn ribbon, and so a dead camera, I think. This also doesn't say how to take the LCD screen out of its frame. Alas.
Maelduin -