Einleitung

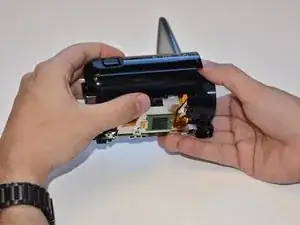
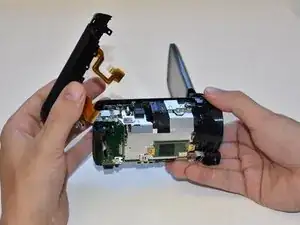
This guide is the pre-requisite to all guides involving the replacement or repair of the internal components of the camera. Before you begin, please note that some screws will be covered with foam protectors.

  1. bXpqptbUXqUYdRaI
    bXpqptbUXqUYdRaI
    hAti3NPN4VIM6MPX
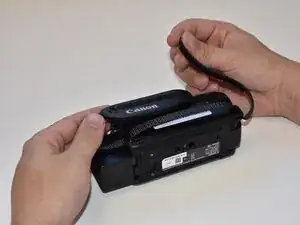
    • Remove the strap by undoing the Velcro and pulling it through the thread points.

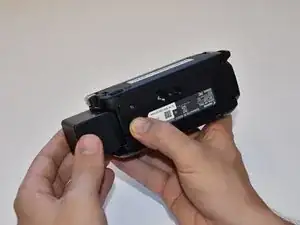
    • Remove the external battery pack by pressing down on the slide release and sliding it out.

  2. YDJgJFDa3lffdMUn
    YDJgJFDa3lffdMUn
    EcwJ4G2nDLnQJsrA
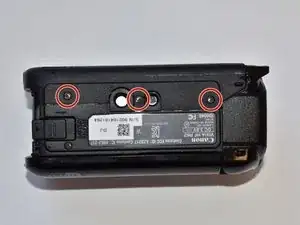
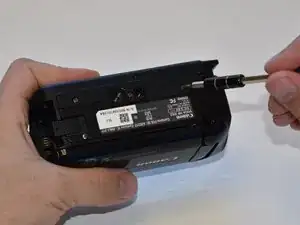
    • Remove the three 5mm Phillips #000 screws on the bottom of the device.

  3. 4QNAFYyLEeDHtYGV
    4QNAFYyLEeDHtYGV
    cKyPfi1ORwURNkFF
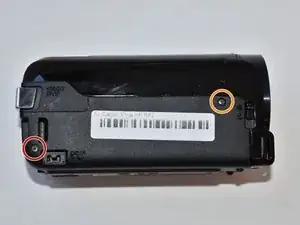
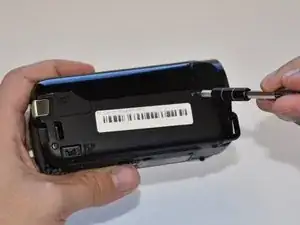
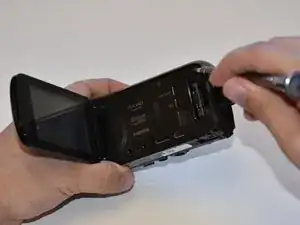
    • On the side of the device, remove the following Phillips #000 screws:

    • One 3mm screw

    • One 5mm screw

  4. aKChsewJBPbrE1HW
    aKChsewJBPbrE1HW
    KjpPR211wtR6Dgic
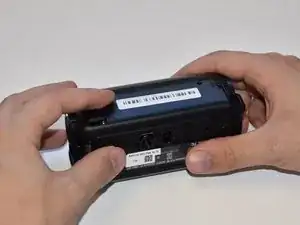
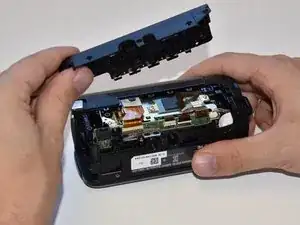
    • Remove the panel opposite the display by pulling up perpendicular to the side.

  5. WRRNqtBMKjfVakXQ
    • Remove the 4mm Phillips #000 screw that was exposed after taking off the side panel.

  6. WWhWYHQLcLi5QZ1s
    WWhWYHQLcLi5QZ1s
    QccSaYG5KSK6sg6U
    • Remove the three 4mm Phillips #000 screws shown.

    • There will be foam covers protecting some or all of these screws. These will need to be removed before you will be able to unscrew them.

  7. 1Q6IJQvHVYotmrFk
    1Q6IJQvHVYotmrFk
    Z6cGXrrcePuBXMZN
    IMQmxUPRVZ4wvTks
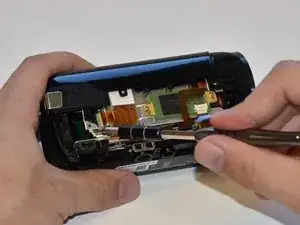
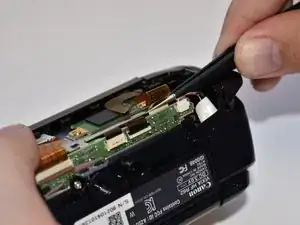
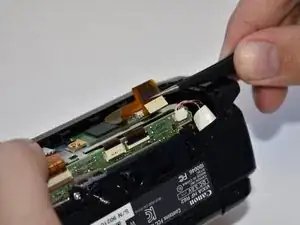
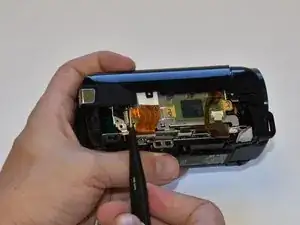
    • Using tweezers, disconnect this ribbon cable by pulling straight out.

  8. ug2rJkM6WkuGZ3pf
    ug2rJkM6WkuGZ3pf
    onPvXtBSunsltqxP
    6lXmerQTZPulvatr
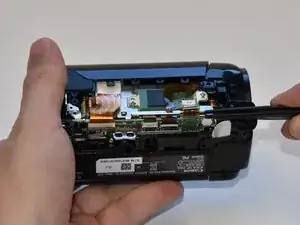
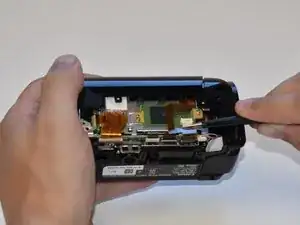
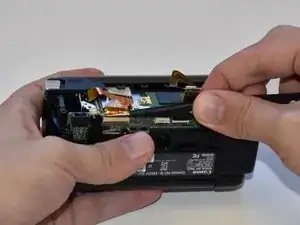
    • Repeat step seven (7) for the remaining three wires shown.

  9. 3scJHJR4JnhAUhU4
    3scJHJR4JnhAUhU4
    mdYL5WVPElQksapu
    JvAbQFUdDqBSODsG
    • Grasp the top of the camera and pull straight up to remove the top panel.

Abschluss

To reassemble your device, follow these instructions in reverse order.

Jeffrey Harn

Mitglied seit: 21/09/18

327 Reputation

0 Kommentare