Einleitung

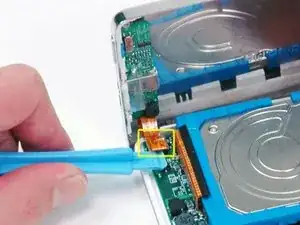
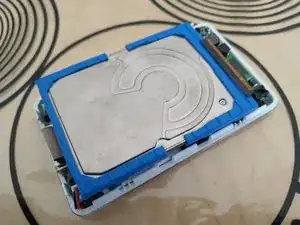
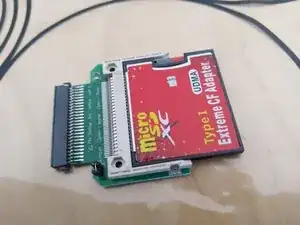
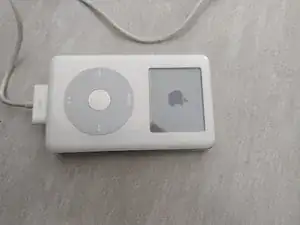
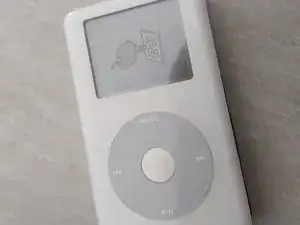
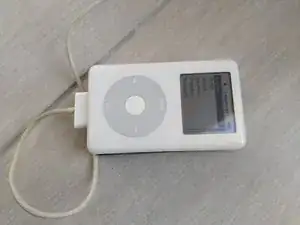
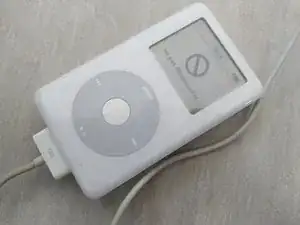
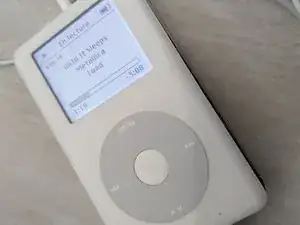
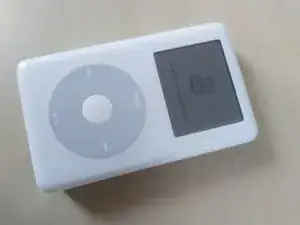
Over time, old iPods with hard drives can experience common errors like a dead battery or an unresponsive hard drive. In this tutorial we will replace an old hard drive of an iPod 4G with a micro sd card of potentially greater capacity. (The screen shown in this tutorial is a sign of a failing hard drive)

  1. mmIJOyYlvjSvCBrH
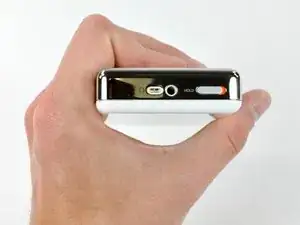
    • Before opening your iPod, ensure that the hold switch is in the locked position. The orange bar should be visible, indicating hold is active.

    How necessary is it to have the HOLD switch in the locked position? On my iPod the switch is stuck in the unlocked position and I can't force it into locked.

    Is locking the iPod for a mechanical reason or an electrical/software reason?

    gabeshaikh -

    Zitat von gabeshaikh:

    How necessary is it to have the HOLD switch in the locked position? On my iPod the switch is stuck in the unlocked position and I can't force it into locked.

    Is locking the iPod for a mechanical reason or an electrical/software reason?

    It is for an electrical reason. If the iPod hold switch is kept on, the device will not turn on, thus ensuring the device stays powered off while performing service.

    trusty -

    I have a 60 GB iPod photo that needs a new Logic Board. I bought a 30 GB used iPod on eBay and replaced the Logic Board. Now the iPod thinks the hard drive is only 30 GB, when it is really 60 GB. It works, but the hard drive is not recognized for its full size. Sites like this offer a 20 GB and 40 GB logic board...I apparently need 60 GB. Can I bypass this somehow, or do I really need a logic board that is specifically made for 60 GB???

    Mark -

    My 30gig drive shows up as a 16.4gig. I can not for the life of me, figure out why this is doing this. Can anyone help? Thanks!

    Stephan -

    Hello,

    First thank you for this tuto and help.

    I did follow your instructions and every step was ok but when I closed my i'Pod, it kept staying on the lock position even with moving the lock button.

    Now it has charged but I could not make it run.

    So I did a complete reboot by connecting it to my Mac with i'Tunes to restore.

    It's still locked.

    What can I do?

    Than You for your answer

    Thomas

    Voisin -

    Much quicker and far easier opening from the right side instead of from the top using the blue plastic spudger. Opened in under 10sec. Do not know why this guide asks you to start from the top and work it to the left corner. Perhaps it was meant as a challenge.

    Edwin Seah -

    Well, I did it! I am pretty mechanically inclined, but I don't work well with small stuff. Anyway, as others mentioned, this step was the hardest for me, the included tools, worthless (to start to separate the case) As another person mentioned, I used a razor blade on the side on the upper left corner pushing down toward the metal clips, 'pop' once the first came off, then I used the blue tools to release the remaining clips. I didn't want to remove the connector in step 8, but had literally no room to work, the connector is a square push in type that is attached to the ribbon cable, I pryed with the blue tool carefully at the connector base, it popped right off! (getting is back on was more challenging, but managed with a small pair of needle nose pliers.) Had to pry the old battery out carefully - it was really in there. Got it all back together, works like a champ! Thanks ifixit!

    mikesnyder -

    Promptly broke both blue plastic tools. I used a putty knife to pop the case. Opening was the only hard part. I didn't disconnect the headphone cable. No problems and the battery has enough charge that I listening to Bare Naked Ladies now. Last week I installed a new hard drive in my Mac mini. IFixit is the greatest!

    heldon -

    If you are lucky, your battery may swell up like mind did, short of blowing up it opened the case for me. That being done really made it easy and encouraged me to do the repair myself. I still needed the proper screw driver (T6 Torx Screwdriver) to remove the two black torx screws that are found at step 10 of this repair guide. I purchased the iFixit 64bit driver kit, simply because I intend to work on several other iPods and phones, the kit is of good quality, well worth the purchase. If you have some mechanical ability, and follow the instructions, I was done in about 20 minutes, placed it back on my Bose player. I couldn't wait for it to charge, just wanted it to start playing, and after a minute or so my iPod 4th gen 20 gb was playing the music which I hadn't heard in about 3 to 4 years, as a result of a enlarged battery. As I write these comments down, I'm listening to my sweet tunes with a big smile on my mug, the sign of a satisfied customer. Thanks to iFIXIT.!!!

    Alex DeLeon -

  2. srhwHwyoDQWVeOBS
    srhwHwyoDQWVeOBS
    BcFihbSjHTAdFrSi
    FKJ4k2HNeYkAoLnr
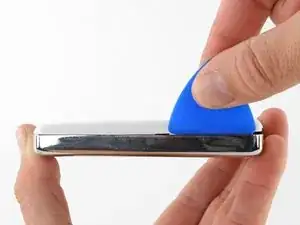
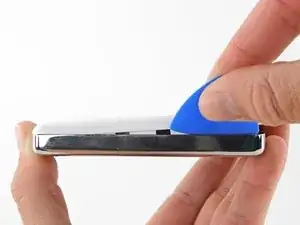
    • Insert an opening pick as far as possible into the seam between the plastic front and the metal rear panel, on the right edge of the iPod.

    • You may need to rock the pick back and forth to slide it in farther.

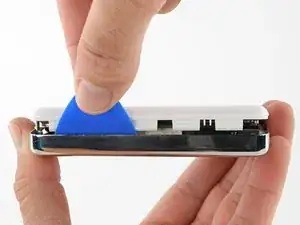
    • Use the opening pick to pry up against the plastic front panel and release five retaining tabs (seen in the third photo).

    • Slide the pick along the edge of the iPod and continue prying to release the rest of the retaining tabs.

    • After all five tabs along the right side are free, the case should easily open.

    This being the first time I opened my iPod, it was super tight. Nothing plastic I had was strong enough; even my thumbnail just barely could get a sliver of separation, not big enough to wedge anything else in there. The sandwiched halves of the case chewed up my spudger pretty good, and so I actually resorted (slap on wrist) to a Liquitex acrylic-painting knife, kind of a superthin metal spatula, which worked perfectly. Just had to slide it in carefully. Unit is way out of warranty, though, so I wasn’t too concerned about some superficial damage to the edge of the plastic case front, which did in fact occur. Probably be easier next time around.

    gginex -

    This step is incorrect and should be changed. There is no way to slide anything into that space except a straight edge razor blade or something just as sharp and sturdy. Once the blade is firmly in place, you can then slip in an opening pick and remove the blade. From there, everything else is accurate.

    Kelly -

    I second the suggestion of using a putty knife. Worked way better! A bit nerve-racking at first as I was afraid of doing serious damage, but I succeeded. I’m definitely a novice at this, but these comments helped at every turn.

    Lori Farthing -

    I also had trouble opening the case at first but, having looked at some other instructions from other guides, I found it easiest to start the opening from the top, After that everything was straitforward. Installing the new battery and reconnecting the couple of connectors took less than two minutes. New battery charging now, but iPod working perfectly at the moment. Many thanks.

    Clive Richards -

    No way you're getting a pick in there. I tried and it's too tight. Start with iPod opening tool to make your gap. Hold it open and wiggle in a pick. Then wiggle and slide the pick up and down the side and it pops right open.

    SEAN Tanton -

    This was by far the most difficult step of the repair process. Did eventually get it open using jewelers tiny flat blade screwdriver and then the pick, Scratched up the case a little on the corner but got the job done,

    tom -

    I had a lot of trouble with this. This video made it super easy though https://www.youtube.com/watch?v=dYZqTvlT... Pressing firmly on the back in the center and using the case opener tool made it super easy. Recommend!

    Sam Soffes -

    I found that starting at the top was much easier than the side. I also found the pick too soft. The plastic spudger included in kit worked great.

    James Monahan -

    Spent an hour trying I had no tools but my long nails it worked with no damage to the ipod rip my nails though

    James middleton -

    Just to make this idiot proof [e.g.: folks like me]. The right edge of the iPod means this: place the iPod face up, with the screen at the top and the wheel at the bottom. Then right is your right [note that it is your right, not the iPod's].

    Nebur -

  3. AkQWHgZJ65T2LQlF
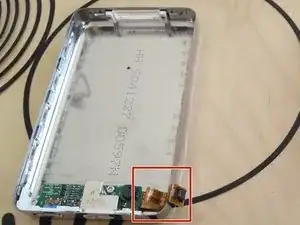
    • The iPod case is now open, but don't separate the two halves just yet. There is still an orange ribbon cable connecting the headphone jack to the logic board.

    • Open the case like a book with the dock connector edge at the top, and lay the rear panel next to the front half of the iPod.

    This is the most fragile piece to work with in the whole process. Make sure you have some glasses or something and actually watch the individual pins while you reconnect the cable. I can't see so close, and didn't see what I was doing clearly. Consequently I broke the pins.

    Adam Logan -

    In my case the cable of of Headphone Jack was to short. so i Cent oben it like a book. instead i lifted the backside up until it gets hold by the cable. Then slowly move the backside to the right ( if the Headphone Jack is facing you). perhaps u have to tilt it a little so ist gets over the corner of the hdd. Now is the Plug in reach of a spudge from three sides. It make its also easier to reconnect the plug to the socket.

    Gyro -

    *Spelling fixes*

    In my case the cable of of Headphone Jack was to short. so i cant open it like a book. Instead i lifted the backside up until it gets hold by the cable. Then slowly move the backside to the right ( if the Hedphone Jack is facing you). perhaps u have to tilt it a little so it gets over the corner of the hdd. Now is the Plug in reach of a spudge from three sides. It make its also easier to reconnect the plug to the socket.

    Gyro -

    In meinen Fall war das Kabel leider zu kurz. stattdessen habe ich die Rückseite parallel angehoben, soweit das Kabel reichte. Dann die Rückseite vorsichtig nach rechts bewegen ( die Anschlüsse zeigen dabei zu einen hin). Unter Umständen muss man durch etwas Kippen der Rückseite über die Ecke der Festplatte bugsieren. der Stecker ist jetzt von drei Seiten aus erreichbar ( Spudge oder ähnliches). auch beim wieder einstöpseln kann man den Stecker besser /grader aufsetzen.

    Gyro -

  4. EyAcjoxd4hluPpXo
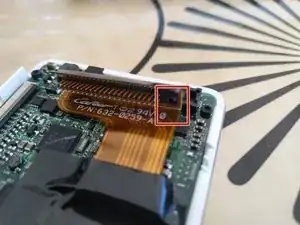
    • Use a plastic tool or your fingernails to carefully disconnect the orange headphone jack cable. Be sure to pull straight up on the connector, not the cable itself.

    • This ribbon cable is very fragile. If you are replacing the battery, you can choose to skip this step and keep the headphone jack connected to the motherboard. Prop and tape the rear case against a box to keep it in place. Be very careful not to strain the fragile headphone jack cable as you work.

    Be very careful disconnecting. In fact may want to leave connected. I "removed" the entire piece pins and all from the board and had to replace the logic board to fix. A $15 fix turned into $65. Happy to say got it fixed with a new board but this was a crucial step that cost me big time! Again leave headphone jack connected if at all possible!!

    tigers27408 -

    DO NOT remove the ribbon cable unless absolutely necessary. I also removed the black female plug from the logic board by mistake. However, in my case I was able to plug it back in and it still works (phew!). Lucky. I might have destroyed some soldering, I don't know ... but it works.

    Paul -

    At this point I damaged the motherboard irreversibly!!

    This guide should be modified. You should not attempt this step. Either you replace the battery without disconnecting the ribbon. Or if you really want more room, you unscrew the other little board from the the metal half of the case.

    Now I have to buy another ipod :-(

    Guillaume Barreau -

    It is worth noting that the connector for the iPod 4th gen and the iPod photo/color are NOT compatible. The 4th gen has only 10 pins, whereas the photo/color have 12 pins.

    Miles Raymond -

    I successfully installed the new battery without removing the ribbon cable.

    Michael Caputi -

    &&^&. Just ripped the circuit. Destroyed my iPod. Thanks for nothing. Other fixes do not have this step. Horribly disappointed. This needs to be deleted!

    Adam -

    Any idea if it can be resoldered?

    Adam -

    I followed the advice in the comments and skipped this step entirely. I did not remove this connecter. It made the remaining steps more difficult because I couldn’t lay the parts open flat, but I managed to do it by myself without removal.

    Lori Farthing -

    Mine had plenty of slack to lay open like a book without disconnecting. Check this first and don't mess with it if you don't need to. It's not necessary for changing a battery.

    SEAN Tanton -

    It is perfectly easy to remove the cable if you are careful and observe what you are attempting to disengage. The plug on the ribbon cable goes into the small black socket on the motherboard. Look sideways at the assembly and slide a thin spudger between the top of the socket and the small board that forms the end of the cable. Lever gently upwards to disengage the cable plug. That way you cannot exert force between the socket and the motherboard and you won’t damage the board.

    Pete Mackenzie -

    It's like a Lego I just popped it off sorry for those who broke it

    If u can leave it plugged

    James middleton -

    I snapped the cable. The comments scared me about disconnecting it so I left it connected, and then damaged it wrestling with the battery. Disconnecting it was easy and I should have done so in the first place.

    Ben -

  5. gtfE5qUKg11vuppp
    gtfE5qUKg11vuppp
    RkTigFkdrfdLELuH
    • Remove the hard drive with your hand, by holding both the iPod and hard drive connector (hold tight in order to not broke the connector).

  6. uoMjuG14oIWE3FNd
    uoMjuG14oIWE3FNd
    oSbKjoTTipqmJ26q
    vhryclDS6sNWbS3G
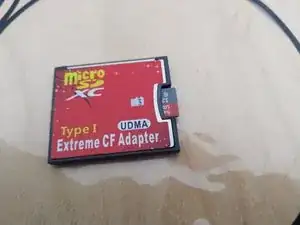
    • Put the micro sd card into the CF adapter.

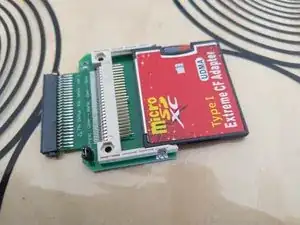
    • Then put the CF adapter into the CE to CF 1.8" adapter.

  7. RbYBMKg21TVDW43K
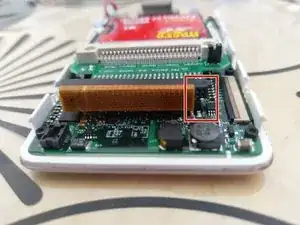
    • Depending on the CE adapter you have, you may need to remove the stopper on the hard drive disk connector on the iPod. Use tweezers to do so.

    • If you notice that you can't fully plug your new memory unit without this step do this, else your memory unit may not be recognized.

  8. ubXebbYWO6WEYDbD
    ubXebbYWO6WEYDbD
    X6nbHpNVZVVy3l5k
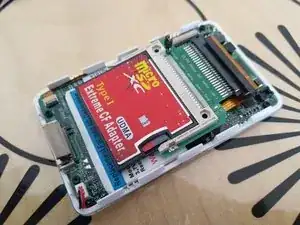
    • Plug your memory unit in place of the old hard drive.

    • It's normal that to have 4 free slots on the memory unit. Be sure to position the memory unit as on the photo.

    • It may be usefull to use double face tape on the battery to ensure the storage unit won't move.

    • Storage unit being thicker than an hard drive, adding a card board on it may help keeping everythin in place while reassembling.

  9. 5khQ1OfWjMIrBjL2
    • Reconnect the bottom case connector. Before reassembling the iPod.

  10. 2jNZKxSNFjJL1Mux
    • Don't reassemble your iPod before connecting it to your PC. The opening step is the hardest part, in case of mistake you won't have to reopen it.

    • Just put the top case on the bottom one without pushing.

  11. POoIDY55M46jYZAV
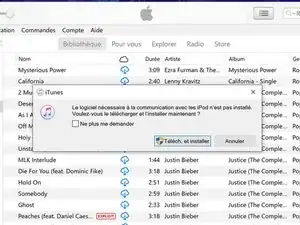
    • After connecting the iPod to the PC you may need to install iPod support. Follow iTunes instructions. Unplug the iPod, Restart iTunes, Restart your PC. Replug the iPod.

  12. UjZy5KrPxk1yW2Ys
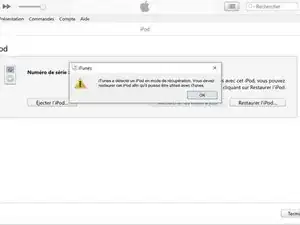
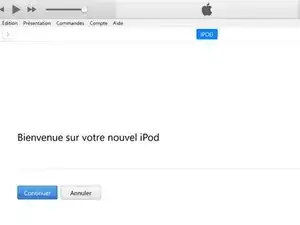
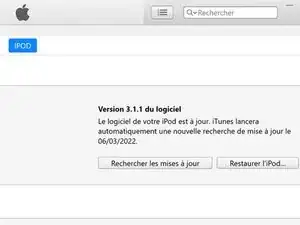
    • Once connected to your computer, iTunes will tell you that the iPod needs to be restored. Follow iTunes instructions to restore the software.

  13. KNvY4J15RAgS5WVx
    KNvY4J15RAgS5WVx
    1I3DrfSPUCYA2GIg
    • The iPod will prompt you to plug it to a wall plug. While this screen is displayed you can't continue.

    • Pluging the iPod to the computer is not enough. If it doesn't work check the power adapter or the iPod cable. iPhone wall adapter (1A) is sufficient for this task.

    • If it reboots to the iPod menu (language settings) you have finished.

    Note: use an apple charger plus usb to 30-pin cable. I tried my super powerful usb c apple charger with an adaptor to connect to the 30-pin cable - it doesn’t let enough juice through.

    Rob Chapman -

  14. OZSKR1nZvGi3Wbof
    OZSKR1nZvGi3Wbof
    UuQgHhxLQ2gxq1WD
    KXPjGePrLUjhZcMb
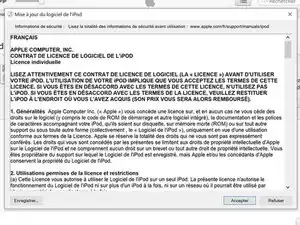
    • Finalize the software restoration process by accepting the Apple license.

  15. Rvqjsbo2m2UnuNRZ
    Rvqjsbo2m2UnuNRZ
    b3aIvkhFfqtr4s3i
    • It's important that you check everything, from charging to synchronizing and listenning to music before reassembling the iPod.

    • If something is not functionning properly, double check each steps.

Abschluss

To reassamble your iPod follow the steps in reverse order.
Marc_Alx

Mitglied seit: 27/02/22

379 Reputation

0 Kommentare