Einleitung
The first steps to access the battery, display cable, and write protect screw on the Asus Chromebook Flip C302.
Werkzeuge
-
-
Turn the Chromebook upside down. You may want to place paper or another soft material between the lid and your work surface, so as not to scratch it.
-
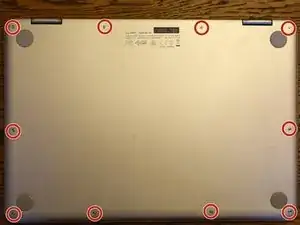
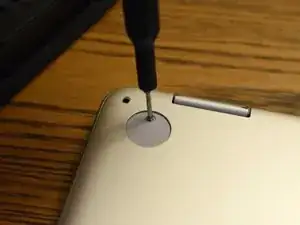
Remove the 10 (6.14 mm) case screws with a T4 Torx driver.
-
-
-
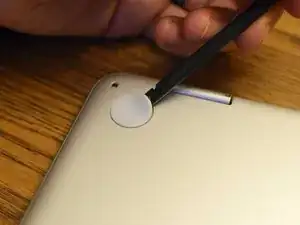
Using a spudger (or prying tool, or fingernail), gently lift the feet at the rear of the laptop (near the hinges). Get underneath the pad, then release the adhesive by sweeping in a circular motion.
-
Store the feet upside down and not sticking to anything―you can likely re-adhere them after replacing the cover.
-
-
-
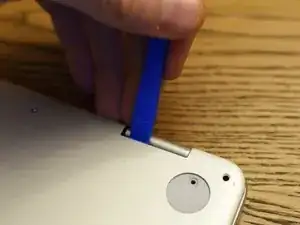
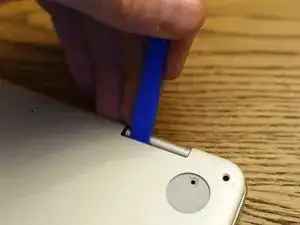
Using a plastic prying tool (avoid metal, as the case is easily scratched), lift the back cover from the case. The underside of a hinge is a good place to start.
-
You'll feel the cover give way, but there are loose clips holding the lid on. Work gently around the lid, prying and moving beyond clips when you encounter them.
-
-
-
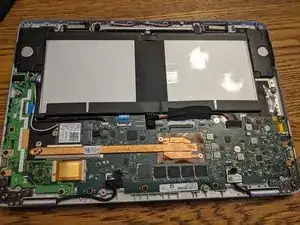
Pull away the back cover. You now have access to the battery, the write-protect screw, and other components.
-
To reassemble your device, follow these instructions in reverse order.

On my machine, an Asus C302C Chromebook, a T4 Torx driver was required. A T5 Torx driver was too large.
Paul -
I concur - T5 too big
Kevin Pierce -
With mine, the T4 supplied with the battery was too small. I was able to use a T5.
rob wilson -
Noted! I’ve updated the guide.
Kevin Purdy -
My screws just spin I will not come out
granyjane -
T5 worked for me
RonWan -
T5 Torx was the one that worked for me. T4 was too small. ASUS Chromebook C302C. Screws came out fine with a T4, but I couldn’t get them back in until I realized that the T5 fit better and was able to get the screws back in.
Wayne Lunsford -
On ours a T5 was needed. Maybe some machines were built with T4s and some with T5s.
MaggieL -