Einleitung
This guide will remove the battery from your ASUS Chromebook Flip C302 and allow for installing a new battery.
Werkzeuge
Ersatzteile
-
-
Turn the Chromebook upside down. You may want to place paper or another soft material between the lid and your work surface, so as not to scratch it.
-
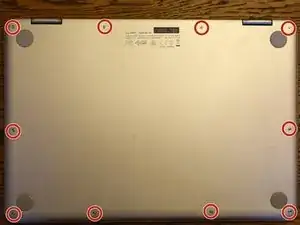
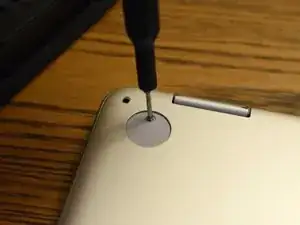
Remove the 10 (6.14 mm) case screws with a T4 Torx driver.
-
-
-
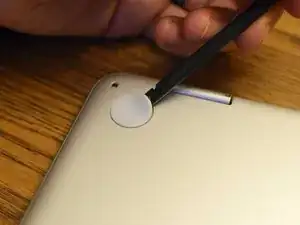
Using a spudger (or prying tool, or fingernail), gently lift the feet at the rear of the laptop (near the hinges). Get underneath the pad, then release the adhesive by sweeping in a circular motion.
-
Store the feet upside down and not sticking to anything―you can likely re-adhere them after replacing the cover.
-
-
-
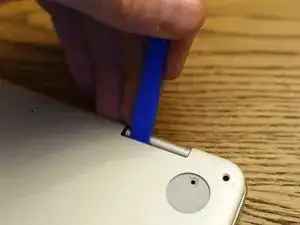
Using a plastic prying tool (avoid metal, as the case is easily scratched), lift the back cover from the case. The underside of a hinge is a good place to start.
-
You'll feel the cover give way, but there are loose clips holding the lid on. Work gently around the lid, prying and moving beyond clips when you encounter them.
-
-
-
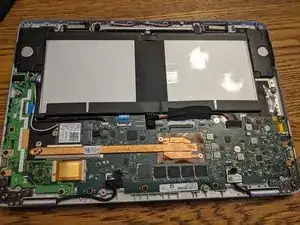
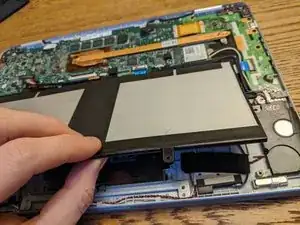
Pull away the back cover. You now have access to the battery, the write-protect screw, and other components.
-
-
-
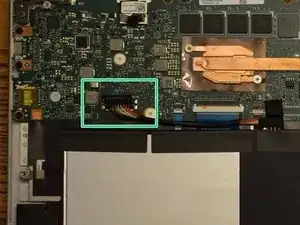
Locate the battery connector. With the large silver/black battery facing you, the connector is just above it, in the middle-left. But first we must remove some tape.
-
-
-
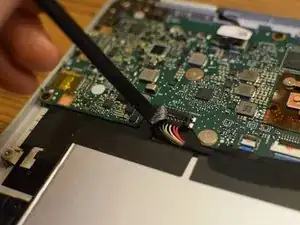
Using a spudger or other ESD-safe plastic tool, pry the thick plastic tape and foam top off the connector, just above the multi-colored leading to the connector.
-
You may use tweezers, or fingers, to get a better grip on the tape, but be cautious not to touch metal or electrical components, as the battery is still attached.
-
-
-
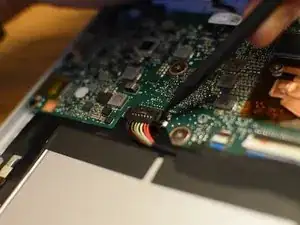
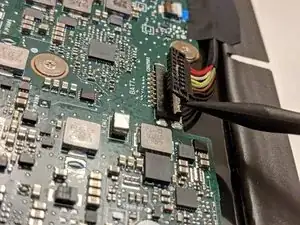
Using a spudger or prying tool (but no metal), gently pry one side of the connector up from the board.
-
After one side has popped loose from its socket, repeat the procedure with the other side, until the connector is loose.
-
-
-
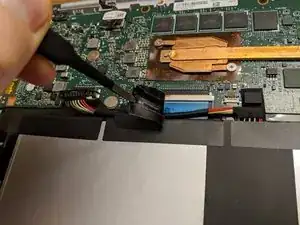
Following the wires from the connector back to the battery, you'll find a piece of thick electrical tape about halfway up the wires. Using tweezers, peel up and remove this sticky tape with slow, even force.
-
-
-
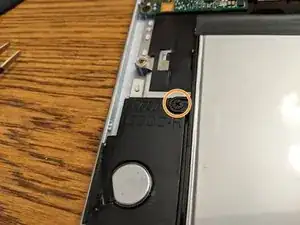
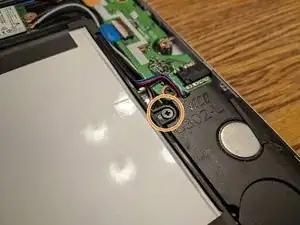
Look for Phillips #0 screws to the left and right of the battery, in small bump-outs to attach the battery to the speakers on both sides. Remove these screws.
-
To reassemble your device, follow these instructions in reverse order. Be sure to replace all the tap and foam pads―they help protect delicate cables and components from impacts.
18 Kommentare
Thank you so much for this guide - worked great. My repair might not have been successful without this guide.
This was my first experience trying anything like this and it was PERFECT - AWESOME experience. This saved me over $500 from buying a new Chromebook. Thanks again!!
Me too - very straightforward, worked perfectly. Many thanks!


On my machine, an Asus C302C Chromebook, a T4 Torx driver was required. A T5 Torx driver was too large.
Paul -
I concur - T5 too big
Kevin Pierce -
With mine, the T4 supplied with the battery was too small. I was able to use a T5.
rob wilson -
Noted! I’ve updated the guide.
Kevin Purdy -
My screws just spin I will not come out
granyjane -
T5 worked for me
RonWan -
T5 Torx was the one that worked for me. T4 was too small. ASUS Chromebook C302C. Screws came out fine with a T4, but I couldn’t get them back in until I realized that the T5 fit better and was able to get the screws back in.
Wayne Lunsford -
On ours a T5 was needed. Maybe some machines were built with T4s and some with T5s.
MaggieL -