Einleitung

How to access the camera within the device for a replacement.

  1. tOtIFFoikL5ZfU3P
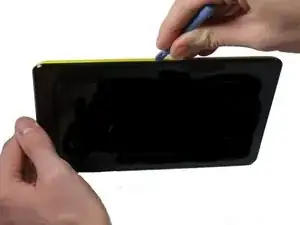
    • Start on the side with the camera

    • Insert a plastic opening tool into the space between the screen and the back side.

    • The screen side is black, the back side is colored

  2. CuxnHZRJxGQUJsrv
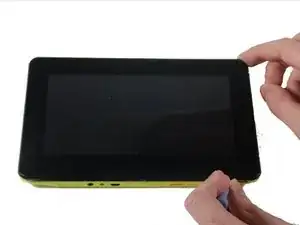
    • Press the plastic opening tool in until you hear a “click” and that part of the tablet opens.

    • Press and slide the plastic opening tool around all sides of the tablet until all sides pop off.

    • The corners can be tricky. Make sure to separate the pieces all the way around the tablet before attempting to open it.

  3. gSYmj2QFG5Zt6tqm
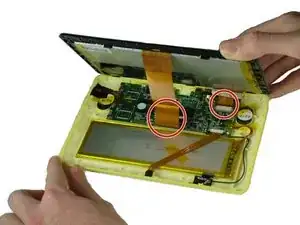
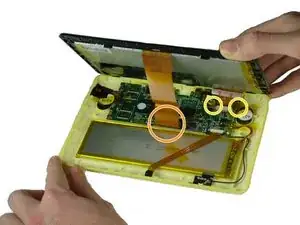
    • Lift the detached screen from the camera side until you can see the inside of the tablet.

    • Don't open too fast, or you might damage the ribbons cables.

  4. 6tKcDHwsKJDXyVij
    6tKcDHwsKJDXyVij
    i6xsf42MWAAHKKcG
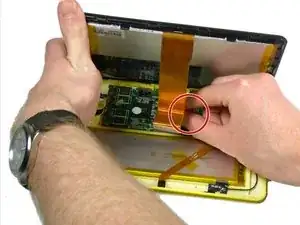
    • Be careful not to damage any wires or ribbon cables during this step.

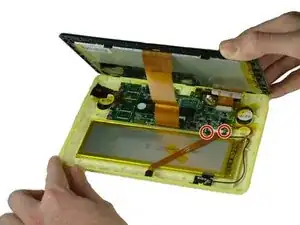
    • There are two ribbon cables to remove during this step. Each is connected to a base on the motherboard.

    • There is a black tab behind the long ribbon cable. Lift up the black tab.

    • For the ribbon cable in the back, pull the black tabs on the side out.

    • Detach the ribbon cables connecting the screen to the motherboard.

    • Remove any tape that is holding down the ribbon cables. Set it aside.

  5. ujEHfdohFjyHeBWp
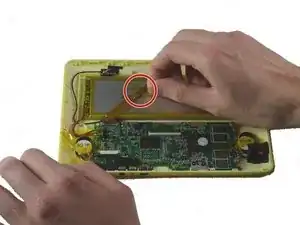
    • Pull off the tape that holds the ribbon cable to the battery.

  6. 3m2mskZPjQIjG6lT
    3m2mskZPjQIjG6lT
    XDjcALCV3Yy6GAFe
    • Be careful not to damage the wires or ribbon cables.

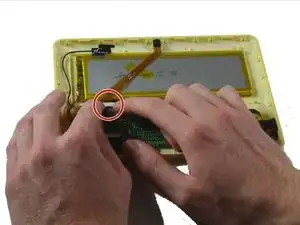
    • Pull out the two black ends of the base on the motherboard.

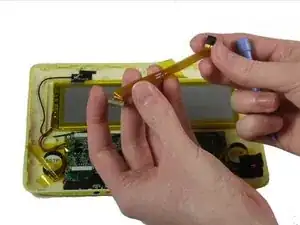
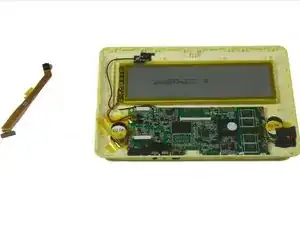
    • Slide out the camera’s ribbon cable once the ends are loosened.

  7. sUUIoJAldCknjSWX
    sUUIoJAldCknjSWX
    AdVUBjikNXFbCiyO
    T6w11LqMqx2IXyug
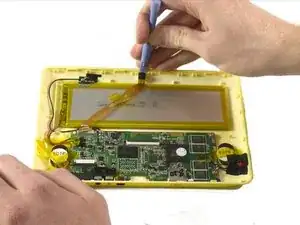
    • Use a plastic opening tool to pry the camera out of its place.

Abschluss

To reassemble your device, follow these instructions in reverse order.
Kevin Finney

Mitglied seit: 22/03/15

553 Reputation

0 Kommentare